9
SHOCK OILS AND SHOCK SPRINGS
Many different combinations can be used between the shock
oils and shock springs. Some basic guidelines for setting up
the Evader are that if the rear end is stiff, the buggy will have
more steering and less rear traction. Stiffening the front shocks
will result in less steering and more rear traction. DuraTrax
offers different rate (stiffness) springs to suite most running
conditions. The springs are color coded for easy identifi cation:
Front Rear
Silver (Extra Soft) DTXC9244 DTXC9261
White (Soft) Included Included
Yellow (Medium) DTXC9245 DTXC9230
Green (Hard) DTXC9246 DTXC9231
Thinner shock oil will make the shocks react faster, but makes
the buggy less stable and may cause the buggy to bottom
out over large jumps. Thicker shock oil makes the buggy
smoother over large jumps and in straights, but less reactive
over rough sections. We have fi lled the shocks with 20-weight
oil, which is a good choice for most driving conditions.
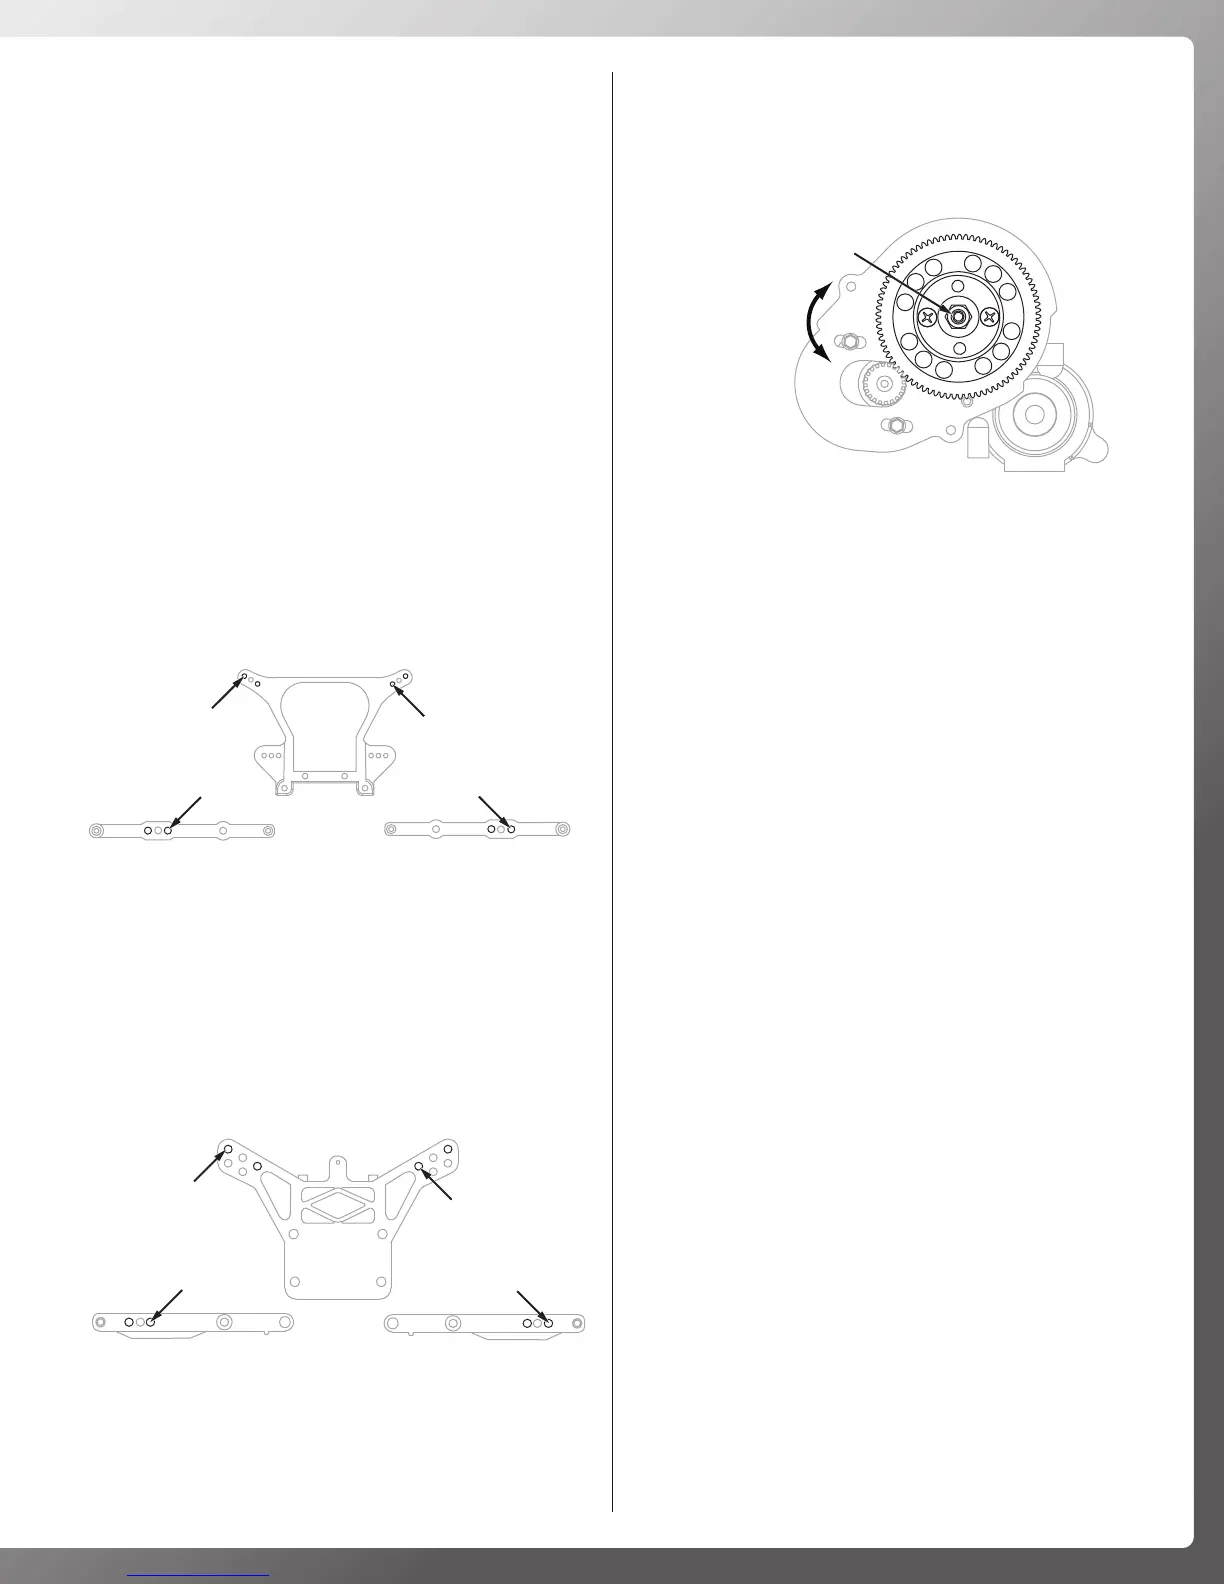
FRONT SHOCK ADJUSTMENT
Top Shock Outer Positions:
More Steering,
Faster Suspension Reaction
Inner Mount Positions:
More Slow Speed Steering
Outer Mount Positions:
More High Speed Steering
Top Shock Inner Positions:
Slower Steering,
Smoother Over Bumps
Moving out the tops of the shocks will increase steering and
produce quicker suspension reaction, but will result in slower
steering reaction. Mounting the bottoms of the shocks in the
inside hole of the arms will improve slow-speed steering but
reduce high-speed steering.
REAR SHOCK ADJUSTMENT
Top Shock Outer Positions:
More Steering,
More Control Over Bumps
Inner Mount Positions:
Less Steering,
Smoother Over Bumps
Outer Mount Positions:
More Steering,
Less Control Over Bumps
Top Shock Inner Positions:
More Rear Grip,
Smoother Over Bumps
Moving in the tops of the shocks will result in more traction
in the corners and greater smoothness over bumps. Moving
out the tops of the shocks will give the buggy more steering
and enable it to handle large jumps better.
SLIPPER CLUTCH ADJUSTMENT
IMPORTANT! To protect the transmission gears, it is
imperative that the slipper is properly set. If too tight, or
locked, gear damage will occur.
Loosen Nut:
More Slip
Tighten Nut:
Less Slip
Slipper Adjustment Nut
1. Tighten the slipper adjustment nut all the way down.
2. Loosen the adjustment nut two full turns.
3. Set the buggy on a work surface and try to rotate the spur
gear by hand. It should be hard to turn with both the rear
wheels resting on your work surface.
4. If it turns easily, the slipper adjustment nut needs to be
tighter. Tighten the adjustment nut 1/8th of a turn and try
to rotate the spur gear again.
5. If the gear will not turn, the slipper is too tight. Loosen the
adjustment nut 1/8th of a turn and try to rotate the spur
gear again.
6. For the fi nal adjustment, use a fully charged pack to run
the buggy. Place the buggy on the surface it will be run on
and give it a short 1-2 second burst of full throttle. When
adjusted correctly it should slip for 1-2 feet without the
tires spinning. If the tires spin, the slipper nut needs to be
loosened. If it slips for more than the recommended 1-2
feet, the nut should be tightened.
7. Repeat each step as needed to get the desired setting.