30
Installation Manual
To ensure compliance with Australian Standard AS/NZS3500.4, for sanitary areas, install the water heater with a
tempering valve. In New Zealand, please refer to the New Zealand Building Code and all other applicable electrical, gas
fitting and plumbing codes.
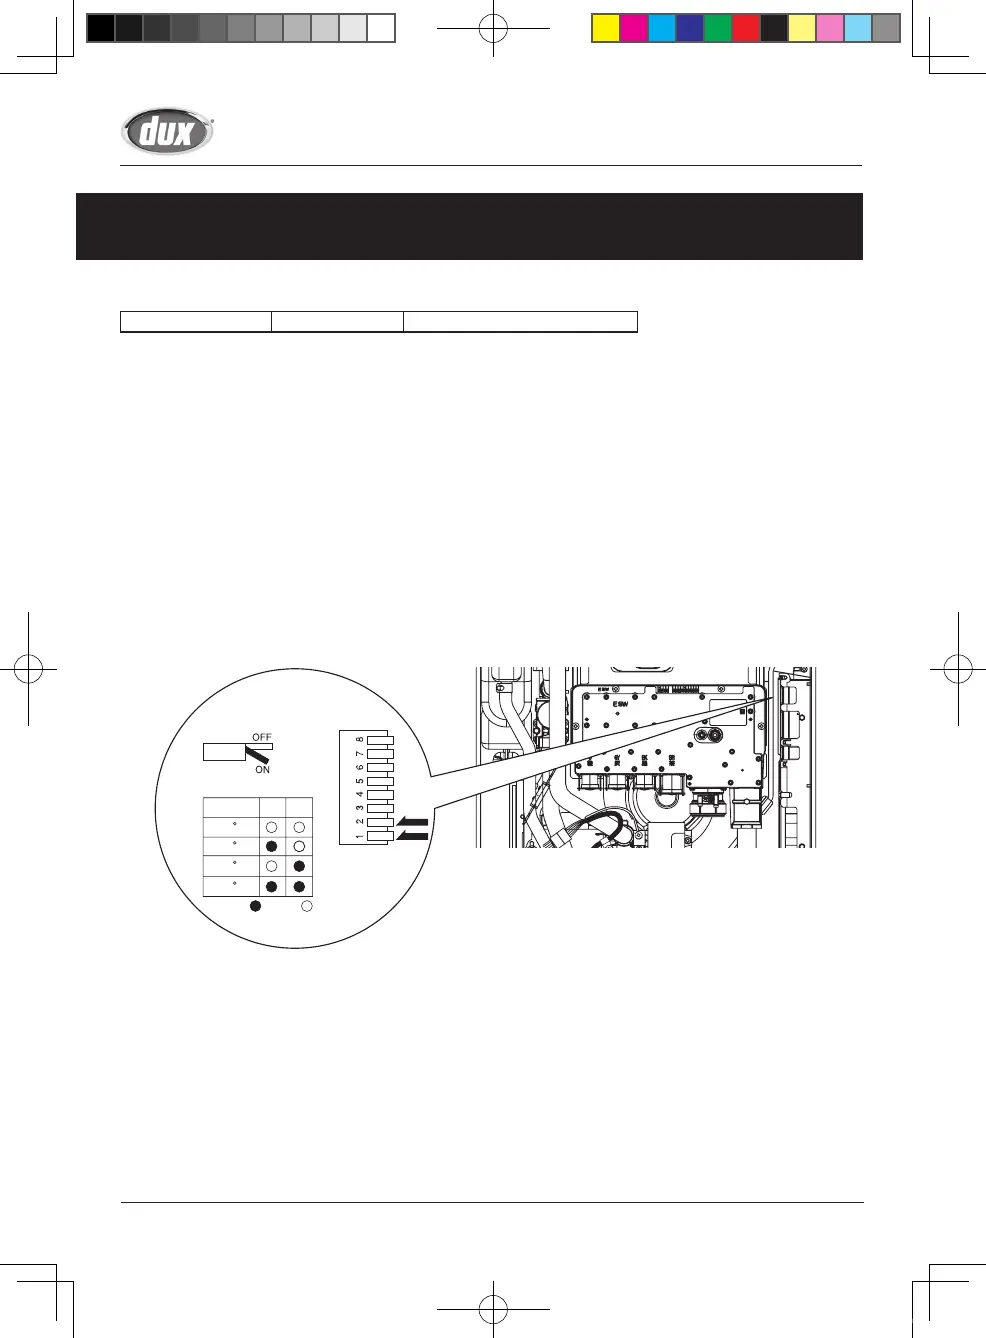
<The changing procedure of the maximum temperature setting.>
1.
Turn the water heater off by pressing the ON/OFF button on the remote controller.
2. Disconnect electrical power to the water heater.
3. Remove the front cover of the water heater (4 screws).
4. Adjust the DIP switches as illustrated below.
5. Replace the front cover of the water heater (4 screws).
6. Reconnect electrical power to the water heater.
Applicable Model
* Maximum temperature is controlled by the maximum default temperature set in the water heater.
* Only one the remote controller can be connected to the water heater.
A malfunction may occur if two or more remote controllers are connected.
The maximum temperature allowed can be changed with adjusting the DIP switches as described below.
Remote Controller
Remote controller RC-9018C Max temperature 85°C *
* Do not change any other DIP switches.
* Maximum temperature.
12
ON= OFF=
85 C
55 C
75 C
85 C
Check
Check
31
Installation Manual
Remote controller cord
• Use remote controller cord for any extensions.
• Install according to the National Electrical Code and all applicable local codes.
Connecting Remote Controller Cord to Unit
• Tie the excess cord outside the water heater. Do not put the extra length inside the water heater.
• The remote controller cord can be extended up to 100m.
• Be sure to hand tighten when screwing to the terminal block. Power tools may cause damage to the
terminal block.
1. Disconnect electrical power to the water heater.
2. Leave enough slack so that the remote controller cord will not be damaged if the unit is removed from
the wall.
3. Remove the front cover of the heater (4 screws).
4. Pass the remote controller cord through the wiring throughway and into the unit.
5. Connect the Y terminals at the end of the remote controller cord to the terminal block.
6. Secure the remote controller cord with a clamp.
7. Replace the front cover.
• When changing the temperature, make sure to confirm with the customer that the temperature of
the hot water will be very high and that there is a risk of scalding.
WARNING
32FCR6 series
Remote Controller Terminal
Clamp
SBB80RX_P001-P044_E_tonb.indd 30 2017/01/27 8:13:59