Dymax ECE Series UV Flood-Lamp Systems User Guide
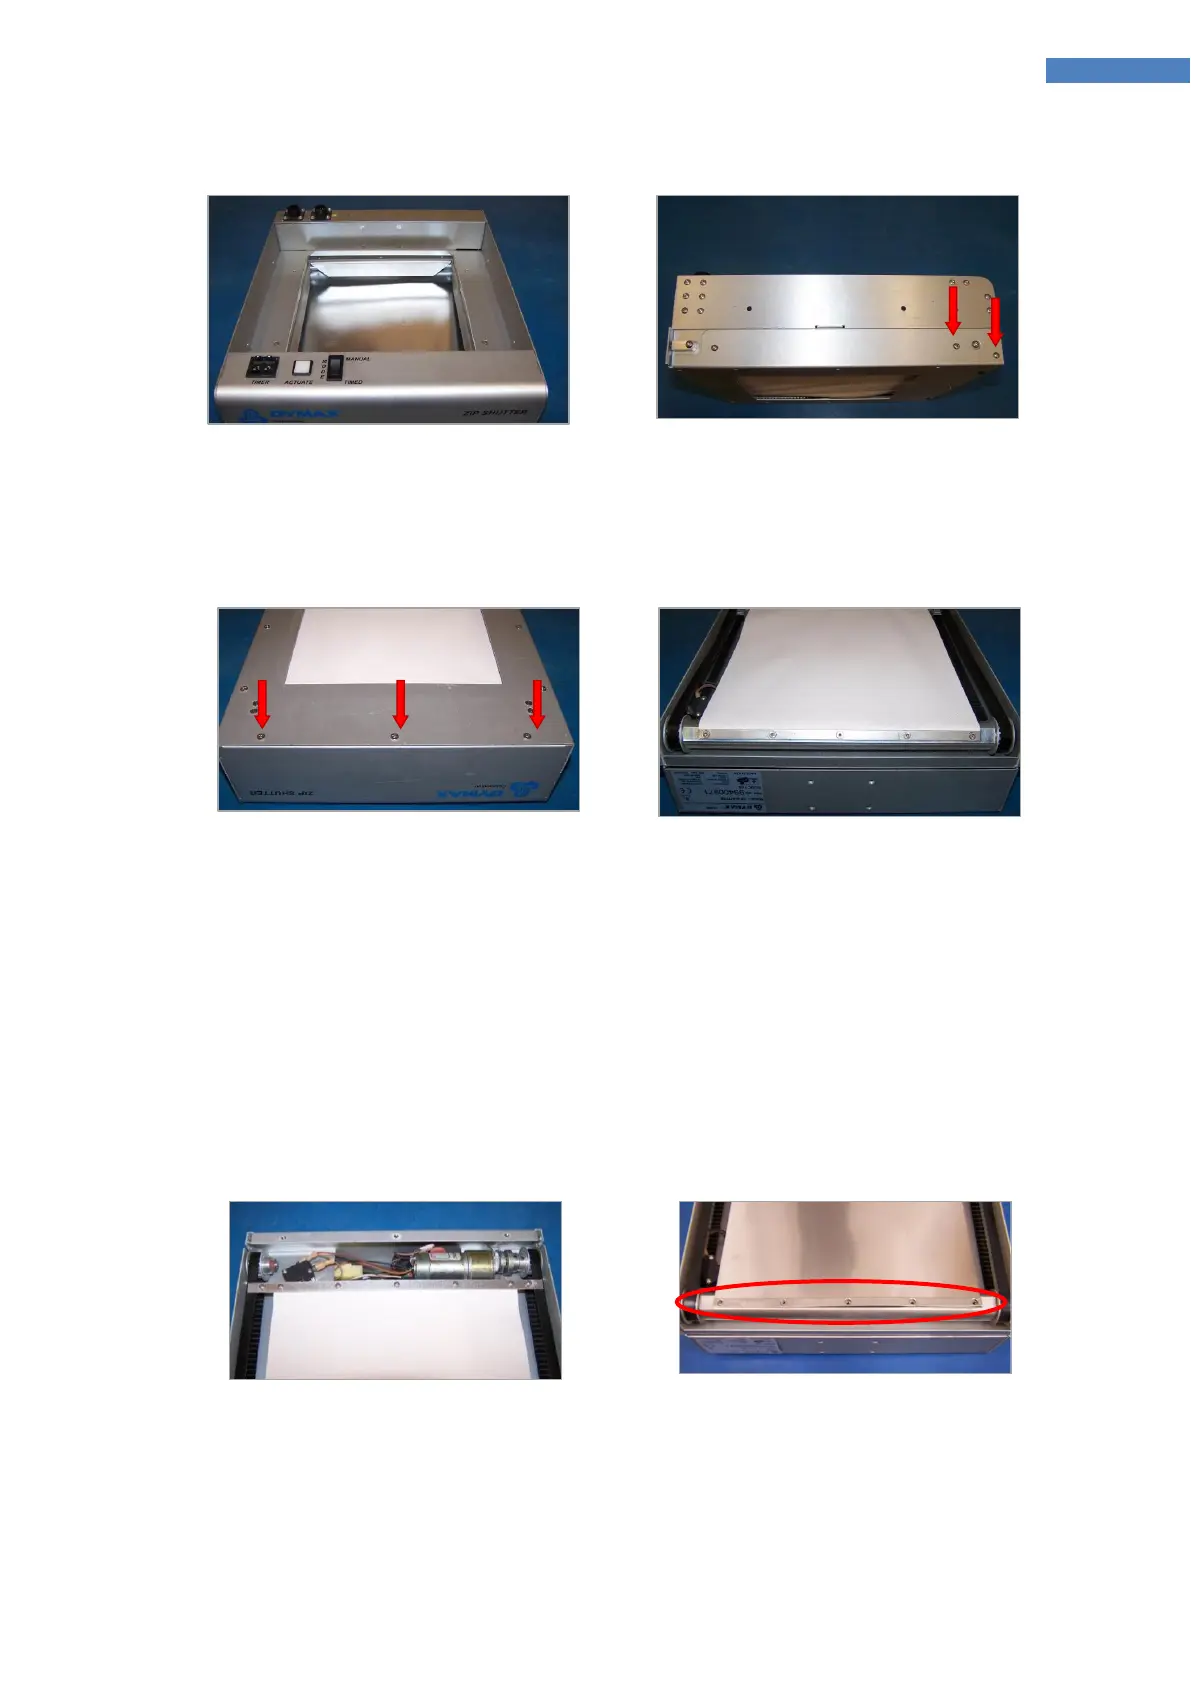
Figure 22. ZIP™ Shutter – Top View
Figure 23. Retaining Screws
3. Remove the three Phillips-Head Retaining Screws on the bottom of the Lower Cover of the Shutter
(Figure 24). Lift the cover off the Shutter to reveal the inner Curtain Assembly (Figure 25).
Figure 24. Phillips-Head Retaining
Screws
Figure 25. Inner Curtain Assembly
(Kevlar Curtain Shown)
4. Manually unroll the Curtain until the Curtain reaches the Front Limit Switch. Loosen the two End
Screws (Figure 26) on the pulley side to release the grip from the Drive Belt.
5. Remove the five Retaining Screws holding the Curtain to the Roller Bar. This will remove the Curtain
Assembly from the Shutter.
6. To install the new Stainless Steel Curtain (PN 41097), affix the new Curtain to the Roller Bar first, using
the five Retaining Screws. (Figure 27)
CAUTION! Use gloves rated at a minimum a CE cut level 5 when installing the stainless steel
material. The edges are very sharp and can cut during installation.
Figure 26. Loosen End Screws
Figure 27. Five Retaining Screws
7. Stretch the Curtain toward the front of the Shutter. When the Curtain is fully stretched out, loosen
the two End Screws and slide the Clamp Bar onto the Belt (Figure 29). The Curtain should be stretched
short of the Front Limit Switch.