EasyManuals Logo

Dymo LabelWriter DUO User Manual

Dymo LabelWriter DUO
42 pages
To Next Page IconTo Next Page
To Previous Page IconTo Previous Page
Page #3 background imageLoading...
Page #3 background image
English
Quick Start Guide
Follow these steps to install the LabelWriter printer and print your first label.
1. Unpacking your LabelWriter Printer
NOTE Do not plug the printer into your computer until asked to do so during the
software installation.
1 Unpack your printer and save the packing materials.
2 Make sure you have all the items shown in Figure 1. (Labels included in the
package may vary.)
Swi
tch
ing Adapt
er
SHOCK HAZA
RD
RISK OF
ELECTRIC
SHOCK
DRY L
OCA
TION USE ON
LY.
NON-SERVICEABLE P
ART
S INSIDE.
FOR USE
WITH ITE ONLY
.
END AST FOR K
ONTORSM
ASKINER.
CAU
TION
Tes
t
ed
to c
o
m
p
l
y
with FC
C
s
ta
n
da
rd
s
FOR HOME
OR
OFFICE
U
SE
I.T.E
. POWER SUP
PLY
C
Model No.:TESA2-2
401000
U.S
. P/N: 90819
Eur
ope P/N: 924883
INPUT:100-240V
-50/60Hz M
ax0.64A
OUTPUT
:24V --- 0-1.0A
MAD
E IN CHINA
LISTED
15WM
E198850
U
L
U
L
N10926
LabelWriter
Quick Start
Figure 1
Power adapter
LabelWriter printer
CD-ROM
Roll of Address labels
Power cable
Quick Start Guide
USB cable
D1 label
cassette

Other manuals for Dymo LabelWriter DUO

Questions and Answers:

Question and Answer IconNeed help?

Do you have a question about the Dymo LabelWriter DUO and is the answer not in the manual?
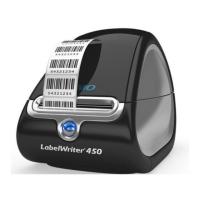
Dymo LabelWriter DUO Specifications

General IconGeneral
ConnectivityUSB
Resolution300 dpi
Print TechnologyDirect Thermal
Print Speed71 labels per minute
Software CompatibilityWindows, Mac OS
Power SourceExternal Power Adapter
Label TypesDymo D1 Tape Cassettes (up to 12mm), Dymo LabelWriter Labels

Related product manuals