4
3. Connecting your LabelWriter Printer
NOTE Do not connect the printer to your computer
until instructed to do so during the software
installation.
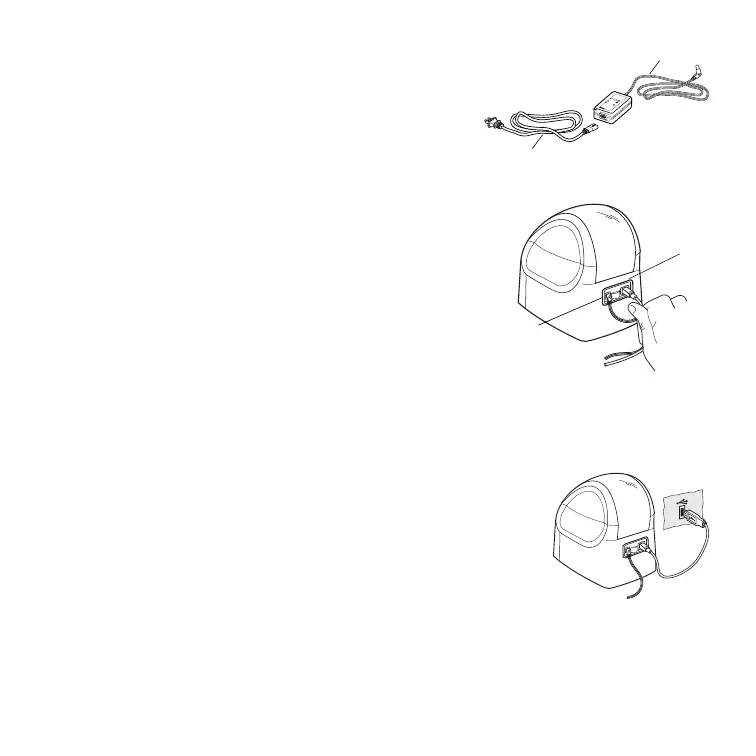
To connect the power
1 Plug the power cord into the power adapter.
See Figure 4.
2 Plug the power adapter into the power
connector on the back of the printer. See
Figure 5.
3 Plug the other end of the power cord into a
power outlet.
4 Plug the USB cable into the USB port on the
back of the printer. See Figure 5.
NOTE DO NOT CONNECT the other end of the USB cable to
your computer until asked to do so during the software
installation.
5 When prompted by the software installer, plug the USB
cable into a USB port.
Switching Adapter
SH
O
CK
H
AZARD
RISK OF EL
E
C
TR
IC
S
H
OCK
D
RY
L
O
C
ATIO
N USE O
N
LY
.
NON
-
S
E
RV
IC
E
ABL
E
P
A
RT
S IN
S
IDE
.
F
O
R USE
W
IT
H ITE ONL
Y
.
END AST F
OR
K
ON
TO
R
SM
A
SKI
N
ER.
CA
UT
ION
T
e
sted
t
o comply
w
ith F
CC standards
FOR
HO
ME
O
R
OFFI
C
E
USE
I.T
.E
. P
OW
ER
SU
PP
L
Y
C
M
odel No.:TE
S
A2-
2401000
U.S. P
/
N:
90819
Eu
r
ope P/N:
92
4883
IN
PUT
:10
0
-240V-50/60
H
z M
ax0
.
64A
OU
TPUT
:24V -
-
-
0-1
.0A
MAD
E IN
C
HINA
L
IS
T
E
D
1
5
W
M
E
198850
U
L
U
L
N10926
Power Adapter
Power Cord
Figure 4

 Loading...