EasyManuals Logo

Dymo LabelWriter Print Server User Manual

Dymo LabelWriter Print Server
34 pages
To Next Page IconTo Next Page
To Previous Page IconTo Previous Page
Page #16 background imageLoading...
Page #16 background image
Adding a Printer
12
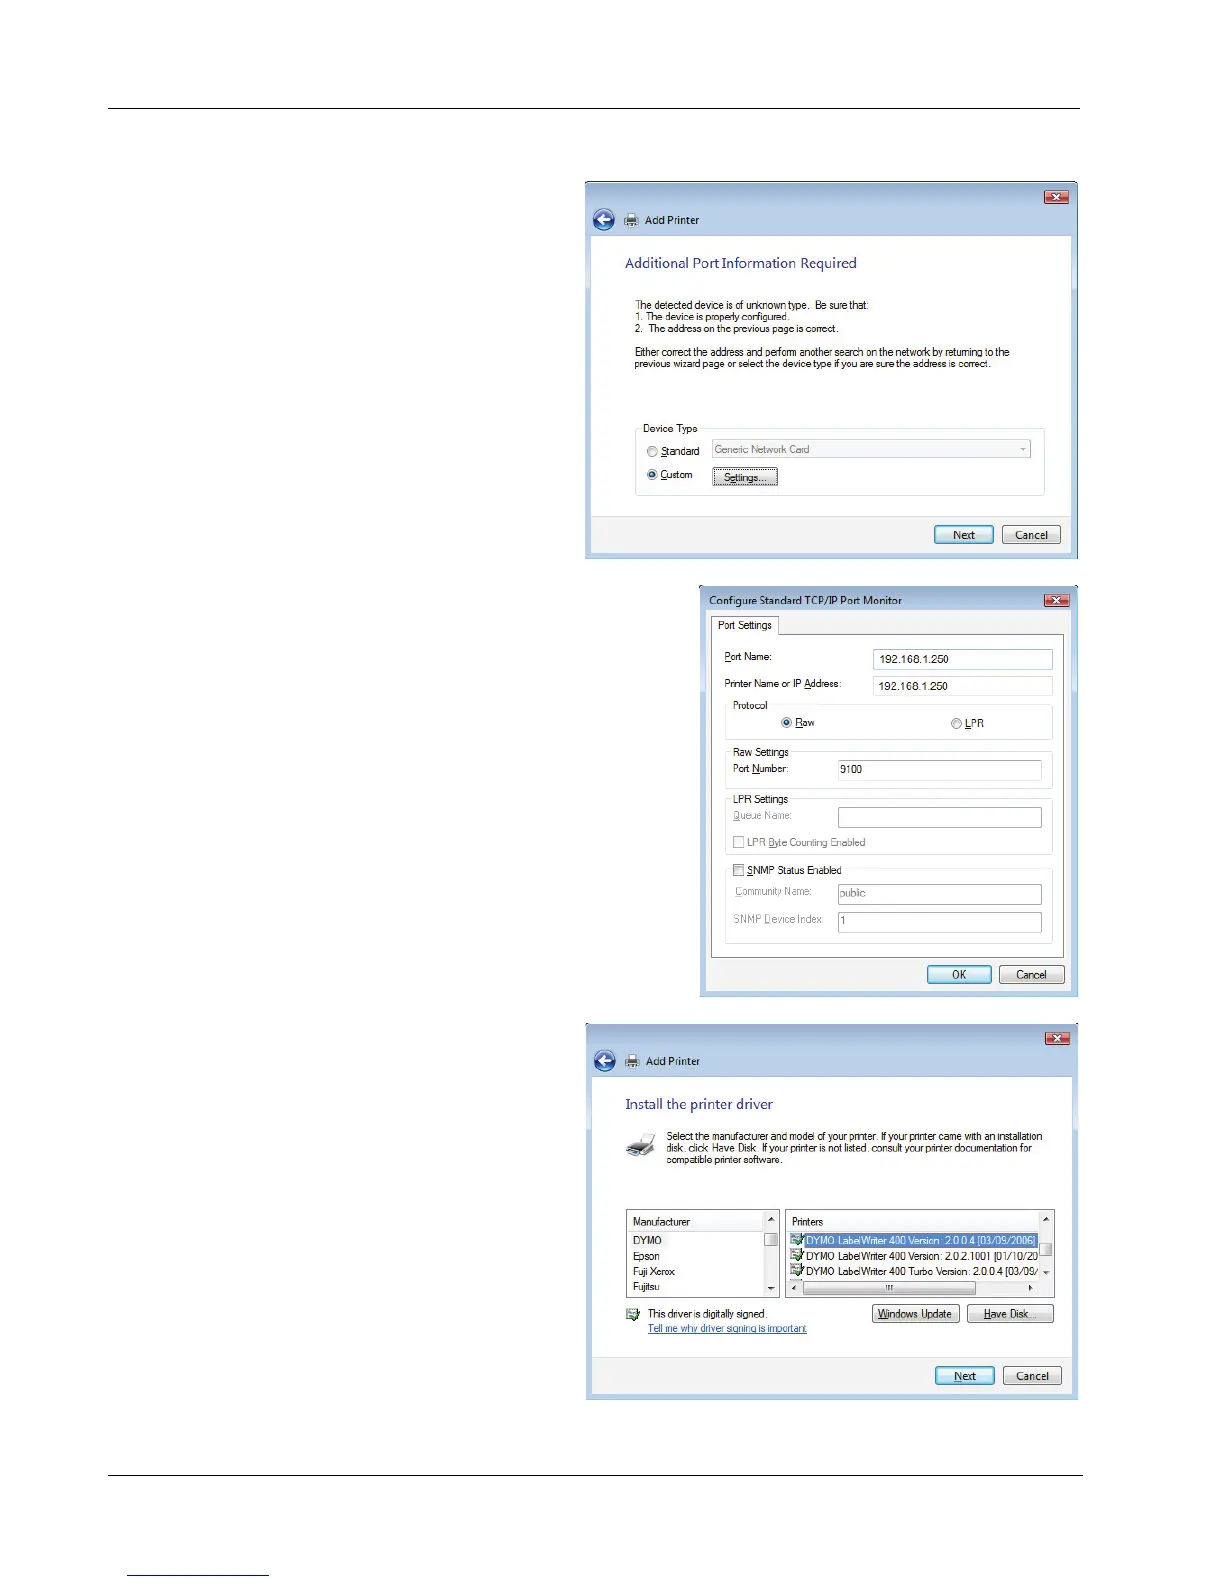
7 On the Additional Port
Information Required page,
select Custom, and then
click Settings.
8 In the Configure Standard
TCP/IP Port Monitor dialog box, do
the following:
a. Under Protocol, select Raw.
b. Under Raw Settings, make sure the
Port Number is 9100.
This is the default value.
c. Click OK.
9 On the Additional Port Information
Required page, click Next.
10 On the Install the printer
driver page, do the following:
a. Choose DYMO from the
Manufacturer list.
b. Choose the LabelWriter
printer that you are adding
from the Printers list.
To add the LabelWriter
Duo, choose DYMO
LabelWriter DUO
Label.
c. Click Next.

Questions and Answers:

Question and Answer IconNeed help?

Do you have a question about the Dymo LabelWriter Print Server and is the answer not in the manual?

Dymo LabelWriter Print Server Specifications

General IconGeneral
Networking standards-
Network connection typeEthernet LAN
InterfaceUSB
Customs code8443321000
Network readyYes
Minimum system requirementsCD-ROM
USB 2.0 ports quantity1
Package typeBox
Package depth235 mm
Package width175 mm
Package height68 mm
Package weight390 g
InternalNo
Country of originTaiwan
Mac operating systems supportedMac OS X 10.3 Panther, Mac OS X 10.4 Tiger, Mac OS X 10.5 Leopard, Mac OS X 10.6 Snow Leopard, Mac OS X 10.7 Lion
Windows operating systems supportedWindows Vista Business, Windows Vista Business x64, Windows Vista Home Basic, Windows Vista Home Basic x64, Windows Vista Home Premium, Windows Vista Home Premium x64, Windows Vista Ultimate, Windows Vista Ultimate x64, Windows XP Home, Windows XP Home x64, Windows XP Professional, Windows XP Professional x64