10
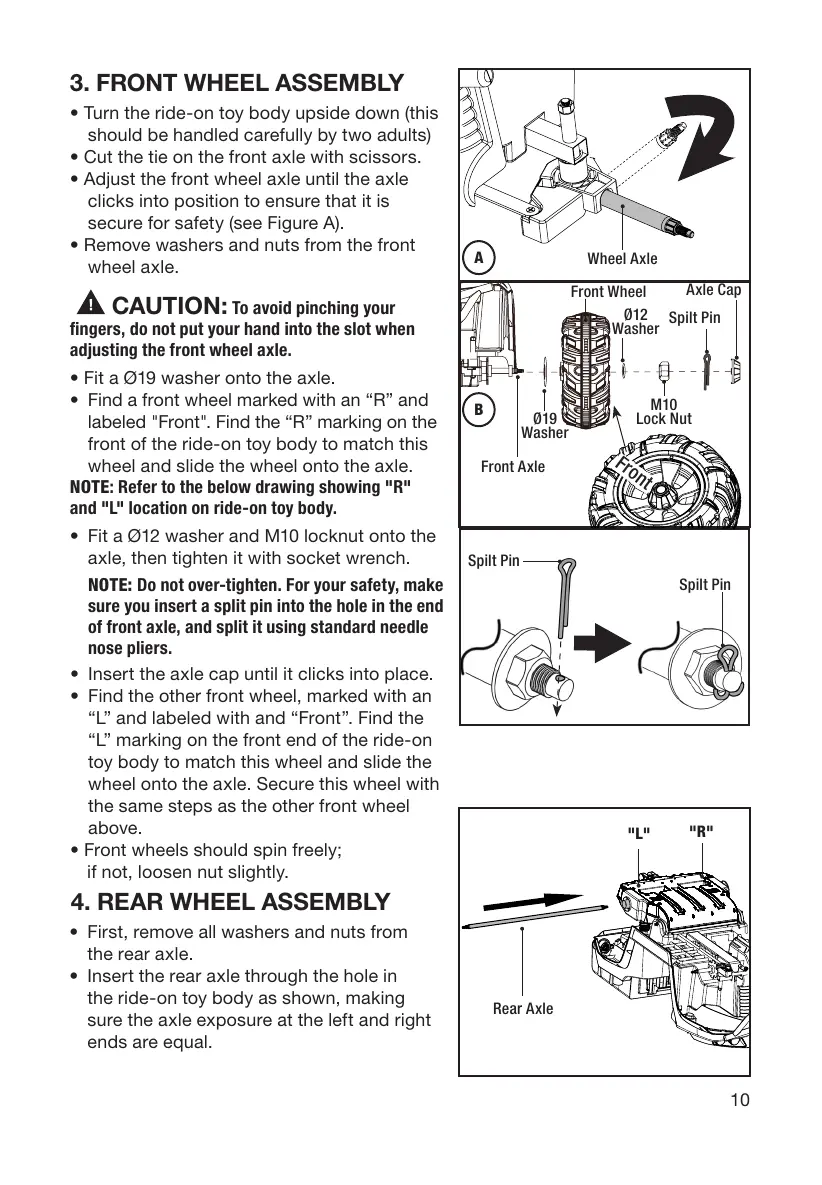
4. REAR WHEEL ASSEMBLY
• First, remove all washers and nuts from
the rear axle.
• Insert the rear axle through the hole in
the ride-on toy body as shown, making
sure the axle exposure at the left and right
ends are equal.
3. FRONT WHEEL ASSEMBLY
• Turn the ride-on toy body upside down (this
should be handled carefully by two adults)
• Cut the tie on the front axle with scissors.
• Adjust the front wheel axle until the axle
clicks into position to ensure that it is
secure for safety (see Figure A).
• Remove washers and nuts from the front
wheel axle.
CAUTION: To avoid pinching your
fingers, do not put your hand into the slot when
adjusting the front wheel axle.
• Fit a Ø19 washer onto the axle.
• Find a front wheel marked with an “R” and
labeled "Front". Find the “R” marking on the
front of the ride-on toy body to match this
wheel and slide the wheel onto the axle.
NOTE: Refer to the below drawing showing "R"
and "L" location on ride-on toy body.
• Fit a Ø12 washer and M10 locknut onto the
axle, then tighten it with socket wrench.
• Insert the axle cap until it clicks into place.
• Find the other front wheel, marked with an
“L” and labeled with and “Front”. Find the
“L” marking on the front end of the ride-on
toy body to match this wheel and slide the
wheel onto the axle. Secure this wheel with
the same steps as the other front wheel
above.
• Front wheels should spin freely;
if not, loosen nut slightly.
Front Axle
Wheel Axle
Front Wheel
Ø12
Washer
Ø19
Washer
Spilt Pin
Spilt Pin
Spilt Pin
M10
Lock Nut
Axle Cap
A
B
NOTE: Do not over-tighten. For your safety, make
sure you insert a split pin into the hole in the end
of front axle, and split it using standard needle
nose pliers.
Front
Rear Axle
"L"
"R"

 Loading...