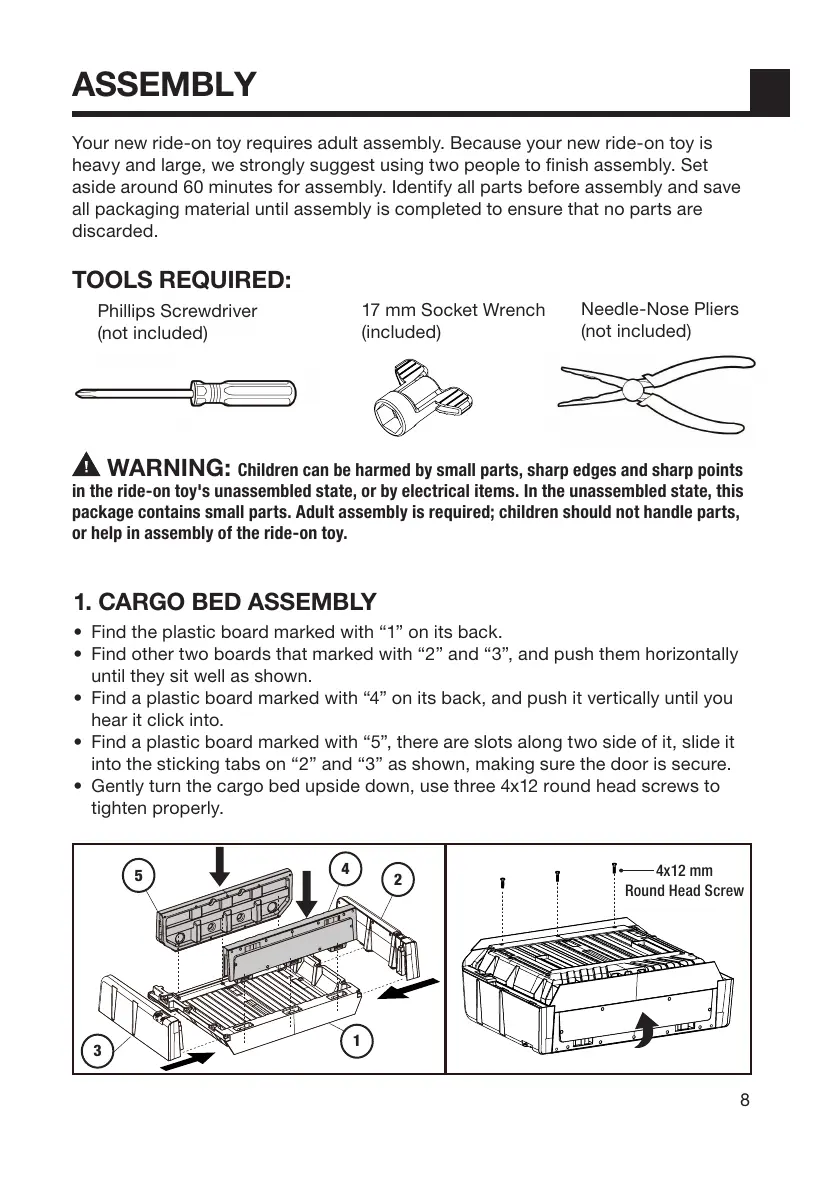
1. CARGO BED ASSEMBLY
• Find the plastic board marked with “1” on its back.
• Find other two boards that marked with “2” and “3”, and push them horizontally
until they sit well as shown.
• Find a plastic board marked with “4” on its back, and push it vertically until you
hear it click into.
• Find a plastic board marked with “5”, there are slots along two side of it, slide it
into the sticking tabs on “2” and “3” as shown, making sure the door is secure.
• Gently turn the cargo bed upside down, use three 4x12 round head screws to
tighten properly.
4x12 mm
Round Head Screw
8
TOOLS REQUIRED:
ASSEMBLY
Your new ride-on toy requires adult assembly. Because your new ride-on toy is
heavy and large, we strongly suggest using two people to finish assembly. Set
aside around 60 minutes for assembly. Identify all parts before assembly and save
all packaging material until assembly is completed to ensure that no parts are
discarded.
17 mm Socket Wrench
(included)
WARNING: Children can be harmed by small parts, sharp edges and sharp points
in the ride-on toy's unassembled state, or by electrical items. In the unassembled state, this
package contains small parts. Adult assembly is required; children should not handle parts,
or help in assembly of the ride-on toy.
Phillips Screwdriver
(not included)
Needle-Nose Pliers
(not included)
5
3
2
1
4
D
 Loading...