8
12 - BALANCE
1. Press the Left and Right Arrows on the LCD Touch Screen to scroll through the main menu
screens until you reach Program Select=View.
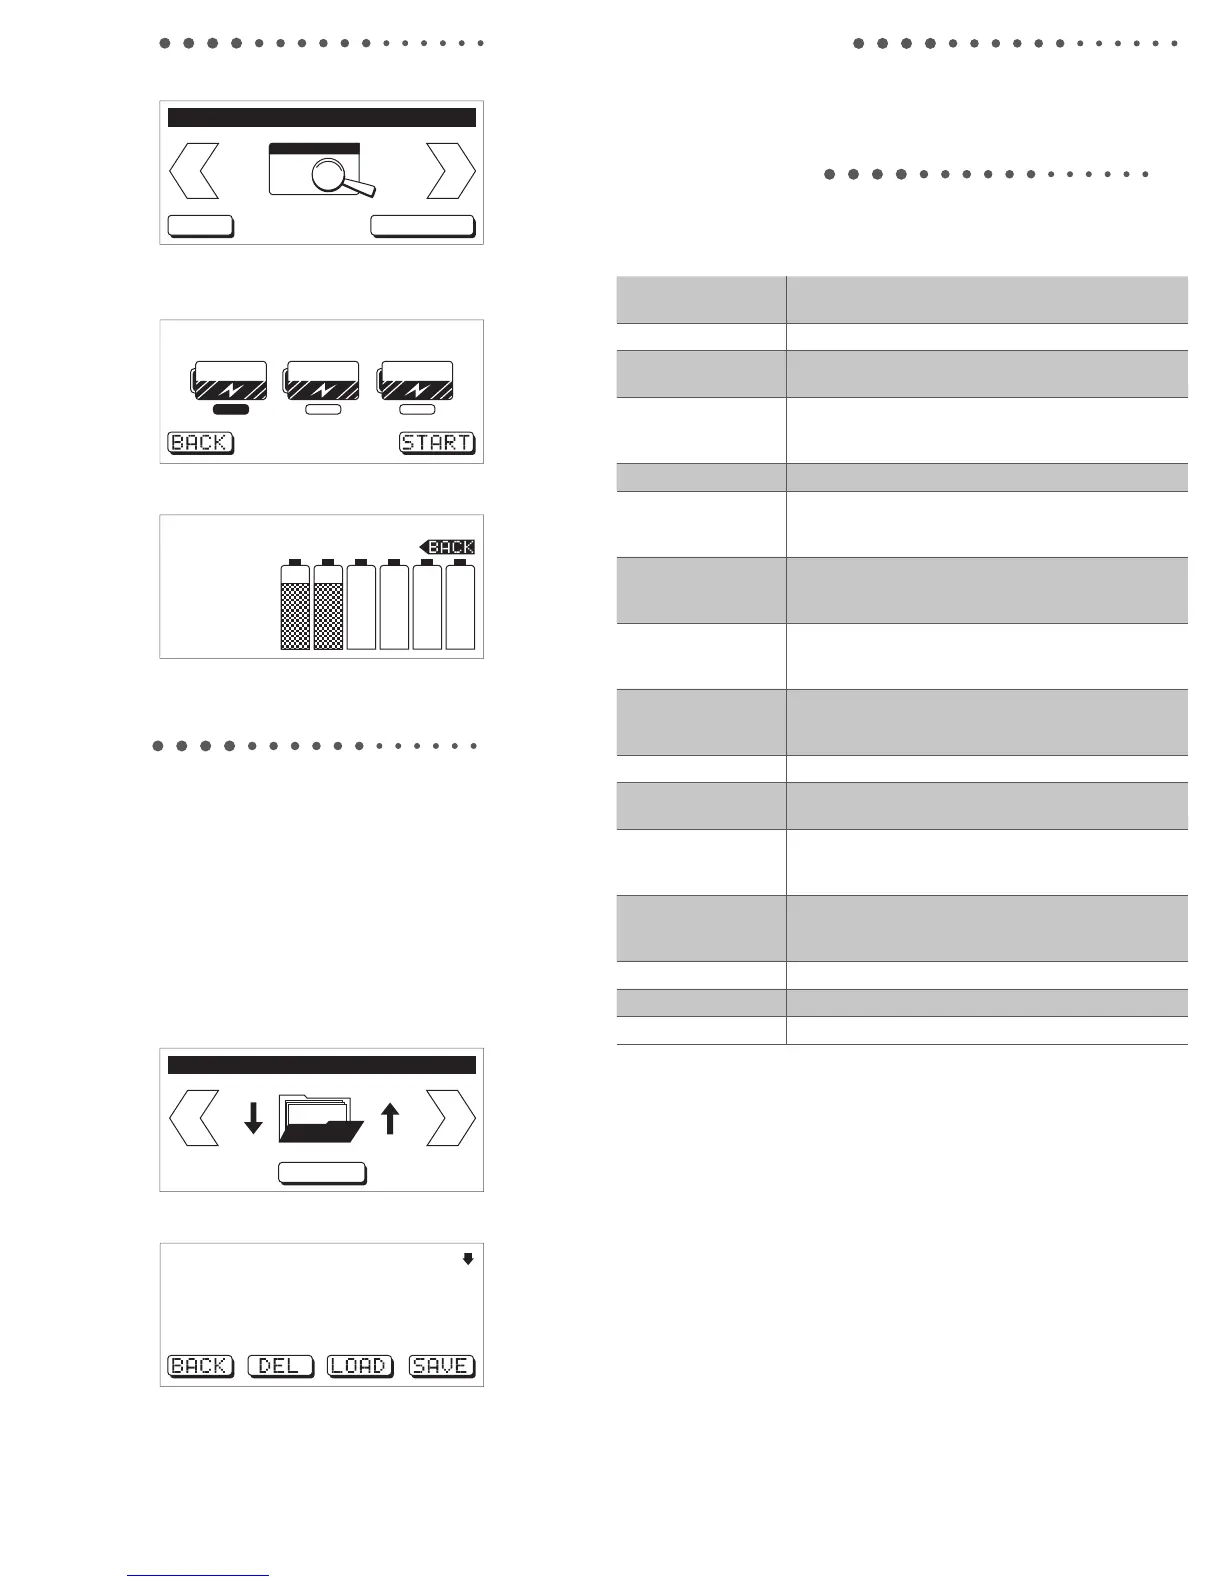
VIEW BALANCE
Program select=View
2. Press BALANCE.
3. Press the type of battery you want to balance: Li-Po/Li-Ion/Li-Fe.
4. Press START. The charger will begin balancing the cells.
5. Press STOP at any time to stop balancing.
6. When balancing is complete, the charger will beep and display the following screen:
-Balancing Complete-
1 > 3.94
2 > 3.94
3 > 0.00
4 > 0.00
5 > 0.00
6 > 0.00
13 - MEMORY
1. Press the Left and Right Arrows on the LCD Touch Screen to scroll through the main menu
screens until you reach the battery program you would like to save: Program Select=Li-Po/Li-Fe/
Li-Ion/Ni-MH/Ni-Cd/Pb.
2. Press the action at the bottom of the LCD Touch Screen to enter that menu.
3. Press a parameter to highlight that parameter.
4. Press the Up and Down Arrows to edit the parameter.
5. Press Select to save the parameter.
6. If there is more than one screen of parameters, press the top right corner of the LCD Touch
Screen to scroll through the parameter screens.
7. Once the parameters are at the desired settings, press Back to return to the main menu
screens.
8. Press the Left and Right arrows on the LCD Touch Screen to scroll through the main menu
screens until you reach Program Select=Memory.
MEMORY
Program select=Memory
9. Press MEMORY.
10. Choose an empty memory profile and press it.
USER SETUP [1/4]
M01 NULL
M02 NULL
M03 NULL
M04 NULL
M05 NULL
11. Press SAVE. The charging parameters you just entered will be saved in that memory profile.
12. To use a memory profile, press it, then press LOAD.
13. To delete a memory profile, press it, then hold DEL.
14. Press the top right of the LCD Touch Screen to scroll through all 20 memory profiles.
14 - USB DEVICE CHARGING
The charger has the capability to charge any USB-compatible device with the 2.1A USB Power
Output Port (F). To use the charging function, simply connect a compatible charging device or cord
into the charge port while the charger is powered ON. The charger provides up to 2.1A current at
5V DC.
During charger operation, circuits monitor battery and charger functions. If the following messages
show on the charger’s LCD screen, make the recommended responses. If the message continues
after you respond as recommended, contact your nearest Horizon Hobby customer service center
for assistance.
REVERSE POLARITY Make sure each connection polarity is correct between the power
source and the charger, then between the charger and the battery.
PROCESS INTERRUPTED Make sure the power connections are correct for charging.
OUTPUT SHORT CIRCUIT Make sure there are no short circuits between the poles of the
battery or the battery and the charger. Replace damaged wires.
INPUT VOLTAGE ERROR Input voltage to the charger fell below the default or adjusted
input voltage setting. Make sure the power source for the charger
provides correct input voltage.
CHARGER FAILURE Charger electronics require repair.
BATTERY LOW VOLTAGE Battery voltage is lower than the value setting in the charger.
Adjust settings, then make sure the battery is not damaged or
replace the battery.
BATTERY HIGH VOLTAGE Battery voltage is higher than the value setting in the charger.
Adjust settings, then make sure the battery is not damaged or
replace the battery.
CELL LOW VOLTAGE Cell voltage is lower than the value setting in the charger. Adjust
settings, then make sure the battery is not damaged or replace
the battery.
CELL HIGH VOLTAGE Cell voltage is higher than the value setting in the charger. Adjust
settings, then make sure the battery is not damaged or replace
the battery.
CELL CONNECT ERROR Make sure the balance connection is correct for charging.
CHARGER OVERHEATING Charger temperature is too high. Power OFF the charger and let
it cool.
OVER POWER Input voltage to the charger exceeded the default or adjusted
input voltage setting. Make sure the power source for the charger
provides the correct input voltage.
MAX CURRENT Current is higher than the value setting in the charger. Adjust
settings, then make sure the battery is not damaged or replace
the battery.
SAFETY TIMER Maximum safe time limit has been reached.
MAX CAPACITY Maximum capacity limit has been reached.
MAX EXT. TEMP External temperature is too high. Let charger and battery cool.
15 - TROUBLESHOOTING
 Loading...