EasyManuals Logo

Dynojet Power Commander III Installation Guide

Dynojet Power Commander III
3 pages
To Next Page IconTo Next Page
To Previous Page IconTo Previous Page
Page #2 background imageLoading...
Page #2 background image
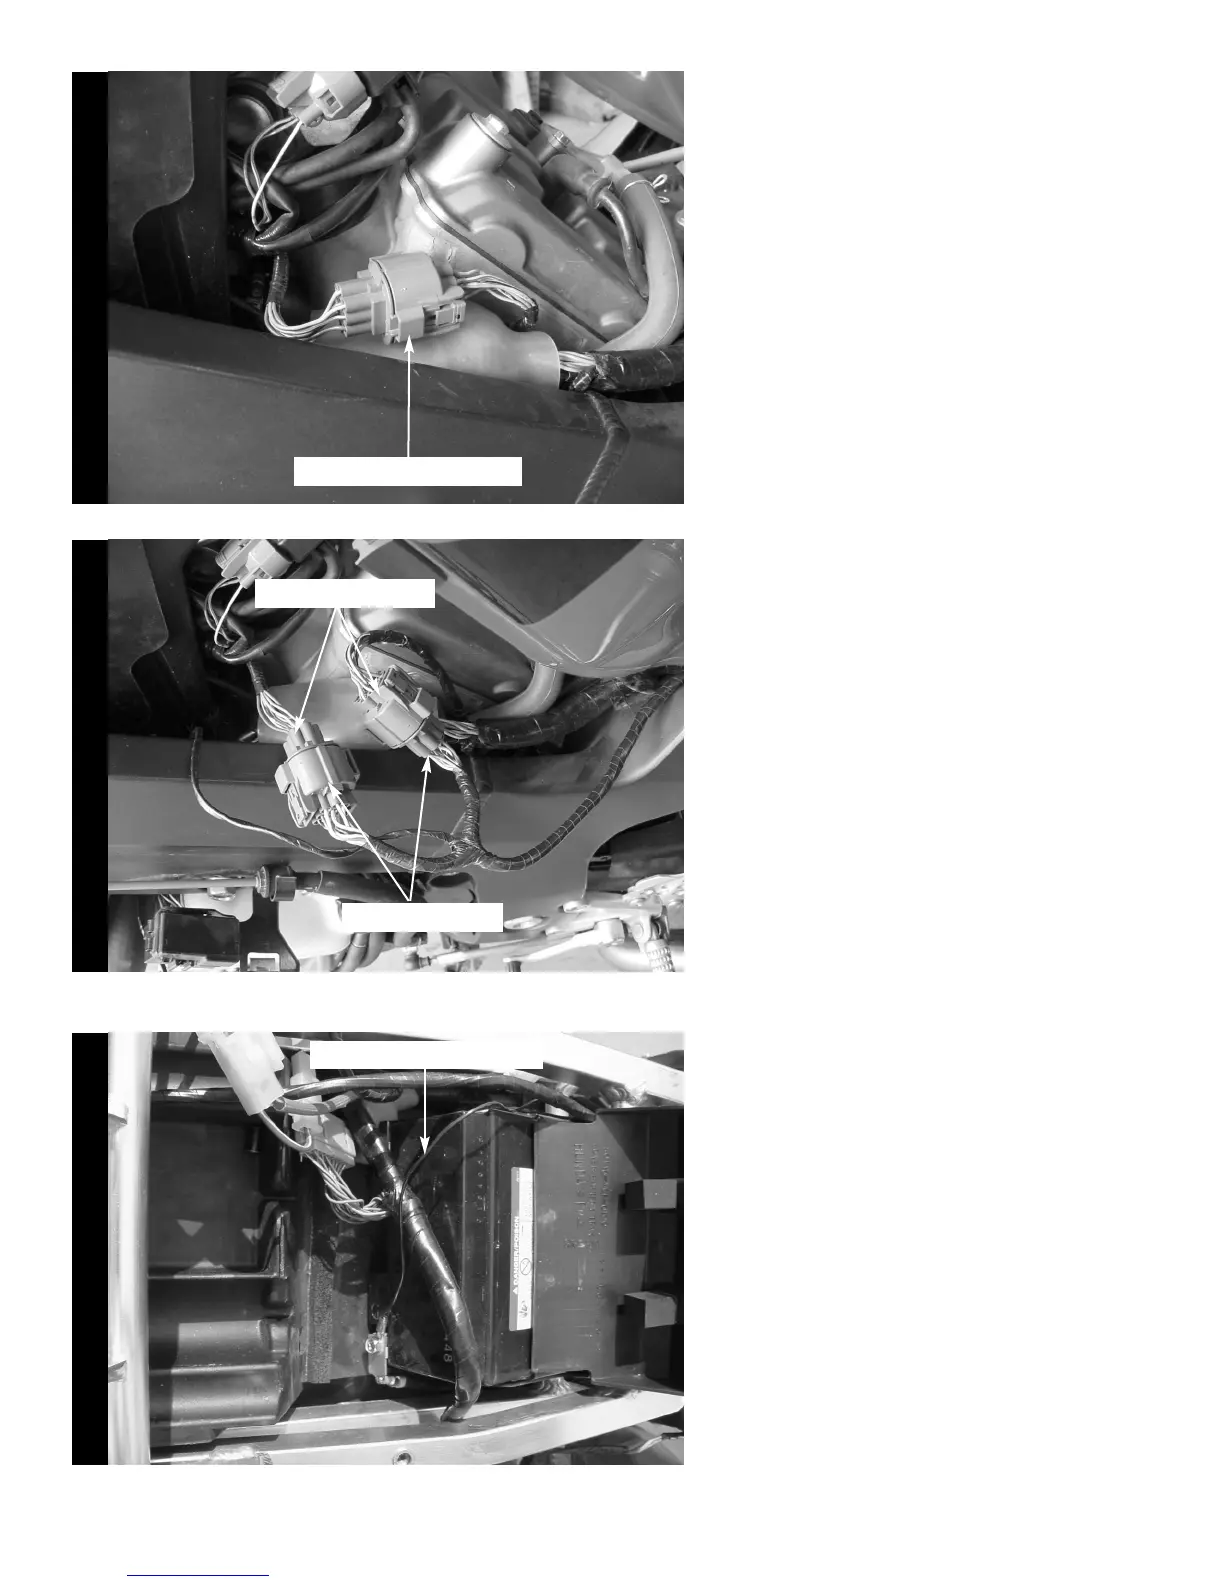
1 Remove the main seat and rear
solo seat cover.
2 Prop the front of the fuel tank
up.
3 Locate the connector in Fig. A.
Unplug this connector. This
connector is located on the left
hand side of the bike.
4 Plug the grey connectors from
the PCIII inline of the stock
connectors (Fig. B)
Fig. AFig. B
i105-411 www.powercommander.com 2000-2001 Honda RC51 - PCIII USB - 2
Unplug this connector
Stock connectors
5 Attach the ground wire from the
PCIII to the negative side of the
battery (Fig. C).
Fig. C
Ground wire from PCIII
PCIII connectors

Other manuals for Dynojet Power Commander III

Questions and Answers:

Question and Answer IconNeed help?

Do you have a question about the Dynojet Power Commander III and is the answer not in the manual?

Dynojet Power Commander III Specifications

General IconGeneral
BrandDynojet
ModelPower Commander III
CategoryMotorcycle Accessories
LanguageEnglish

Related product manuals