Do you have a question about the Eaglemaster E4 and is the answer not in the manual?
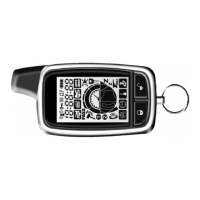
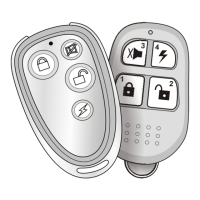
Explains the purpose of each button on the 2-way LCD remote transmitter.
Covers basic maintenance, primarily battery replacement for the remote.
Instructions on how to turn the remote receiving signal on or off.
How to lock or unlock the remote buttons to prevent accidental presses.
Page sent to the remote when the alarm system is triggered.
How to check the current status of the vehicle using the 2-way remote.
How to arm the vehicle security system using the remote.
How to disarm the vehicle security system using the remote.
How to arm the system with the siren turned off.
How the system automatically re-arms if a door isn't opened after disarming.
How to activate the panic mode to attract attention or trigger the alarm.
Explains the operation of the dual-stage shock sensor for light and heavy impacts.
How to enter and exit Valet mode, which disables the security system.
How to arm/disarm the system using the original key and valet switch.
Procedure for installers to reset the system in case of lost remotes or forgotten PIN.
Allows the engine to keep running after arriving at the destination.
Keeps the engine running after ignition off to cool the turbo.
Manual disarming procedure using the Valet switch.
Manual disarming procedure using a PIN code.
How to activate Anti Car-Jacking mode remotely while driving.
Anti Car-Jacking mode activated by door switch if forced open/closed.
Procedure to program a personal PIN code for the system.
Overview of programmable settings and how to access them.
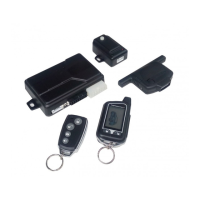
Guidelines for installing the main control unit in the vehicle.
Guidelines for mounting the dual-stage shock sensor.
| Remote Control Range | Up to 1, 500 feet |
|---|---|
| Door Trigger | Yes |
| Hood Trigger | Yes |
| Trunk Trigger | Yes |
| Starter Kill | Yes |
| Panic Mode | Yes |
| Valet Mode | Yes |
| Battery Backup | Yes |
| Compatibility | Universal |
| Alarm Type | 2-Way |
| Remote Control | Included |