11
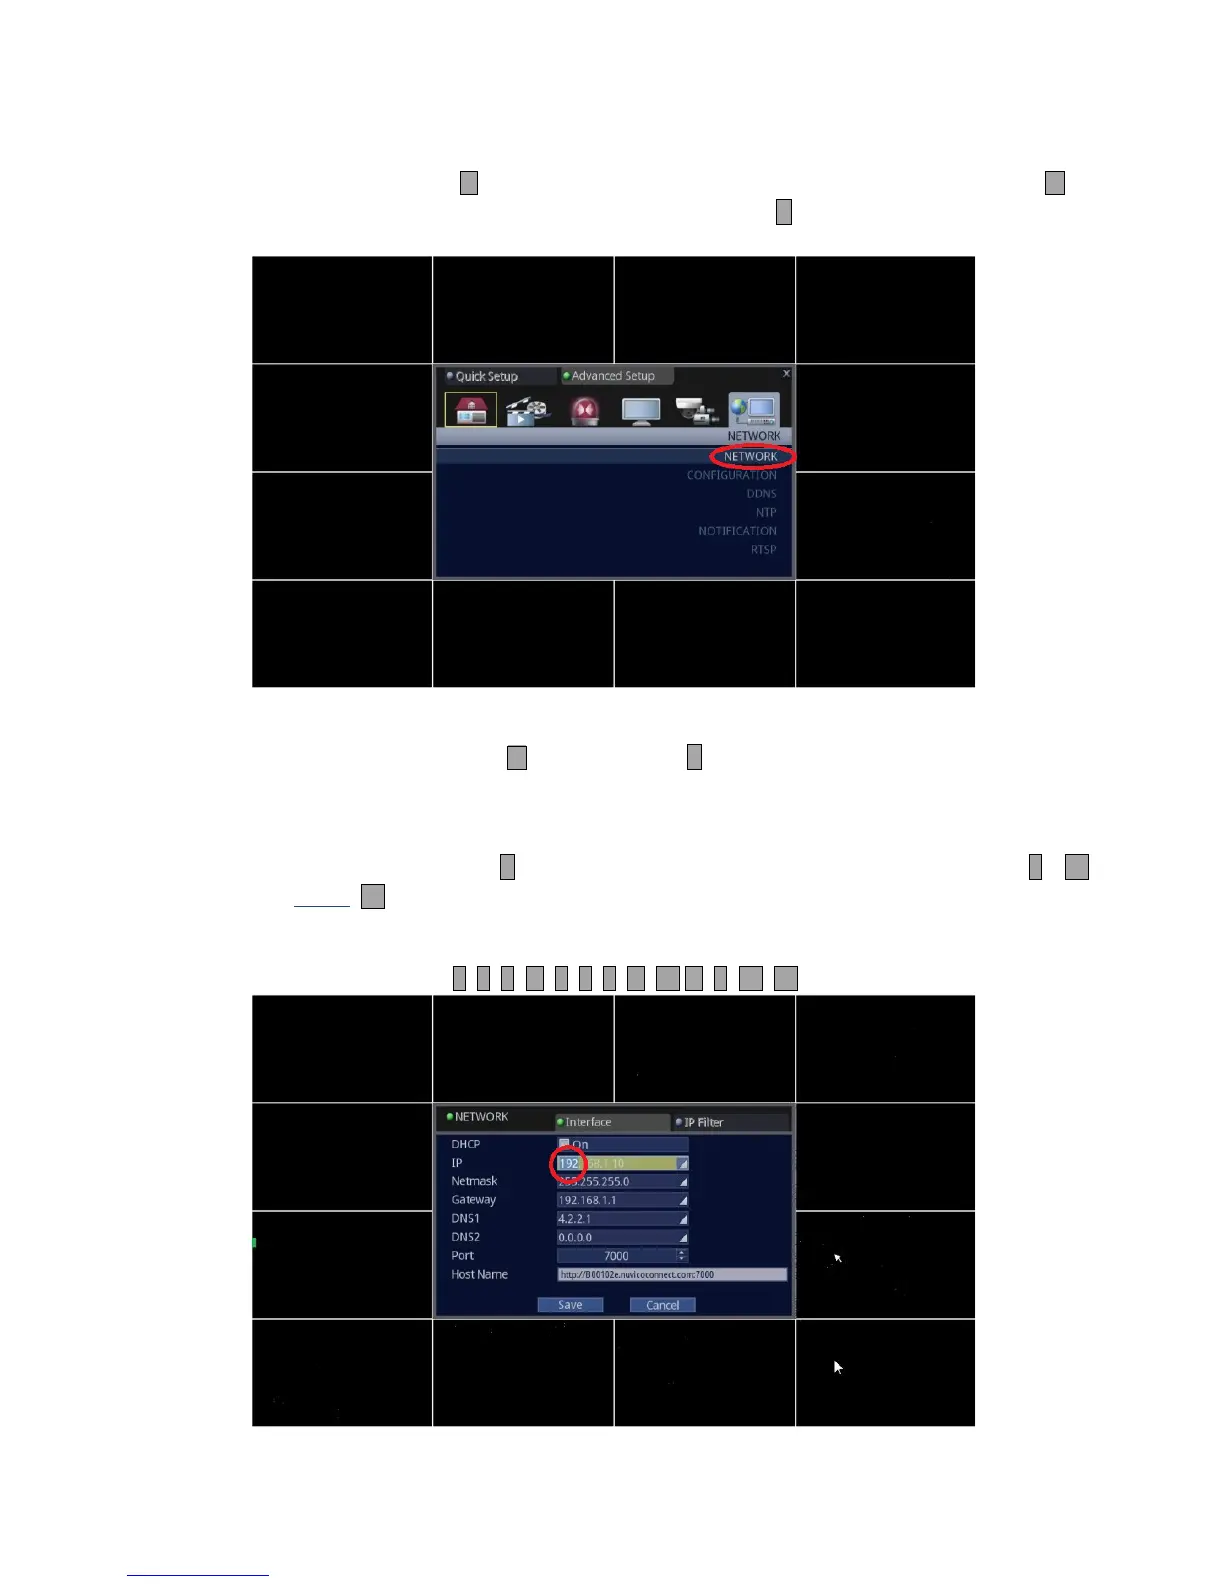
3. Select Network and access the sub-menu of NETWORK.
• Using Front Panel/Remote: Press button multiple times to move over to [NETWORK], then, press button
twice to highlight [NETWORK], and press ↵ button.
• Using Mouse: First, click on the [NETWORK] icon, and then click on the [NETWORK] text.
4. Make necessary changes.
• Front Panel/Remote: For DHCP, Press button and press ↵ to check or uncheck.
For IP, Netmask, Gateway, DNS1, DNS2, Port, follow the instructions below. (These parameters are given by your
Internet Service Provider or Network Administrator on a corporate network environment.)
Highlight the first group of IP address and press ↵ button. When first group of IP is highlighted, use buttons 1 ~ 10 to
modify to desired value. NOTE: 10 is used for [0].
Example of entering “192.168.0.100”
When first group of IP is highlighted, press 1 9 2 1 6 8 10 1 10 10
 Loading...