L
Inside Micrometer
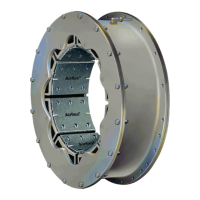
Fig. 9
2.4.2
2.4.3
2.4.4
2.4.5
Fabricate a rigid bracket for supporting a
dial indicator and attach to the spider. See
Figure 9.
Thoroughly clean the flange O.D. and the face
of the drum hub where alignment readings are
to be taken.
Rotate the spider and take parallel alignment
readings off the drum hub flange O.D. If both
shafts can be rotated together, the alignment
readings are less influenced by any surface
irregularities.
A
! Caution:
When recording parallel alignment
readings, “sag" of the indicator/
indicator bracket must be accounted
for
.
Angular alignment readings can be made by
accurately measuring the gap between the
e
spider and drum hub faces with an inside
micrometer. If a dial indicator is used, make
sure to monitor and correct for any axial move-
ment of the shaft. To reduce the influence any
surface iregularities may have on the angular
alignment readings, index the spider 90
degrees after taking the initial set of readings.
Take an additional set of readings and index
the spider another 90 degrees. Continue in this
manner until four sets of readings have been
taken. For misalignment correction, use the
average of the four readings at each position.
In other words, average the four top readings,
the four bottom readings, and each of the four
side readings.
2.4.6
Shim and shift the base of the movable shaft to
correct the misalignment. After tightening the
base, recheck the alignment and correct if
necessary. Make sure to check for a “soft foot”
condition. Dowel or chock into position after
satisfactory alignment has been achieved.
Note: On many applications, thermal growth
of the driving or driven machinery may result
in unacceptable shaft alignment in a running
condition. It is always good practice to make a
“hot" alignment” check and re-shim if necessary.
25
l
Installation of Element and Drum
(Narrow, Dual Narrow and
Single Wide)
2.5.1
Note the orientation of the drum flange with
respect to the air connection(s) on the element
and slide the drum into the element.
2.5.2
Separate the shafts as far as the bearing
clearances will allow and hoist the ele-
ment/drum into position.
2.5.3
Attach the drum to the drum hub with the
appropriate fasteners. See Table 1
l
Make sure
the bore in the drum flange fully engages the
pilot on the drum hub.
A
! Warning:
Use only the proper grade and num-
ber of fasteners. Using commercial
.
grade fasteners (Grade 2) in place of
Grade 8 fasteners (where called for)
may result in failure of the fasteners
.
under load, causing personal injury or
equipment damage.
2.5.4
Install the air connection gaskets onto the
air tubes. The metal backup washer is to be
positioned toward the elbow (away from the
spider). See Figure
10.
Note: Some older elements use a flanged
air connection tube and a thin gasket. See
Table 3 for correct part numbers.
Fig. 10
8
@
Copyright Eaton Corp., 1989. All rights resewed.
VC 5000
Revised: July, 1995 (PDF format)
 Loading...