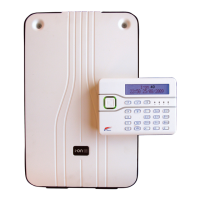
i-on40 Installation
Page 19
an alarm tone. If you are working at the top of a
ladder make sure that the sudden noise does not
startle you and cause a fall.
1. Apply battery then mains power to the control
unit.
The keypads and internal sounder may give
an alarm tone. The heartbeat LED (see fig 3 )
starts flashing.
(If you are installing a UK version please
go to step 6.)
The display initially shows:
2. Press or to show other languages on the
bottom line of the display. for example:
3. Press to select the language you wish to use.
From this point on, the display operates in the
selected language. If you want to change the
language later use Installer Menu - System
Options - Language.
4. Press or to show other countries, for
example:
5. Press to select the country you want.
6. Press A or B to select either a partitioned system
or a Part Setting system.
Note: To change to Partition or Part Set mode at a
later date you will have restore factory defaults.
7. Either: Press to load the Profile.
Or: Press to start with a blank system
Note: The Profile may not be EN50131 compliant.
(The factory default is EN50131 compliant.)
The control unit loads your choice of profile,
and then shows:
8. Press or to show the range of wiring
types available, for example:
9. Press to select the wiring type you intend to
use for the wired zones
Note that the alert LEDs around or built-into
the navigation key glow red. This is because
the control unit lid is off and the tamper is
active.
11. Place a temporary link over the lid tamper.
Note: Remember to remove the link before
finishing the installation.
12. Press to leave Installer Mode.
Note 1: It is necessary to leave Installer Menu at
this stage in order to make sure that the control
unit will learn radio zones successfully during
commissioning.
Note 2: If you do not have a suitable link to
disable the lid tamper, then you can simply
remove all power (mains and battery) from the
control unit, and then re-apply power to the
control unit.
At this point you can carry on to commission the
system. See the next page.
Note: You can set the time and date from within
the Installer Menu by using System Options – Set
Time & Date.

 Loading...