Page 7 of 20
Wiring
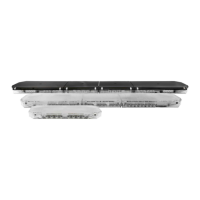
A multicolor LED CC series lightbar has a 2-wire power cable and a 16-wire control cable. The entire power load of the bar goes through the
power cable. The black ground wire should be connected directly to the battery. The 10 AWG red power wire requires a constant 10 to 16V
power source with a customer supplied in line fuse. To select an appropriately rated ATO (regular) or Maxi Fuse, add the amp ratings, found
in the specications section, of the modules in your conguration specic lightbar and based on that sum, insert a fuse of the next larger size
(to be no larger than a 30 A fuse). The 16 control cable wires carry only low power (30 mA average) input signals to control the lightbar func-
tions and must be routed to the output of a control switch (or directly to multiple switches).
Before attempting to connect the lightbar wiring harness, refer to the conguration specic wiring key included with the lightbar for the con-
guration specic functions of each wire. Use an appropriate high-temperature wiring if it passes through the engine compartment. Use cable
ties and grommets to secure and protect all cables and wires.
Note:
• When the Arrowstik Left and Arrowstik Right wires are both connected to +power, the Center-Out Arrowstik function is activated.
• The Front Cut and Rear Cut functions must be used with the greatest care to ensure that the use of these functions do not diminish
the effectiveness of the Emergency Warning signal.
• When the Pattern Select wire is connected to +power alone, test mode is enabled to exercise all outputs in sequence.
• The Dim Function lowers the brightness of the LEDs in the ArrowStik and Emergency Warning Flash modes.
• The WHT Drivers Side Cut wire may be changed to Arrowstik Flash. Please see the Arrowstik ash pattern section below for details.
TABLE 1
Standard Wire Functions
Function Wire Color Function Description Notes
GRN/BLK L1 Level 1 Emergency Mode
WHT/BLK L2 Level 2 Emergency Mode
RED/BLK L3 Level 3 Emergency Mode
RED Arrowstik Left Left Arrowstik Overrides L1, L2 & L3 for rear of lightbar
ORG Arrowstik Right Right Arrowstik Overrides L1, L2 & L3 for rear of lightbar
WHT Drivers Side Cut Cut Driver Side Directional and Alley Lights Designed to interface with the driver’s door switch
BLK/RED Pattern Select Pattern Select
BLK Take Down Flash Take Down/Work Light Wig/Wag Flash
ORG/BLK Take Down lights Take Down/Work Light Steady Burn Overrides Take Down Flash
BLU/WHT Alley Light Flash Enables Alley Light Wig/Wag Flash
BLK/WHT Left Alley Light Left Alley Steady Burn Overrides Alley Light Flash
RED/WHT Right Alley Light Right Alley Steady Burn Overrides Alley Light Flash
GRN/WHT Front Cut-Off Blacks-Out Front Facing LEDs
BLU/BLK Rear Cut-Off Blacks-Out Rear Facing LEDs
GRN Cruise Lights End LEDs only Overridden by all other functions except Dim
BLU Lightbar DIM Sets LEDs to DIM mode Sets LEDs to DIM mode