73 INCH CHIPPER/SHREDDER
Section
3 FEATURES & CONTROLS
Understanding how your machine works will help you achieve the best results when using your chipper/shredder. The
following descriptions dene the features and controls of your machine.
REFER TO ENGINE OWNER’S MANUAL FOR FURTHER ENGINE OPERATING INSTRUCTIONS.
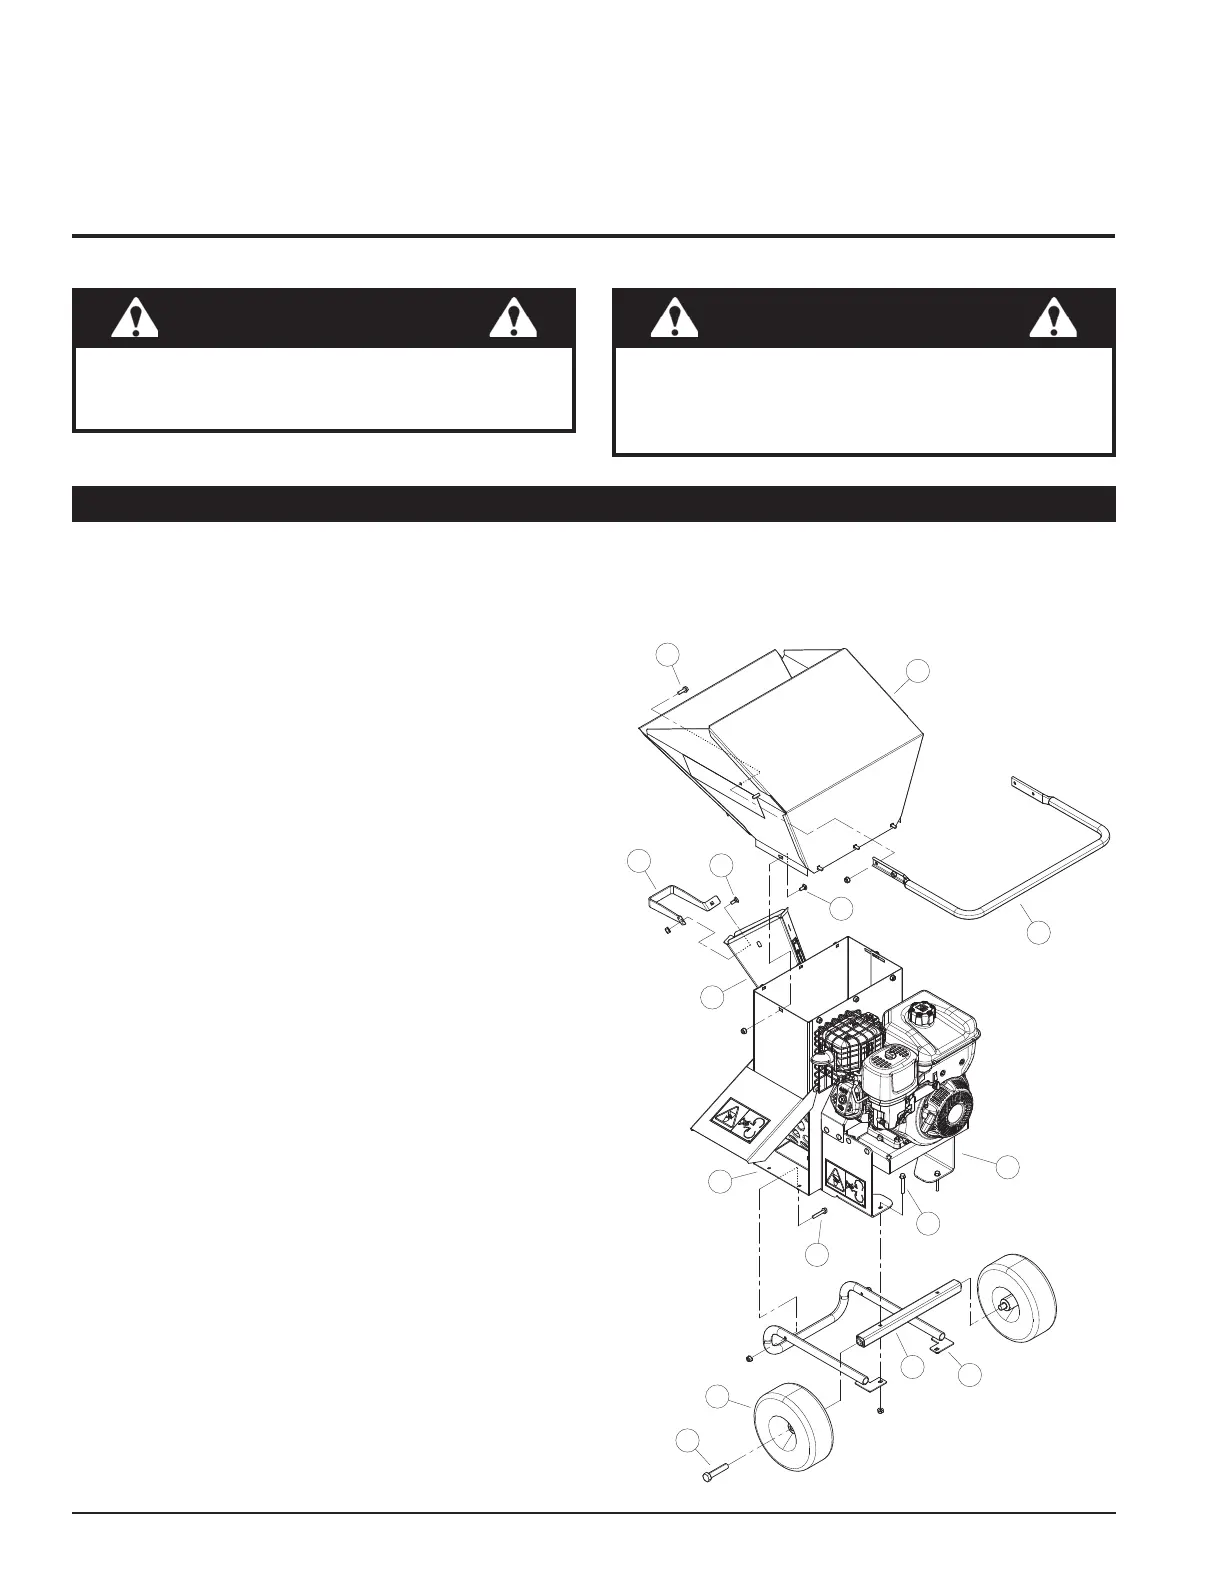
1. SHREDDER CHUTE
Materials no larger than 3/4" (1.9 cm) in diameter are fed through the shredder chute to the shredder knives.
2. CHIPPER CHUTE
Materials no larger than 3" (7.6 cm) to be chipped are fed through the chipper chute to the chipper blades.
3. ENGINE THROTTLE
This controls the speed of the engine. Increase the throttle by moving the lever to the FAST position. To decrease
the throttle, move the lever to the SLOW position.
4. ENGAGEMENT HANDLE
During engine start-up, the engagement handle must be in the disengaged (UP) position. With the engine at 1/4
throttle, carefully engage the rotor by slowly pushing the engagement handle down, allowing the rotor to speed up
gradually. Engaging the chipper too quickly with the engine at full or half throttle will bog down the engine and will
shorten the life of the belt. See Sections 4.2 and 4.4.
Figure 3.1, Start Position Belt Disengaged Figure 3.2, Operating Position Belt Engaged
ENGLISH