18 3 INCH CHIPPER/SHREDDER
SERVICE & MAINTENANCE
WARNING
BEFORE INSPECTING OR SERVICING ANY PART OF THIS MACHINE, SHUT OFF POWER SOURCE,
AND MAKE SURE ALL MOVING PARTS HAVE COME TO A COMPLETE STOP.
Check the oil level before each use. Change oil as directed
in the engine owner’s manual.
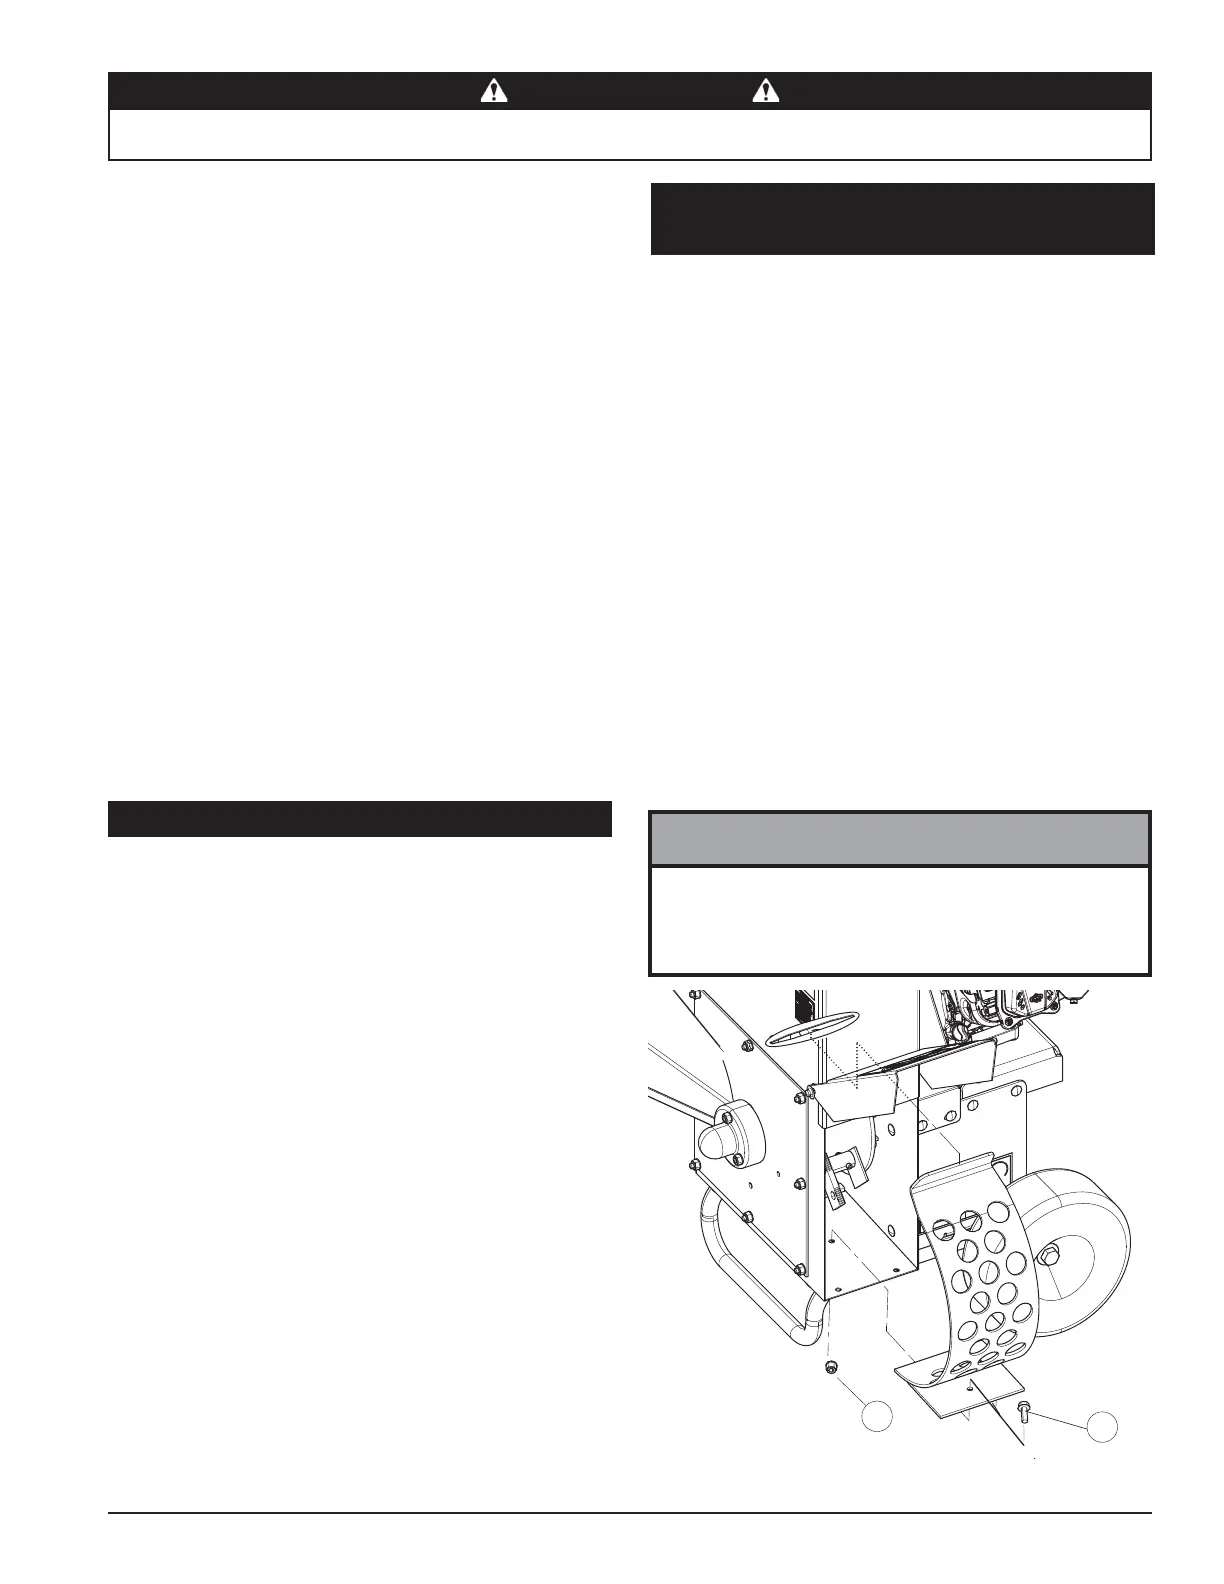
5.14 REMOVING THE ROTOR
5.15 CHANGE OIL
Lubricate the machine periodically with a lithium-based
grease. Extreme working conditions will require more
frequent greasing.
Grease the following points every 50-100 hours of
operating time:
● Engine side bearing
● Chute side bearing
Polyurea and lithium-based greases are not
compatible. Mixing the two grease types may lead to
premature failure.
WARNING
Figure 5.13, Chute Side Bearing Zerk
Figure 5.12, Engine Side Bearing Zerk (Bottom of Bearing)
Do not over grease bearings. Overlling can lead to
excessive heat and/or unseating of the seals. Add
grease slowly and under light pressure. Whenever
possible, rotate bearing slowly while lubricating.
NOTE
1. Remove discharge door/shield, discharge screen and
rotor shaft end cap on chute side of the machine.
2. Loosen the set screws on the lock collar securing the
chute side bearing on the rotor shaft.
3. Using a punch and hammer, tap the lock collar in
the opposite direction of normal rotation until loose;
remove lock collar and bearing.
4. Remove the upper shield, upper belt guide and lower
belt guard to allow access to the engine side bearing.
5. Remove the drive belt.
6. Loosen the set screws holding the belt pulley on the
rotor shaft and remove the pulley.
7. Repeat steps 2 and 3 on the engine side rotor bearing.
8. Remove the bolts securing the chipper chute cover to
the frame and remove chipper chute cover.
9. Remove rotor.
5.16 LUBRICATION