WP-1000 ASSEMBLY
© 4/2015 ECHO Inc.
X7505120800 13
ASSEMBLY
Suction Hose
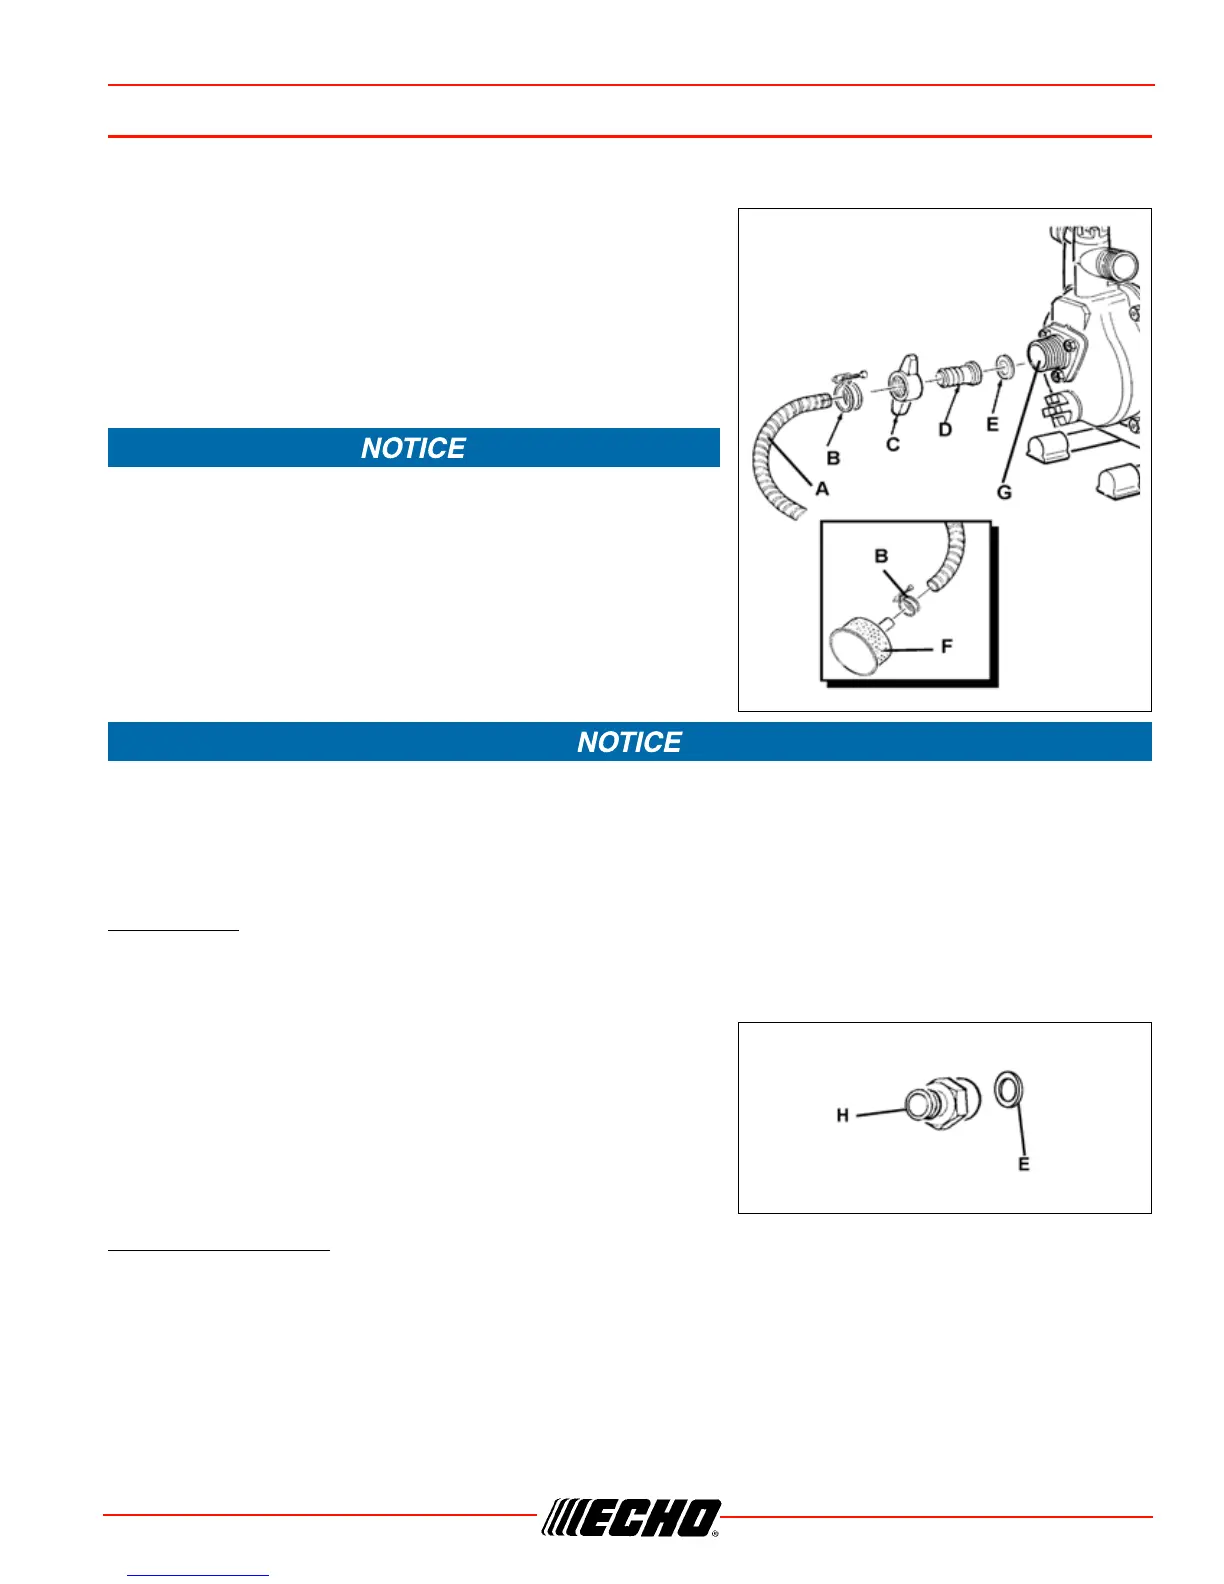
1. Remove vinyl cap from suction port (G).
2. Assemble suction hose (A) with clamp (B), hose connecter
(C), hose fitting (D), and sealing washer (E) on one end and
strainer (F) with second clamp on the other end.
3. Attach hose to suction port (G).
Note: Longer 25 mm (1 inch) suction hose can be used up to a
maximum length of 7.5 m (24 feet).
• Make sure that all hose and pipe connections are air tight.
An air leak in the suction line or suction fittings may prevent
priming and will reduce the pumps capacity or efficiency.
• Keep priming port plug and pump drain plug tightly secured
in place to prevent entry of air into the pump.
• Use an acceptable pipe thread sealant on all threaded
nipple connections.
Always use the strainer with the suction hose. Gravel or debris sucked into the pump will cause serious
impeller and housing damage. If the strainer clogs with debris, prevent the strainer from touching the bottom.
Placing the strainer in a submerged bucket or basket may also work.
Discharge Hose
Garden Hose
Note: Garden hose ranging from 13 mm (1/2 inch) to 19 mm (3/4 inch) in diameter can be used on the
discharge end of this pump.
1. Remove vinyl cap from suction port (G).
2. Attach the 25 mm to 3/4 inch adaptor (H) and washer (E)
tightly onto pump discharge port.
3. Attach garden hose onto adaptor (H).
1 Inch Discharge Hose
Note: Rubber or fabric hose may be used. Hose can be obtained from local contractor supply companies.
Extra fittings are included with the pump.