11
Eclipse RatioMatic Burners, RM Series, V5, Installation Guide 110, 12/3/2014
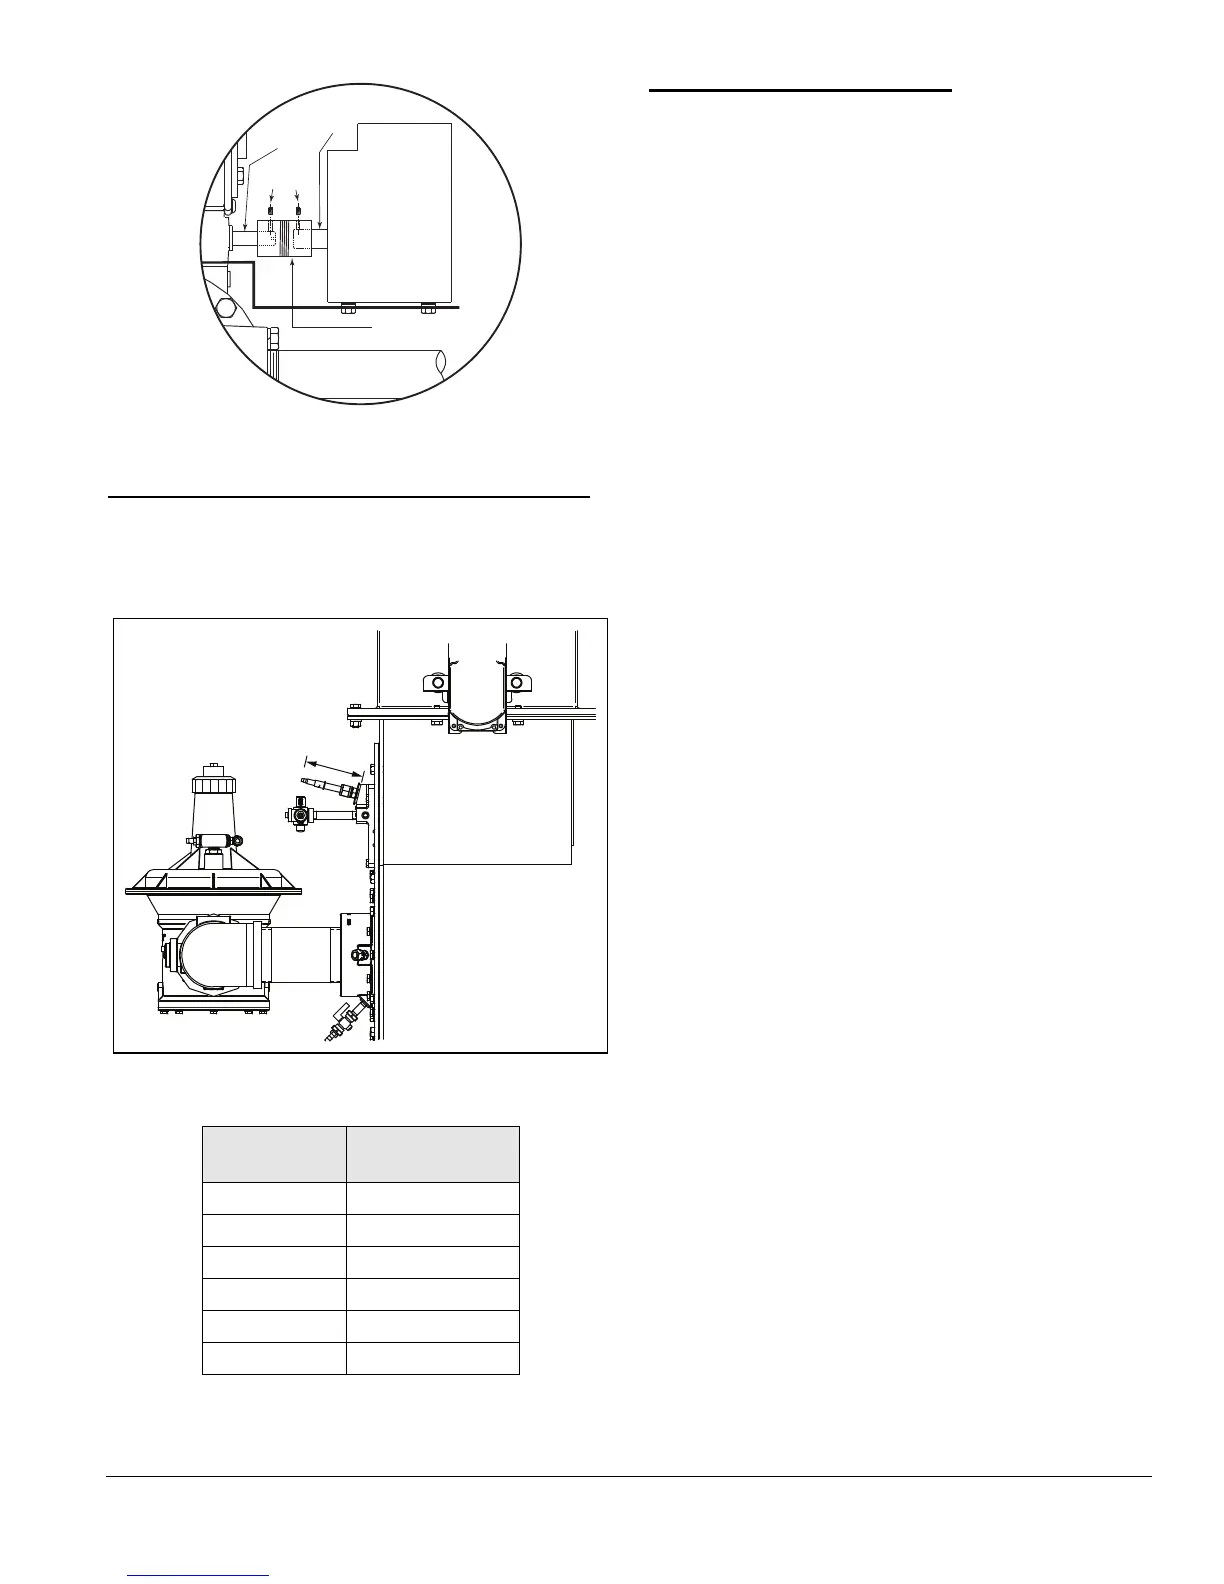
Figure 3.10. Control Motor Mounting
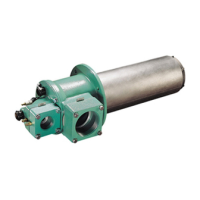
Setting Ignitor Location (RM1000-RM3000)
For RatioMatic models RM1000 through RM3000, set the
ignitor location using the self-tightening compression
fitting. The distance required is shown in Figure 3.11.
Figure 3.11. Spark Rod Distance
Checklist After Installation
To verify the system was properly installed, perform the
following checks:
1. Be sure there are no leaks in the gas lines.
2. Be sure all the components contained in the flame
monitoring and control system are properly installed.
This includes verifying that:
• all the switches are installed in the correct locations.
• all wiring, pressure, and impulse lines are properly
connected.
3. Be sure all components of the spark ignition system are
installed and functioning properly.
4. Be sure the blower rotates in the proper direction. If the
rotation is incorrect, have a qualified electrician rewire
the blower to rotate in the proper direction.
5. Be sure all valves are installed in the proper location
and correctly oriented relative to the flow direction.
RM Model
Dimension A,
mm (inches)
RM1000 82 (3.2)
RM1250 82 (3.2)
RM1500 95 (3.7)
RM2000 95 (3.7)
RM2500 95 (3.7)
RM3000 95 (3.7)
Set
Screws
Motor
Shaft
Control
Motor
Coupling
BV
Shaft
A