l.
Tum
off the
heat
pump
and its
water
supply.
2.
Open
a
plumbing
connection
on the
water
supply
side, if
possible,
to
break
the system
vacuum
and
a11ow easier drainage of
the
system
and water coil.
3.
Drain the water out of the system
and water coil
via
the boiler drains on the entering and
leaving
water lines, and the
drain
on the heat exchanger.
EWARNING!! &
FAILURE
TO COMPLETELY
DRAINTHE WATER COIL HEAT EXCHANGER
COULD
POSSIBLY RESULT IN A FREEZE
RUPTURE!
4.
Set the thermostat to "Heat"
to
start
the heat
pump
in the heating mode and
quickly
freeze
the
coil.
5.
Allow the heat
pump
to run until
it automatically
shuts off on
low
pressure
and then
turn the
thermostat to the
"Off' position.
6. Recap the
water
coil drain and tighten
any
plumbing
connections that may have been
loosened.
7.
If so equipped, open the
field installed drain cock
on the
water discharge side of the
heat
pump,
and
install
a short
piece
of
rubber hose
to allow
drainage into a drain or bucket.
A drain cock on
the discharge side allows the
water flow to bypass
the solenoid
valve,
flow
valve, flow
meter,
or
any
other item that may be clogged by
mineral debris.
Drainage
to
a bucket helps
prevent
the
clogging
of
drains and allows
you
to
visually determine the
effectiveness
of the
procedure.
8.
Turn on the
water
supply
to
the
heat
pump
in order
to start
the
process
of flushing any
mineral debris
from the
unit.
9. Set the thermostat to
"Cool"
and start the heat
pump
in the cooling mode
to
quickly
thaw out the
water coil.
10. Run the heat
pump
until the
water
coil
is
completely
thawed
out
and any loosened scale,
mineral deposits, or other debris buildup
is flushed
completely
from
the
water
coil.
Allow at least 5
minutes
of
operation to ensure that the
water coil
is thoroughly thawed out.
I 1.
If the water still contains mineral debris, and if
the
flow through the
unit
did not improve along
with
an increase in the temperature difference between
the water
supply
and
discharge,
repeat the entire
procedure
listed above.
12. Reset the heat
pump
for normal operation.
b. Chlorine Cleaning
(Bacterial
Growth)
1. Turn the
thermostat to the
"Off'
position.
2. Connect
a
submersible circulating
pump
to the
hose
bibs
on the
entering and leaving
water
sides
of the heat
exchanger.
3.
Submerse the
pump
in a
five-gallon
pail
of
water
and chlorine bleach mixture. The chlorine
should
be strong enough to kill the bacteria. Suggested
initial mixture is 1
part
chlorine bleach
to 4
parts
water.
4. Close the shut off
valves upstream and
downstream
of the heat exchanger.
5.
Open the hose bibs to allow
circulation of the
bleach solution.
6. Start the
pump
and circulate
the solution through
the heat exchanger for
15 minutes to one hour.
The solution should change color to
indicate
the
chlorine is killing the bacteria
and removing it
from
the heat
exchanger.
7. Flush the used solution
down a drain by adding
a
fresh water supply to the
pail.
Flush until the
leaving water is clear.
8. Repeat this
procedure
until
the solution
runs
clear
through the chlorine circulation
process.
9.
Flush the entire
heat
pump
system with
water.
This
procedure
can
be repeated annually, semiannually,
or
as often as
it
takes to
keep bacteria out of the
heat
exchanger, or
when bacteria appears in a
visual flowmeter
to
the
point
the flow cannot be
read.
Another
alternative to bacteria
problems
is to shock
your
entire
well.
Shocking
your
well may
give
longer term
relief from bacteria
problems
than cleaning
your
heat
exchanger,
but will
probably
need
to be repeated,
possibly
every three
to five
years.
tContact a
well driller in
your
area
for more information.
c.
Miratic Acid Cleaning
(Diflicult
Scaling
and Particle Buildup
Problems)
1. Consult installer
due to dangerous
nature
of acids.
2.
Iron out
solutions
and de-scaling
products
are also
useful.
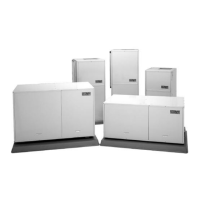
V. CONDENSATE
DRAIN
Condensate
traps are built
into every
GeoSource
2000
vertical
unit, so an external
trap should not
be installed.
Vertical units
must be level to insure
proper
condensate
drainage.
Horizontal units require
an
external
condensate
trap
in
order
to drain
water
from
the heat
pump.
Horizontal units must
also
be
mounted level
in
order
for
the condensate to drain.
The
condensate
line as it leaves the U bend
of the
condensate trap must be at
least 3" below the base of the
heat
pump.
This requires the
U
bend to be 6" below the
unit to
give
the upward
portion
of the U bend
a
3"
lift.
The condensate trap should be
vented
after
the U bend.
The
condensate
line should be
pitched
away
from
the unit
a minimum of l/8"
per
foot. If the unit
produces
an
odor
in
the cooling
mode, the condensate trap or line may be
plugged,
or the unit may not be
pitched
correctly. Bleach
may
be
poured
down
the condensate drain in the heat
pump
to
kill
any bacterial
growth
in
the condensate
line.
Downflow units also
require an external
condensate
trap.
A
stand
is required undemeath a downflow unit, since
placing
the
unit
on the
floor would not allow
for
the 6"
,7
t
\_
L