EcoNet
®
Smart Thermostat User Guide 13> Return to Table of Contents
Settings (con’t)
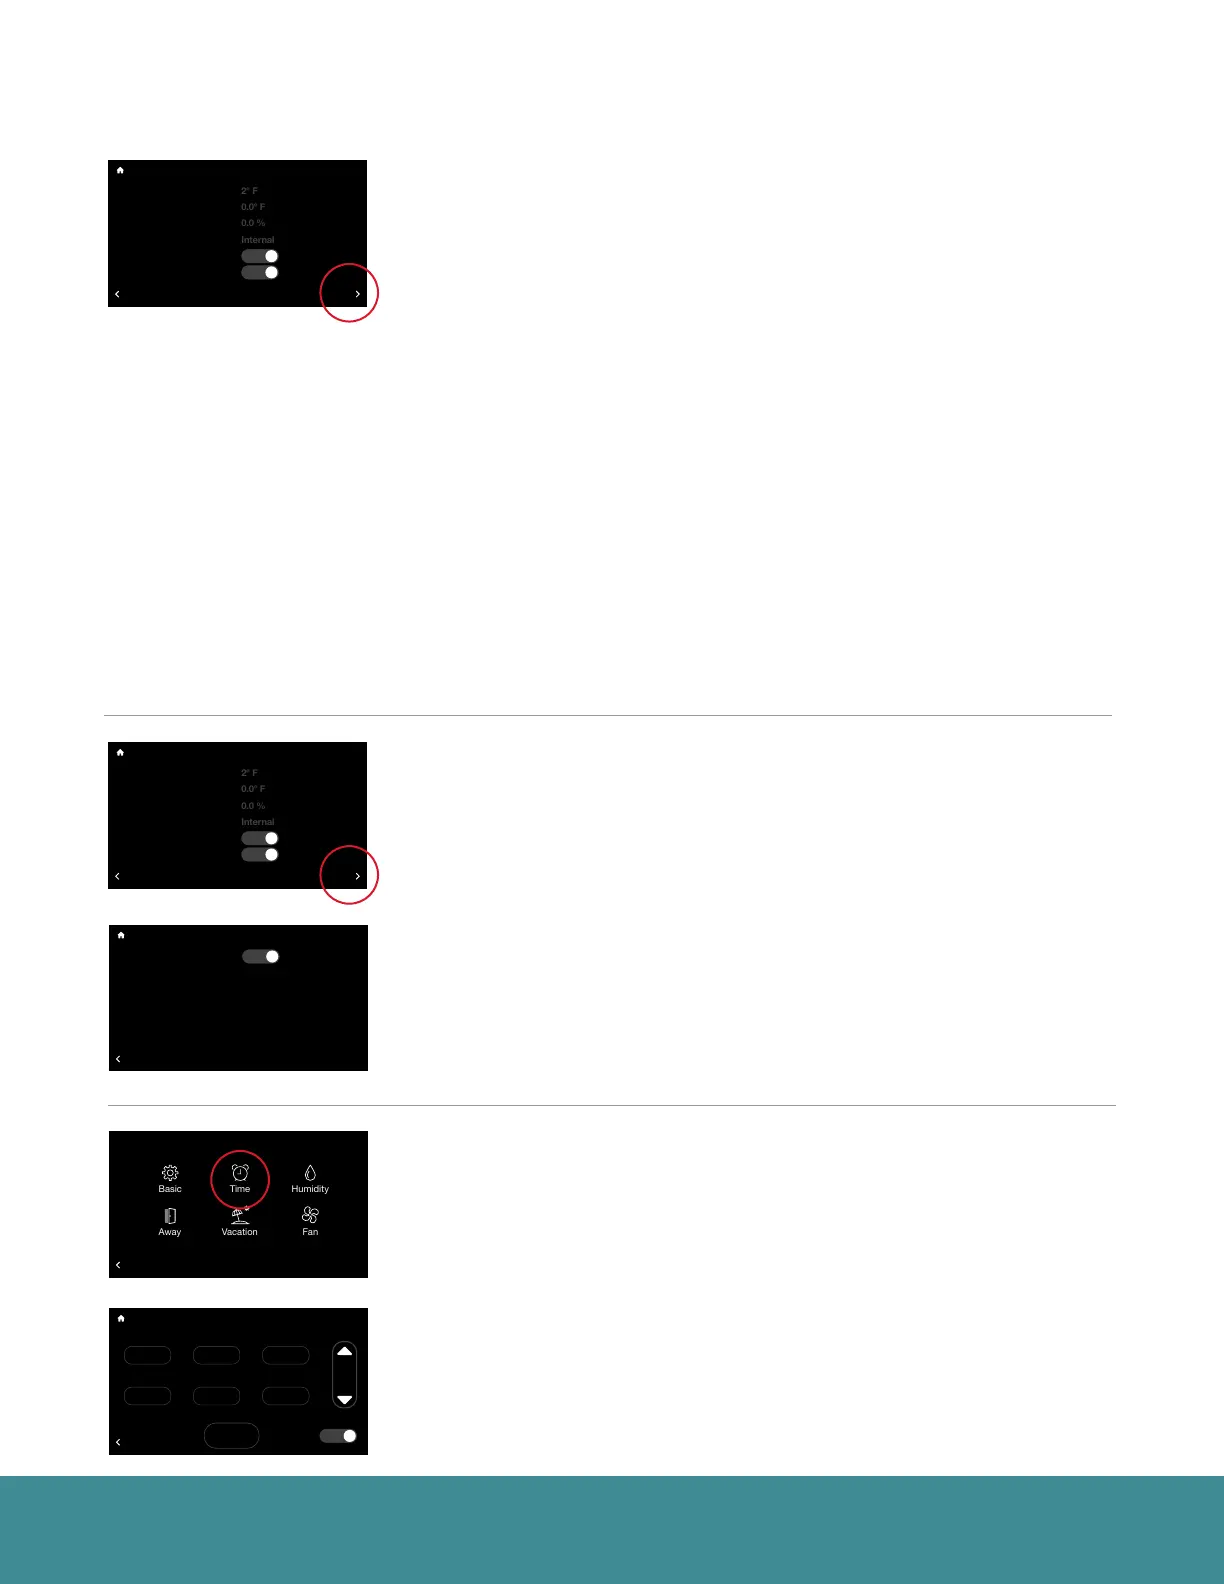
More >
Set Point Deadband – This is the minimum difference between heating and
cooling set points in Auto mode. The default is 2 degrees. This setting is
configurable between 0 and 6 degrees. A 0 degree deadband means your
system will switch between heating and cooling to maintain the specified set
point. The smaller the deadband setting the more frequently your system will
switch between heating and cooling.
Temperature Offset – This is an offset applied to the displayed room
temperature. A negative offset will cause the displayed indoor temperature to
be less than the sensed temperature. A positive offset will cause the displayed
temperature to be higher than sensed temperature.
Relative Humidity Offset – This is an offset applied to the indoor relative
humidity. A negative offset will cause the displayed relative humidity to be less
than the sensed relative humidity. A positive offset will cause the displayed
relative humidity to be higher than sensed relative humidity.
Note: You should allow the thermostat to calibrate in the conditioned space for 30 minutes before
adjusting offsets.
Room Sensor Selection – You can wire a remote 10K temperature sensor* to
the EcoNet Smart Thermostat. If a remote temperature sensor is connected,
you can choose to use the remote sensor, internal sensor on the Smart
Thermostat or an average between the two for current indoor temperature.
*Optimized for use with an Aprilaire 8051 indoor temperature sensor.
Proximity Sensing** – Selecting ‘No’ will disable the motion sensor. To
activate the thermostat, you will need to tap the screen.
**Motion Sensor may not be available on all units.
Smooth Arrival – The thermostat will start recovery at the optimum time
to ensure the set point is reached at the scheduled time. If a setback in
temperature is scheduled, for either cooling or heating, the set temperature
is ramped to the next scheduled set temperature 60 minutes before the next
time period.
Backlight Enabled – When the thermostat is not being used it will enter
standby mode. The default screen brightness in standby is 1%. You can turn
off the Backlight when in standby by selecting “No.”
Time & Date (Menu > Settings > Time)
Set the current time and date. Your schedule times, vacation events and
weather forecast will be based off the time entered on this screen. It is
important to ensure the correct date and time are programmed before
setting your schedule.
DST – At the bottom of this screen you can elect to enable or disable
daylight savings time.
36
UNITS
34
Group 1
Refrigeration
!
75
44%
80
65
Away
Resume Schedule
71
Home 44%
70
80
Cooling to
BACK
Time and Date
2 :
38
pm
Jan
29
2018
D.S.T.
Accept
Yes
36
UNITS
34
Group 1
Refrigeration
!
75
44%
80
65
Away
Resume Schedule
71
Home 44%
70
80
Cooling to
BACK
Settings
Installer
36
UNITS
34
Group 1
Refrigeration
!
75
44%
80
65
Away
Resume Schedule
71
Home 44%
70
80
Cooling to
BACK
Basic Settings
Backlight Enabled?
Yes
36
UNITS
34
Group 1
Refrigeration
!
75
44%
80
65
Away
Resume Schedule
71
Home 44%
70
80
Cooling to
Set Point Deadband
Temperature Offset
Relative Humidity Offset
Room Sensor Selection
Proximity Sensing?
Smooth Arrival Enabled?
BACK
Basic Settings
Yes
Yes
MORE
36
UNITS
34
Group 1
Refrigeration
!
75
44%
80
65
Away
Resume Schedule
71
Home 44%
70
80
Cooling to
Set Point Deadband
Temperature Offset
Relative Humidity Offset
Room Sensor Selection
Proximity Sensing?
Smooth Arrival Enabled?
BACK
Basic Settings
Yes
Yes
MORE