71
B350AM4-M USER MANUAL
Chapter 5
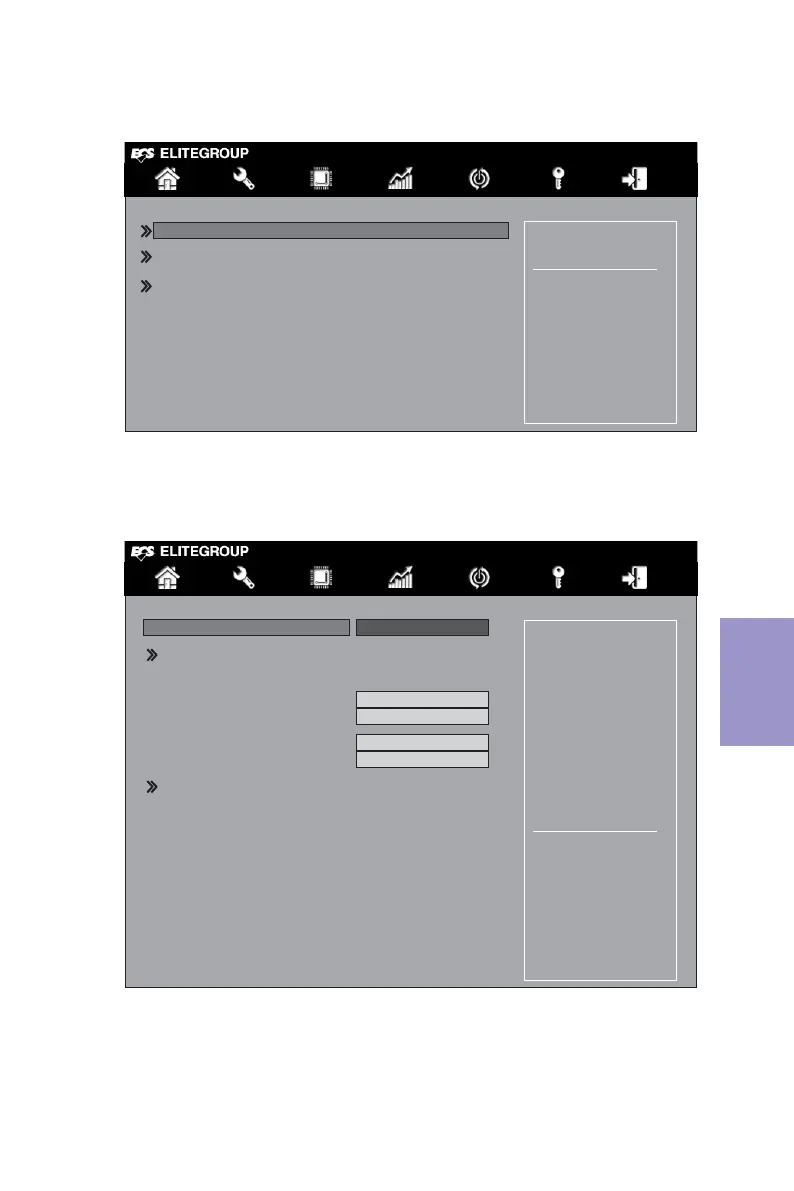
3. Press <Enter> and use the arrow keys to select “Create Array” as below.
Figure 1.5 Array Management Screen
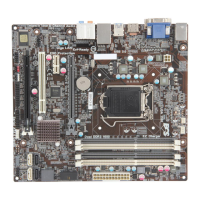
4. Press <Enter> and use the arrow keys to select “Select RAID Level” and
set it to “RAID 0” as below.
Figure 1.6 Create Array Screen
Main Advanced Chipset M.I.B. X Security Boot Exit
+/- : Change Opt.
Enter/Dbl Click : Select
: Select Screen
/Click: Select Item
F1: General Help
F2: Previous Values
F3: Optimized Defaults
F4: Save & Exit
ESC/Right Click: Exit
Selects the desired RAID level.
The configuration utility
supports RAID levels 0 and 1.
RAID 0 -- Uses disk striping
to provide high data
throughput.
RAID 1 -- Uses disk mirroring
to provide an exact copy for data
redundancy.
RAIDABLE -- RAID aware
single disk for future
redundancy.
VOLUME -- Non-RAID using
a single disk.
Select RAID Level: RAID 0
Select Physical Disks
Configure Array Parameters:
Array Size: 0
Array Size Unit:
Read Cache Policy: Read Ahead
Write Cache Policy: Write Back
Create Array
Main Advanced Chipset M.I.B. X Security Boot Exit
Create Array
Manage Arrary Properties
Delete Array
+/- : Change Opt.
Enter/Dbl Click : Select
: Select Screen
/Click: Select Item
F1: General Help
F2: Previous Values
F3: Optimized Defaults
F4: Save & Exit
ESC/Right Click: Exit