5
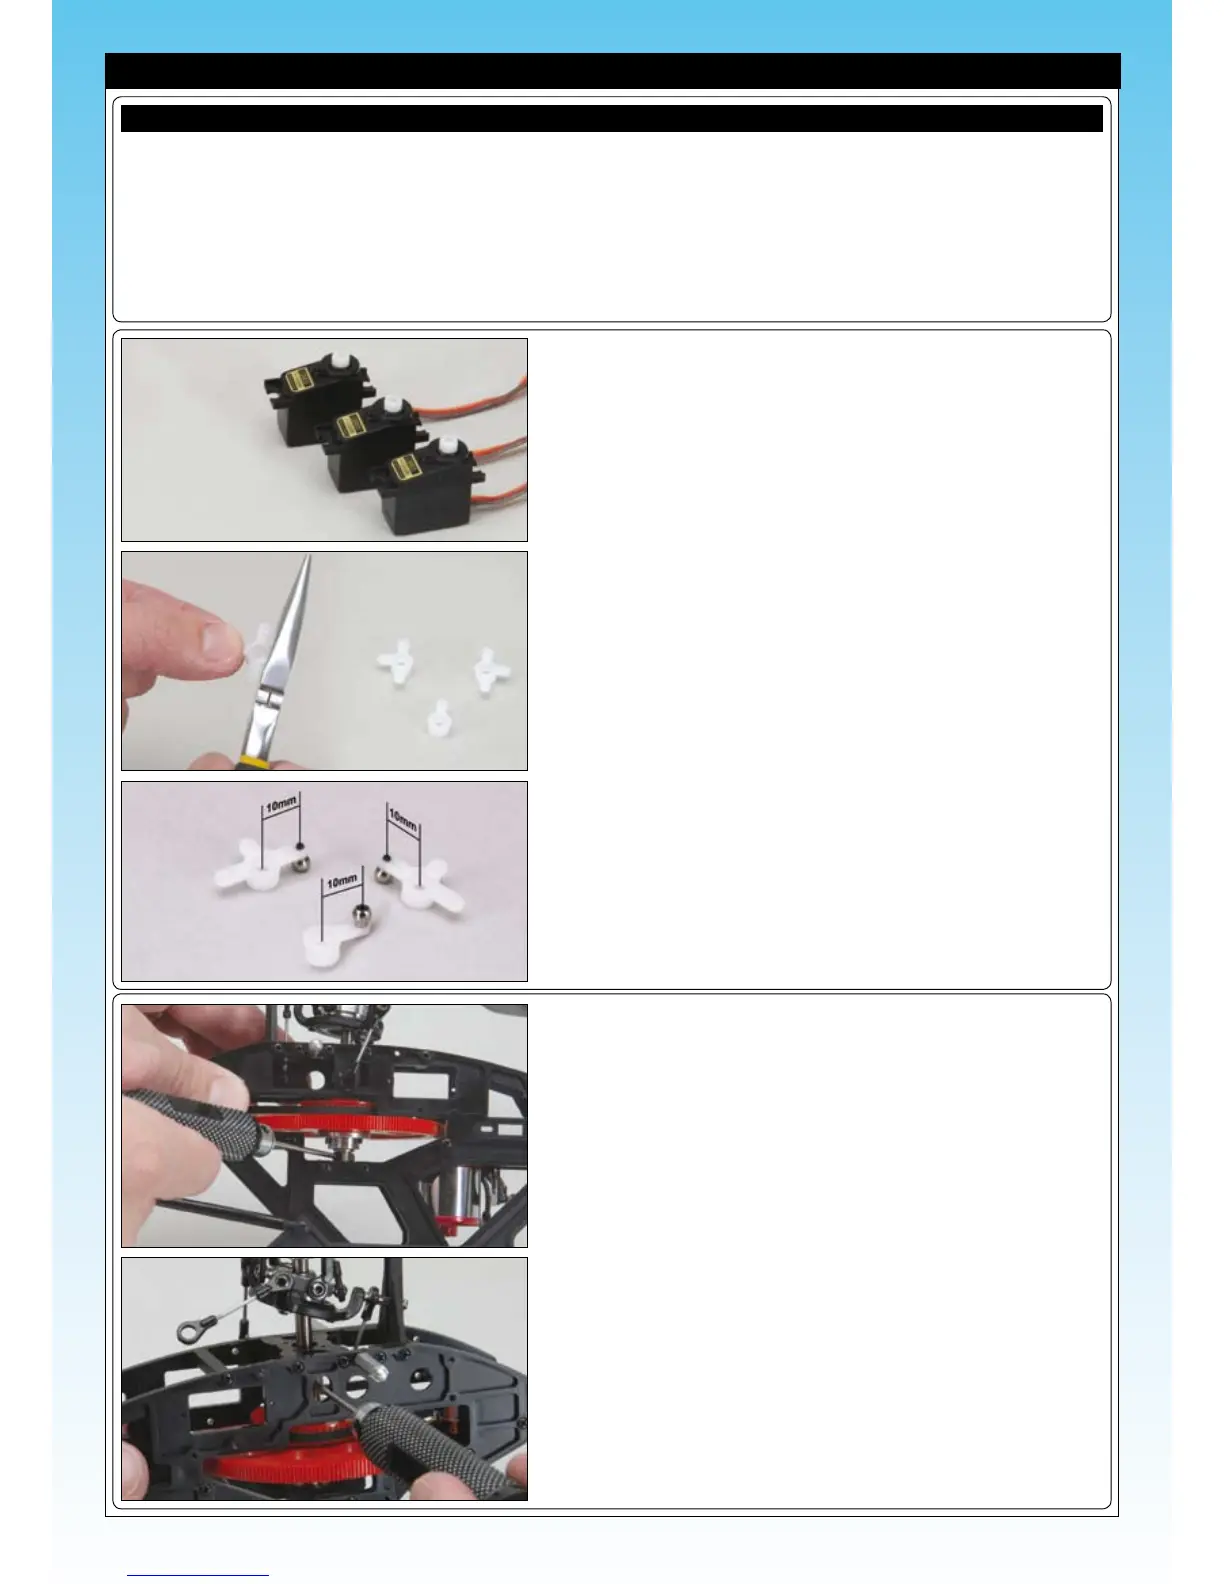
❑ The swashplate is controlled by a 120° CCPM system. Choose three
identical servos - we are using ballraced Cirrus 302BBs.
❑ Remove the servo horns
❑ Trim the servo horns as shown using a pair of pliers or sidecutters. You
need to trim one arm off each of the left/right servo horns and three arms
off the fore/aft servo horn as shown.
INSTALLING THE CYCLIC SERVOS
SERVO INSTALLATION TIPS
●
After installing the balls onto the servo horns, apply a drop of thin C/A to the ends of the threads to lock the screws into place
●
Make sure that you install the servo horn retaining screws to secure the servo horns to the servos
●
Make sure that the servos are centred and that you centre the servo horns and ensure that they're pointing in the correct direction
●
Make sure that you install the balls the correct distances out from the centre of the servo horns
●
Make sure that you install the servos with the servo output shafts pointing the correct direction
●
Tighten the servo mounting screws gently, yet tight enough to hold the servos rmly in place
❑ Locate three mounted balls and install them on the underside of the left/
right servo horns and on top of the the fore/aft servo horn as shown.
❑ Note that all three balls are mounted exactly the same distance out from
the centre on each horn.
❑ Beginners may need to reduce the measurement to 8mm (one hole further
in on the arm) to reduce the control throw.
❑ To give sufcient access to install the fore/aft servo, the main shaft needs
to be temporarily removed.
❑ Using an Allen key, remove the lower shaft retaining bolt. Grip the nut on
the other side with a pair of pliers or adjustable wrench.
❑ Loosen the grub screw in the upper retaining collar using the access point
in the main frames as shown. Do not remove the grub screw, just loosen
it.