EasyManua.ls Logo

EGO HT2400E - User Manual

EGO HT2400E
32 pages
Print Icon
To Next Page IconTo Next Page
Loading...
WARNING: To reduce the risk of injury, the user must read and understand the
Operator’s Manual before using this product. Save these instructions for future reference.
OPERATING MANUAL
56-VOLT
LITHIUM-ION
CORDLESS
HEDGE TRIMMER
MODEL NUMBER HT2400E

Other manuals for EGO HT2400E

Questions and Answers

  • L
    Laura JohnsonAug 4, 2025
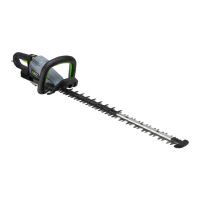
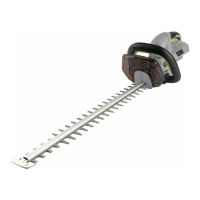
    What to do if my EGO HT2400E Trimmer doesn't work?
    • K
      Kyle ClarkAug 4, 2025
      If your EGO Trimmer isn't working, several factors could be the cause. First, ensure the battery pack is correctly attached. If it is, remove the battery and check for any issues with the contacts, then re-install it. The battery might be depleted, so try charging it. Also, the battery pack or the trimmer itself could be too hot; remove the battery and let them cool down below 67°C and 77°C respectively. Make sure you're depressing both switch levers simultaneously. Finally, check for a jammed blade; if present, remove the battery, carefully clear the obstruction, and restart the tool.
  • T
    tinasmithAug 9, 2025
    What to do if my EGO HT2400E fails to start?
    • C
      Christian NashAug 9, 2025
      If your EGO Trimmer fails to start, it could be due to several reasons. The Main PCB or its wires might be broken, requiring a replacement of the PCB Assembly. Alternatively, the blade could be jammed by an obstruction, causing it to curve or deform; in this case, clear the obstruction or replace the Blade Set. Another possibility is that the motor is jammed because of foreign objects stuck inside, necessitating replacement of the Motor And Gear Assembly. Also, gears may be jammed due to broken teeth, requiring you to replace the faulty gears. Finally, the switch levers could be malfunctioning, which means you'll need to replace the Switch Lever.
  • C
    Christopher GarciaAug 14, 2025
    What to do if my EGO Trimmer doesn’t work?
    • J
      Jeffrey WilsonAug 14, 2025
      If your EGO Trimmer isn’t working, several factors could be the cause. First, ensure the battery pack is properly attached. If it is, remove the battery, check the contacts, and reinstall it to ensure good electrical contact. The battery pack might be depleted, so charge it fully. Also, the battery pack or the trimmer itself could be too hot; remove the battery pack and allow them to cool down below 67°C and 77°C, respectively. Make sure you're depressing both switch levers simultaneously. Finally, the blade might be jammed; remove the battery, carefully remove any obstruction, and then reinsert the battery.
  • B
    Bonnie YangAug 19, 2025
    Why is my EGO HT2400E vibrating excessively?
    • J
      Jason LewisAug 19, 2025
      Excessive vibration or noise in your EGO Trimmer can stem from a few issues. The blades might be dry or corroded, requiring lubrication. Loose blade bolts can also cause this, so tighten them using a wrench, turning clockwise. Bent or damaged teeth can also cause vibration and noise.
  • F
    fwestAug 25, 2025
    Why is my EGO HT2400E vibrating excessively and failing to soft start?
    • C
      crystal07Aug 25, 2025
      Excessive vibration and soft start failure in your EGO Trimmer can stem from a few issues. The Main PCB might be broken, in which case you should replace the PCB Assembly. Another cause could be an unbalance or breakage of the motor, which would require replacing the Motor And Gear Assembly. It's also possible that the Eccentric Block is over-worn, necessitating its replacement. Finally, dust adhered to the switch can cause this problem, so clearing the dust might resolve the issue.
  • H
    hbrownAug 28, 2025
    Why is my EGO Trimmer making excessive vibration or noise?
    • D
      Deborah TaylorAug 29, 2025
      Excessive vibration or noise in your EGO Trimmer can be due to several reasons. The blades may be dry or corroded, so lubricating them could help. Loose blade bolts can also cause this issue; tighten them using a wrench, turning clockwise. Bent or damaged teeth or blades can also be the reason. In this case you should replace them.

Summary

READ ALL INSTRUCTIONS!

Understand Manual

Emphasizes the importance of reading and understanding the manual before use.

Pacemaker Safety

Warns individuals with pacemakers about potential interference from electrical equipment.

Qualified Repair Service

Advises that all repairs should be performed by qualified service technicians.

SAFETY SYMBOLS

Safety Alert Explanation

Urges users to read and understand all safety instructions, including symbols, to prevent hazards.

Symbol Meaning

Explains the meaning of the SAFETY ALERT SYMBOL.

Eye Protection

Warns about eye damage from flying objects and recommends eye protection.

SAFETY INSTRUCTIONS

Hazard Indicators

Indicates a potential personal injury hazard.

Manual Reference

Advises reading the manual to reduce the risk of injury.

Weather Precautions

Warns against using the tool in rain or leaving it outdoors during rain.

GENERAL POWER TOOL SAFETY WARNINGS

Work Area Safety

Advises keeping the work area clean, lit, and free from distractions and hazards.

Electrical Safety

Provides guidelines on electrical safety, including plug matching and avoiding wet conditions.

PERSONAL SAFETY

Use Personal Protective Equipment (PPE)

Recommends wearing appropriate PPE such as eye protection, masks, and shoes.

Prevent Accidental Start

Instructs to ensure the switch is off before connecting power or battery.

Maintain Balance and Footing

Advises maintaining proper footing and balance for better control.

Proper Attire

Warns against loose clothing and jewelry that can get caught in moving parts.

POWER TOOL USE AND CARE

Correct Tool Application

Advises using the correct tool for the application to ensure safety and efficiency.

Safe Storage Practices

Instructs to store tools out of reach of children and untrained users.

Tool Maintenance

Emphasizes regular maintenance checks for parts and conditions affecting operation.

Cutting Tool Sharpness

Recommends keeping cutting tools sharp for better control and less binding.

BATTERY TOOL USE AND CARE

Charger;Battery Compatibility

Warns against using incorrect chargers for battery packs due to fire risk.

Battery Pack Handling

Instructs to keep battery packs away from metal objects to prevent shorting.

SERVICE

Qualified Service Personnel

Advises having service performed by qualified personnel using identical parts.

HEDGE TRIMMER SAFETY WARNINGS

Blade Hazard Awareness

Warns to keep body parts away from moving blades and to switch off before clearing jams.

Safe Carrying Practices

Advises carrying the trimmer by the handle with the blade stopped and using the cover.

Electrical Hazard Warning

Warns that blades may contact hidden wiring, making the tool live.

IMPORTANT SAFETY INSTRUCTIONS

Avoid Wet Conditions

Prohibits using the hedge trimmer in rain or charging batteries in wet conditions.

Compatible Battery;Charger Use

Lists compatible battery packs and chargers for the hedge trimmer.

Handle Blades Safely

Warns against touching exposed blades when handling the trimmer.

Stable Operating Surface

Advises against using the trimmer on unstable surfaces for better control.

Keep Children Away

Prohibits children from operating the hedge trimmer.

Do Not Tamper with Safety Devices

Stresses the importance of not tampering with safety devices.

Use All Safety Guards

Mandates the use of all safety guards and protective devices.

Inspect Damaged Parts

Instructs to inspect and ensure damaged parts are properly repaired or replaced.

INTRODUCTION

SPECIFICATIONS

ASSEMBLY

Damaged;Missing Parts Warning

Warns against operating the product with damaged or missing parts.

Modification;Accessory Warning

Advises against modifying the product or using unrecommended accessories.

Assembly Battery Removal

Instructs to remove the battery pack during assembly to prevent accidental starting.

UNPACKING

Check Package Contents

Provides instructions for unpacking the product and checking contents.

PACKING LIST

DESCRIPTION

Component Identification

Identifies key components of the hedge trimmer with a diagram.

Hand Guard Function

Explains the function of the hand guard for protection.

OPERATION

Avoid Operational Carelessness

Warns against becoming careless due to familiarity with the product.

Safety Gear Requirements

Recommends wearing eye and hearing protection during operation.

Approved Accessories Only

Warns against using unapproved attachments or accessories.

Pre-Operation Inspection

Advises pre-operation checks for damaged or loose parts.

APPLICATION

Hedge and Shrub Trimming

Specifies the primary application for trimming hedges and bushes.

BATTERY PACK INSTALL;REMOVE

Battery Removal Safety

Warns to remove the battery pack during assembly or maintenance to prevent accidental starts.

Initial Battery Charge

Advises fully charging the battery before its initial use.

TO INSTALL (Fig. 2)

TO REMOVE (Fig. 3)

Battery Release Surroundings Check

Warns to be aware of surroundings when releasing the battery pack.

HOLDING THE HEDGE TRIMMER

Two-Handed Grip Essential

Stresses the importance of using both hands for control and preventing injury.

STARTING;STOPPING THE HEDGE TRIMMER

Before starting the hedge trimmer:

Lists preparatory steps before starting the hedge trimmer.

Ensure Stable Footing

Advises ensuring stable footing before operating the trimmer.

Upright and Relaxed Stance

Recommends standing upright and holding the trimmer in a relaxed posture.

Blade Guard Removal

Instructs to remove the blade guard before operation.

Clear Blade Before Start

Advises checking that the blade is clear of objects before starting.

Correct Handle Grip

Details the correct grip using both hands on the handles.

TO START THE HEDGE TRIMMER

TO STOP THE HEDGE TRIMMER

Battery Removal During Breaks

Reminds users to remove the battery pack during breaks and after use.

USING THE HEDGE TRIMMER

Jammed Blade Electrical Hazard

Warns about the danger of electrically live blades when jammed.

Operate Only With Intact Parts

Prohibits operation with missing, damaged, or broken parts.

Reinforce Two-Handed Operation

Reaffirms the need to use both hands for safe operation.

Keep Hands Clear of Blades

Advises keeping hands away from blades, especially when clearing jams.

Clear Cutting Area

Emphasizes clearing the cutting area of obstacles before use.

TOP CUTTING

Sweeping Motion for Top Cutting

Details the sweeping motion technique for top cutting.

SIDE CUTTING

Upward Cutting Motion

Describes the upward cutting technique for side trimming.

SAWING FUNCTION

Cutting Capacity Details

Details the cutting capacity for wood thickness using the blade gap and tip.

TIP PROTECTOR

Cutting Near Surfaces

Describes how the tip protector aids cutting near surfaces.

MAINTENANCE

Use Only OEM Replacement Parts

Emphasizes using only OEM parts for servicing and repairs.

CLEANING

Battery Removal for Cleaning

Stresses removing the battery pack before cleaning or maintenance.

Soft Brush Cleaning

Advises using a soft brush for cleaning air intakes and blades.

Resin Solvent for Residue

Explains how to remove sticky residue from blades using solvent.

Dry Cloth Surface Wipe

Recommends wiping the trimmer's surface with a dry cloth.

Avoid Water Cleaning

Warns against using water for cleaning the trimmer.

Protecting the environment

SHARPENING THE CUTTING BLADE

Blade Sharpening Preparation

Initial step for blade sharpening to allow file access.

Sharpening Safety: Battery Removal

Safety step to remove the battery before sharpening.

Blade Tooth Filing

Describes filing the blade teeth while maintaining the original angle.

Do Not Use Dull Blades

Warns against using dull or damaged blades.

LUBRICATING THE BLADE (Fig. 11)

Lubrication Safety: Battery Off

Safety step to remove battery before lubricating.

Blade Lubrication Process

Instructions for applying lubricant to the blade.

TRANSPORTING AND STORING

Use Blade Guard for Transport;Storage

Advises using the blade guard during storage and transport.

Pre-Storage Cleaning

Recommends cleaning the trimmer before storing it.

Proper Storage Location

Specifies storage conditions: indoors, dry, and out of reach of children.

Storage Away From Chemicals

Advises storing the trimmer away from corrosive substances.

Sharp Blade Handling Warning

Warns about the sharpness of the blades when handling.

TROUBLESHOOTING

Hedge Trimmer Not Working

Addresses issues where the hedge trimmer fails to operate.

WARRANTY

EGO WARRANTY POLICY

Details the general warranty duration for EGO products.

LIMITED SERVICE WARRANTY

Warranty Non-Transferable

States that the warranty is non-transferable and applies to the original buyer.

Commercial Use Warranty

Defines the warranty period for commercial or professional use.

Rental Use Voids Warranty

States that using the product for rentals voids the warranty.

Exclusions: Modifications;Repairs

Excludes damages from unauthorized modifications or repairs.

Exclusions: Misuse and Abuse

Lists exclusions from warranty coverage, such as misuse and abuse.

Exclusions: Wear and Tear

Excludes normal wear and tear, cosmetic damage, and deterioration from external factors.

HOW TO OBTAIN SERVICE

Contact EGO Customer Service

Gives the contact number for EGO customer service for warranty claims.

ADDITIONAL LIMITATIONS

Chervon Australia Warranty Details

Details warranty coverage from Chervon Australia for product and battery/charger.

PARTS LIST

Exploded View of Components

Shows an exploded view of the hedge trimmer for part identification.

Parts Identification Table

Tabulated list of parts with index number, part number, description, and quantity.

EGO HT2400E Specifications

General IconGeneral
BrandEGO
ModelHT2400E
CategoryTrimmer
LanguageEnglish

Related product manuals