GB
- 11 -
Approved materials
•
Indoor wall paint (emulsions etc.)
•
Solvent-based and water-soluble lacquers
•
Glazes and primers
•
2-component lacquers and clear lacquers
•
Vehicle topcoats
•
Stains and wood preservatives
Non-approved materials
•
Alkaline solutions, acidic coating materials
•
Combustible coating materials
1. Use the container (15) for the viscosity test in
order to check whether your paint has the re-
quired viscosity (see Fig. C). Fill the viscosity
test container with the required spray material
until completely full.
2. Let the spray material in the container run out
through the opening in the bottom and note
the time it takes for all the spray material to
emerge. The time recorded is the basis for
calculating the viscosity of the spray material
in the unit DIN-sec.
3. If you are unsure about which material to use
for your project, ask your paint dealer or a
similar specialist.
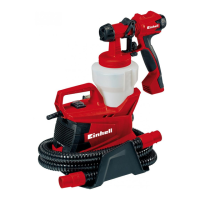
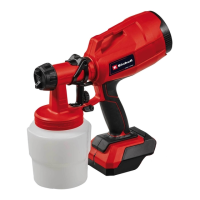
Filling in the material
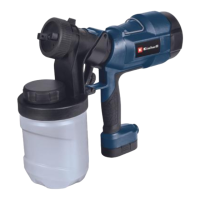
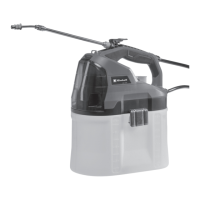
1. If applicable, remove the spraying unit (9/11)
from the motor unit (2) as described in the
section “Attaching/replacing the spraying
unit”.
2. Open the paint tub (8) by unscrewing the lid
(10) counter-clockwise (see Fig. A).
3. Fill the prepared material into the paint tub. If
necessary, use a suitable funnel in order not
to spill any material.
4. Screw the lid clockwise onto the paint tub in
order to close the paint tub. Take care not to
tilt the lid while screwing it on and make sure
that the paint tub is fully closed.
Attaching/replacing the spraying unit
Caution!
Risk of injury!
Improper handling of the fi ne paint sprayer could
result in injuries.
•
Do not connect the fine paint sprayer to a po-
wer socket until the required spraying unit has
been fitted to the motor unit and the paint has
been filled in.
Fitting the spraying unit to the motor unit
1. Swing the safety catch (18) on the motor unit
(2) down as far as possible (see Fig. A).
2. Insert the required spraying unit (9 or 11) into
the motor unit mount such that the line mark
on the spraying unit points to the line mark
alongside the symbol on the motor unit (see
Fig. B).
3. Turn the motor unit clockwise through 90° as
far as it will go. The line mark on the spraying
unit must point to the line mark alongside the
symbol on the motor unit.
4. Swing up the safety catch so that you hear it
latch in the hook on the spraying unit.
Removing the spraying unit from the motor
unit
1. Swing the safety catch (18) on the motor unit
(2) down as far as possible (see Fig. A).
2. Turn the motor unit counter-clockwise through
90° such that the line mark on the spraying
unit points to the line mark alongside the sym-
bol on the motor unit (see Fig. B).
3. Remove the spraying unit from the motor unit
in forward direction.
6. Operation
6.1 Material preparation
Usually the paint needs to be thinned before it
can be used in the fi ne paint sprayer. Instructions
on how to thin the paint for spraying are rarely
printed on the paint tin. You should therefore use
the viscosity table as a guide. (viscosity = consis-
tency of the paint)
Caution! Risk of injury!
Improper handling of the fi ne paint sprayer could
result in injuries.
•
Before you begin your work, make sure that
the power cable does not become a tripping
hazard.
•
Always wear the necessary protective equip-
ment such as a breathing mask and make
sure there is enough ventilation.
Important! Risk of damage!
Improper handling of the fi ne paint sprayer could
result in damage.
•
Test the settings and the spray material’s be-
havior on a sample piece.
•
Adapt the settings as described below before
you begin with the actual work.
Anl_BT_FSS_500_EX_UK.indb 11Anl_BT_FSS_500_EX_UK.indb 11 05.10.2021 12:45:3305.10.2021 12:45:33