GB
- 23 -
Handle
Vibration emission value a
h
= 1.57 m/s
2
K uncertainty = 1.5 m/s
2
The stated vibration emission levels and stated
noise emission values were measured in ac-
cordance with a set of standardized criteria and
can be used to compare one power tool with
another.
The stated vibration emission levels and stated
noise emission values can also be used to make
an initial assessment of exposure.
Warning:
The vibration and noise emission levels may vary
from the level specifi ed during actual use, depen-
ding on the way in which the power tool is used,
especially the type of workpiece it is used for.
Keep the noise emissions and vibrations to a
minimum.
•
Only use appliances which are in perfect wor-
king order.
•
Service and clean the appliance regularly.
•
Adapt your working style to suit the appliance.
•
Do not overload the appliance.
•
Have the appliance serviced whenever ne-
cessary.
•
Switch the appliance off when it is not in use.
•
Wear protective gloves.
Caution!
Residual risks
Even if you use this electric power tool in
accordance with instructions, certain resi-
dual risks cannot be rules out. The following
hazards may arise in connection with the
equipment’s construction and layout:
1. Lung damage if no suitable protective mask is
used.
2. Contact with hazardous substances. Spray
materials can be harmful if inhaled or swal-
lowed or if allowed to come into contact with
the skin or eyes. Follow the instructions and
wear suitable protective equipment.
5. Before starting the equipment
Warning!
Switch the equipment off and remove the battery
before carrying out any assembly work.
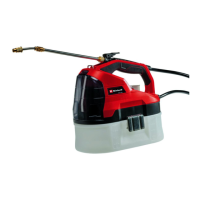
5.1 Assembling the spray tube and hose
1. Screw the spray tube onto the spray gun
handle (Fig. 3).
2. Attach the hose to the spray gun handle (Fig.
4a) and screw it on tightly using the fastening
nut (Fig. 4b).
3. Connect the other end of the hose to the
housing and screw it on tightly using the fas-
tening nut (Fig. 4c).
Important! Always check the hose connections.
Any leaks must be remedied immediately and the
equipment must not be used until this has been
done.
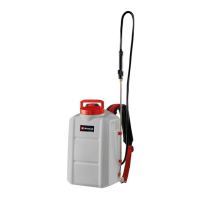
5.2 Assembling and fi tting the shoulder strap
1. Hook the ends of the shoulder strap into the
strap fi xture (Fig. 1/Item 9).
2. Slip the shoulder strap over your shoulder.
3. Adjust the length of the shoulder strap so that
the strap attachment is at waist level and you
can work without fatigue.
5.3 Installing the battery
Note:
•
The equipment is supplied without batteries
and without a charger.
•
The cover flap closes by itself and is held in
position by magnets.
Open and hold the cover fl ap (Fig. 5/Item 5). Push
the battery into the battery mount provided. Make
sure that the pushlock button (Fig. 5/Item C) en-
gages as soon as the battery has been pushed in
all the way. To remove the battery, proceed in the
reverse order.
5.4 Charging the battery
1. Take the battery pack out of the equipment.
To do so, press the pushlock button. (Fig. 5/
Item C).
2. Check that your mains voltage is the same as
that marked on the rating plate of the battery
charger. Insert the power plug of the charger
into the socket outlet. The green LED will then
begin to fl ash.
3. Insert the battery pack into the charger.
4. In the section entitled „Charger indicator“ you
will fi nd a table with an explanation of the LED
Anl_GE_WS_18-35_Li_SPK9-1.indb 23Anl_GE_WS_18-35_Li_SPK9-1.indb 23 17.09.2019 14:08:4717.09.2019 14:08:47