Measure the connection pressure: if this value is
not in the range shown in table 2 and it cannot be
brought within these values by adjusting the
pressure reducers of the gas supply system,
definitive start-up of the appliance is quite
impossible.
The gas supply Body must be informed about this.
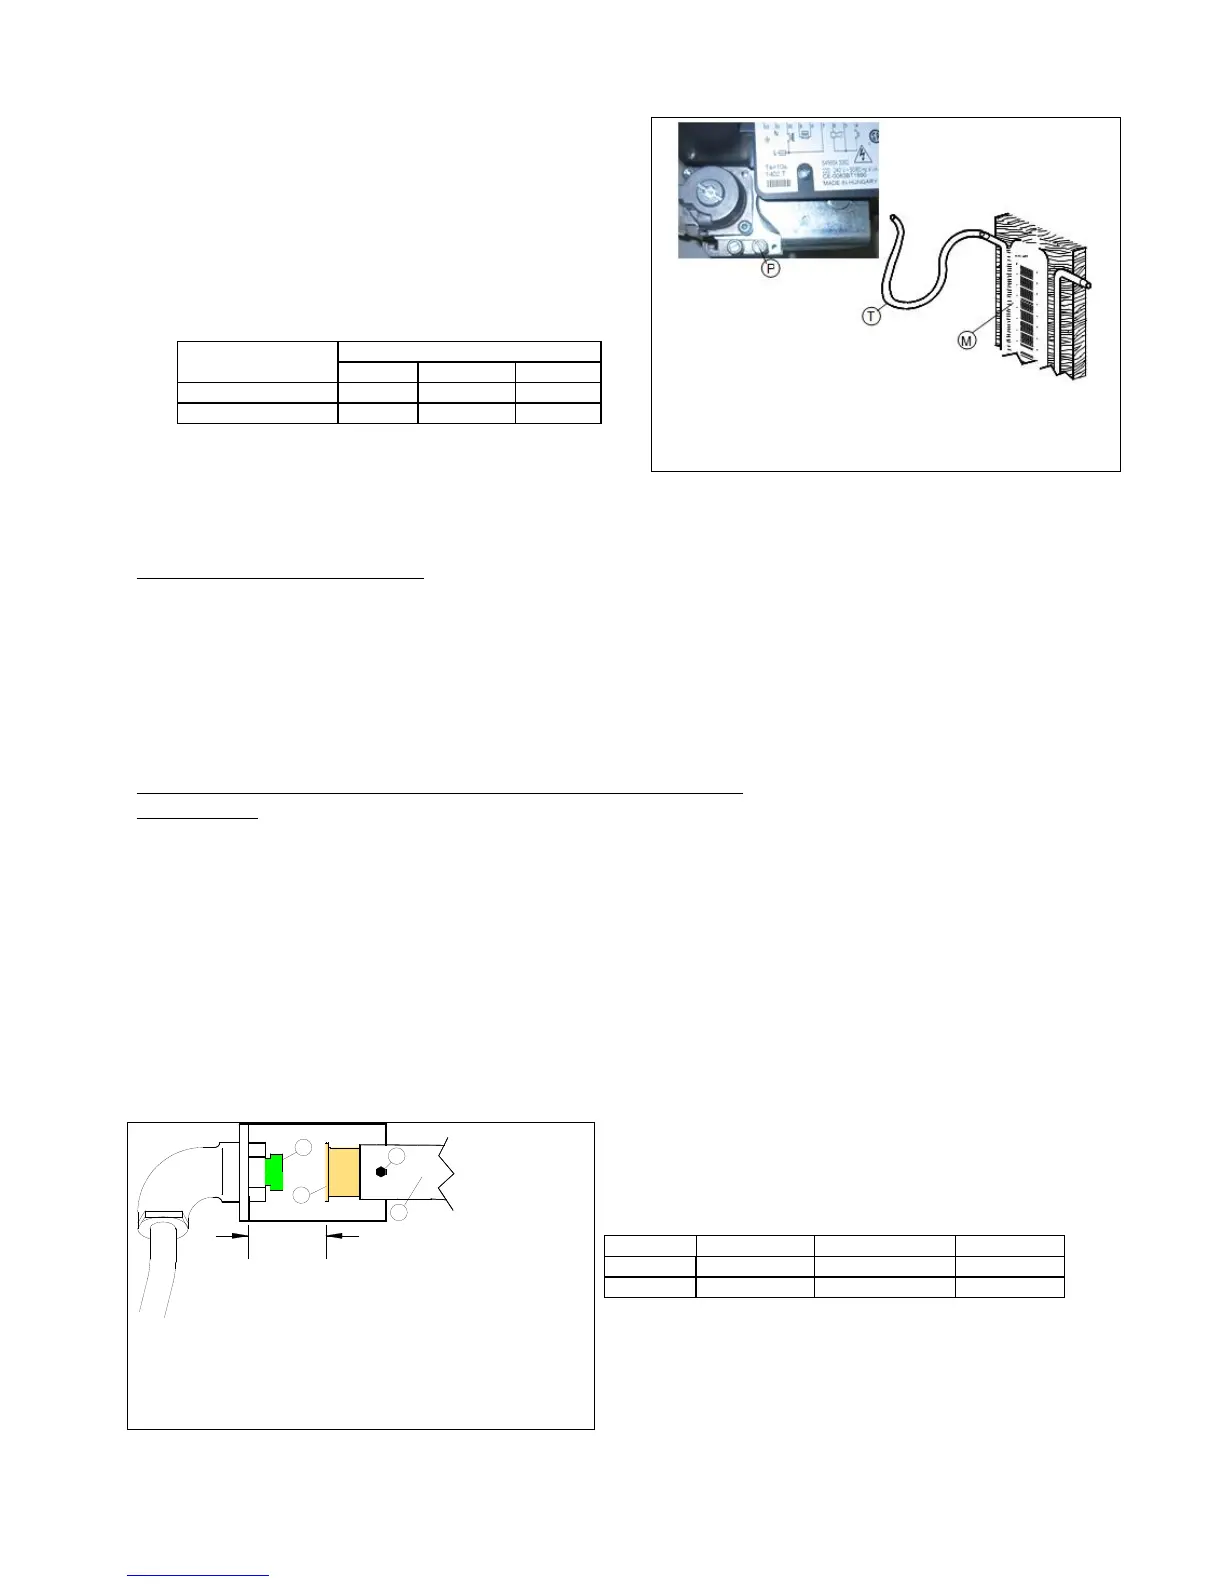
After you have measured the connection pressure, disconnect the hose “T” and screw the
tightness screw of the pressure take-off “P”.
3.3 Adjustment to Other Gas
To adapt the oven to a type of gas that differs from the one tested in the factory (see technical
data plate), replace the injector of the main burner and adjust primary air inflow with the
adjustment bush. For this, disconnect the power and, after removing the lateral left panel,
access the burner and the primary air adjuster. If you do not have the necessary spare parts,
contact the manufacturer’s technical assistance service. Adaptation must be effected by
qualified personnel. Consult the technical specifications in table 1 and 3, and then replace the
main injector and adjust primary air.
3.4 Injector replacement and adjustment of primary air (Fig. 7)
WARNINGS! Before you attempt this operation, make sure you shut off the gas ON/OFF tap
located upstream of the appliance and disconnect electrical power to the appliance.
After removing the lateral left panel of the unit, carry out the following operations in series:
- Loosen the “V” locking screw with a spanner or a screwdriver and pull out bush “B“
towards the burner Venturi pipe.
- Using a 13 mm wrench, unscrew and replace injector “U” with the appropriate injector
for the new type of gas installed, referring to table 3 and checking if the diameter is
stamped on it.
- Adjust air bush “B” to the correct distance H, which is the distance in millimetres
between the flat seat of the injector-holder and the adjustment bush.
- Seal the screw and bush with paint.
- Refit the back of the unit.