54
Commissioning
Combustion analysis
Low load (Step 2/3)
Step 2: O
2
/ CO
2
check on low load
Setting the low load
The low load of the boiler can be set by
you as follows:
- Push the button “D” once (OK
buttonforconrmation)untilthe
number “100%” blinks.
- Turn the rotating button
“C” (temperature control /
menu selection button) in a
counterclockwise direction, until the
number “0%” is displayed.
- Push the button “D” once (OK) until
the number “0” no longer blinks.
Now the equipment unit will operate
at low load (0%).
- Use the measuring tool to carry out
a O
2
/CO
2
control measurement.
The detected values must lie in the
measuring range shown below.
The O
2
value at low load must lie
higher than the CO
2
value at full load.
The measuring procedure must be
carried out, until a constant measuring
result is achieved. Please take up
contact with ELCO, if the values should
lie outside of the applicable tolerances.
Switching o
- Push the button “I” and keep
the button pressed until the stop
functionswitcheso.Thestandard
display appears.
The maximum operating time of
the stop function is 4 hours without
interruption.
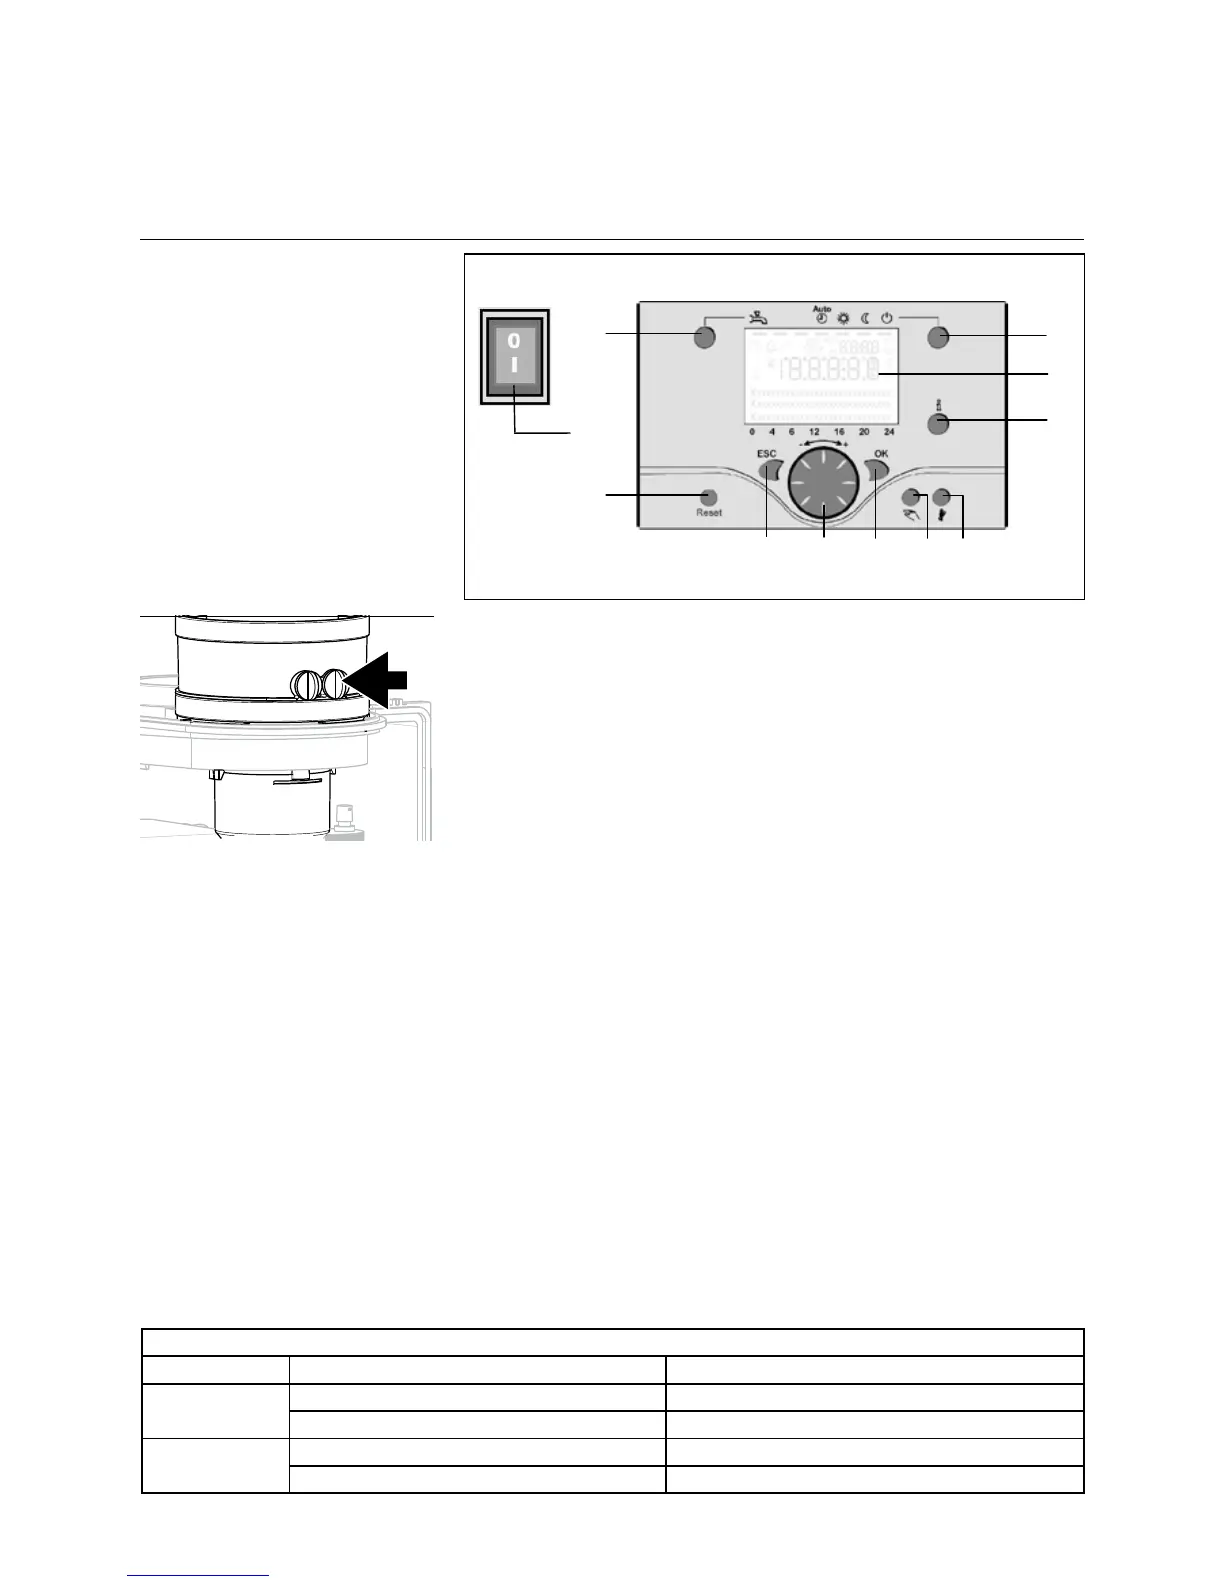
a
B C D E F
I
L
G
Legend:
A On/Oswitch
B Back button (ESC)
C Room temperature control button
D Conrmationbutton(OK)
E Function button for manual
operation
F Chimney sweep function button
G Info button
H Reset button
I Operation mode button for heating
circuit(s)
L Display
M Operating mode button for DHW
Legend
a Measuring point of the waste
gas probe
O
2
/ CO
2
check on low load (Step 2)
Low load Natural gas E (G20), LL (G25) Propane (G31)
O
2
Minimal 0,5% higher than measured on full load Minimal 0,2% higher than measured on full load
Maximum 7,5% Maximum 7,3%
CO
2
Minimal 0,3% lower than measured on full load Minimal 0,1% lower than measured on full load
Minimum 7,5% Minimum 8,9%
Values are valid with closed cover/air box.
 Loading...