36 / EN
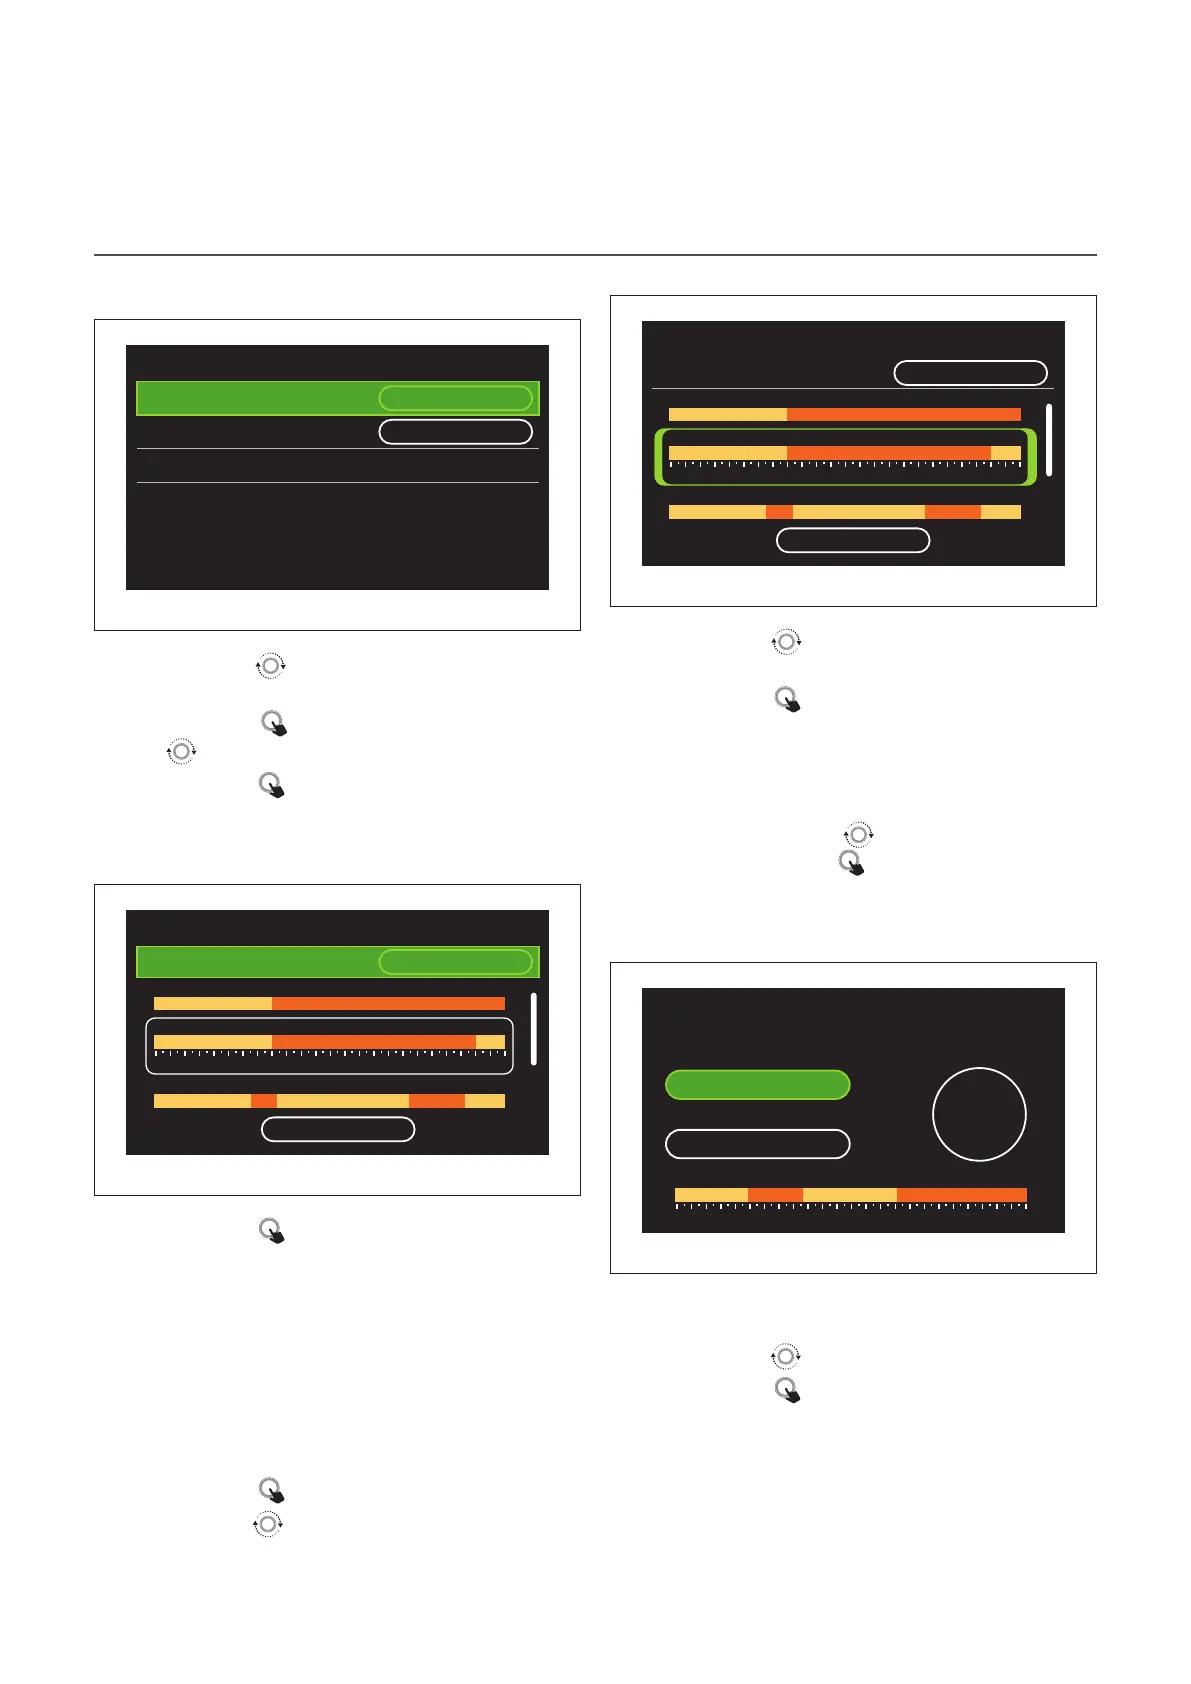
User Menu
Defining the comfort and reduced set-point tempera-
tures
Zone 1
Set comfort temperature
20,0°C
Set reduced temperature 16,0°C
Set time program
>
Fig. 24
– Turn the selector
to highlight either “Set comfort tem-
perature” or “Set reduced temperature”.
– Press the selector
to enter the edit mode. Turn the se-
lector to define the temperature set-point.
– Press the selector
to confirm the value.
– The “Set time program” allows the user to define the day of
the week to be scheduled.
Selecting the type of time schedule: free or pre-set
Zone 1
Scenario
Free
16°
16°
16°
16° 16°
16°
20° 20°
20°
20°
0 2 4 6 8 10 12 16 20 14 18 22 24
Sunday
Monday
Tuesday
Save
Fig. 25
– Press the selector
to enter the edit mode.
– Select “Free” to proceed with the creation of a customised
weekly schedule, otherwise select one of the pre-set pro-
files:
– "Family"
– "No lunch"
– "Midday"
– "Always active"
– "GREEN"
– Press the selector
to confirm “Scenario”.
– Turn the selector
to move to the selection of the day of
the week to be scheduled.
Selecting the day of the week
Zone 1
Scenario
Free
16°
16°
16°
16° 16°
16°
20° 20°
20°
20°
0 2 4 6 8 10 12 16 20 14 18 22 24
Sunday
Monday
Tuesday
Save
Fig. 26
– Turn the selector
to scroll the days of the week. A pre-
view of the current time schedule will be displayed.
– Press the selector
to select the day.
– In this way you can define the time slot for the selected
day.
NOTE: To maintain the weekly time schedule currently
shown:
– Turn the selector
to navigate to “Save” then
press the selector to confirm.
– The user will be taken directly to the “Copying
zones” page.
Defining the time slot
Zone 1
Scenario Free Sunday
Start 00:00
20°
,0
End 04:30
20,0° 22,0° 21,0° 23,0°
0 2 4 6 8 10 12 16 20 14 18 22 24
Fig. 27
Once the day of the week has been selected, the time slot
scheduling page opens up.
– Turn the selector
to change the “Start” time.
– Press the selector
to confirm.
 Loading...