14-8
SERVICING
SM OU12HP 2-E.2 GB
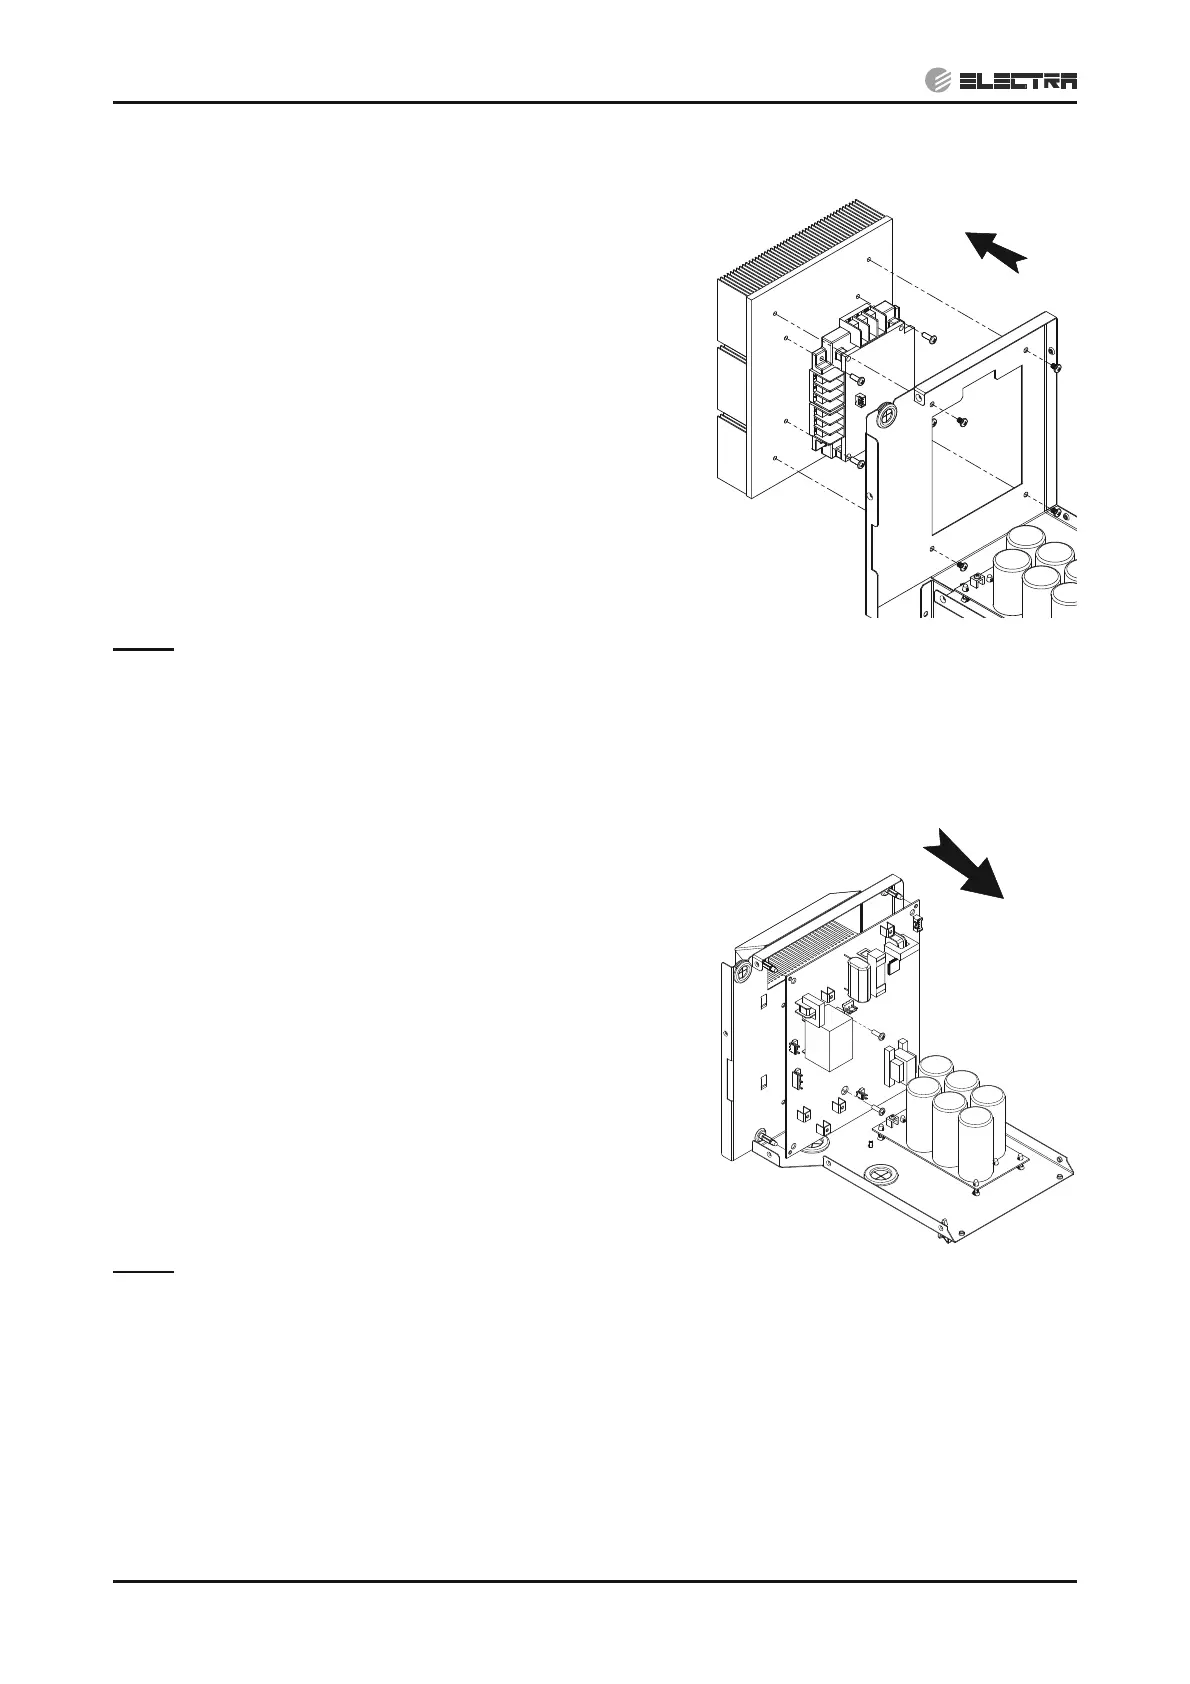
14.1.15 Removing driver module
14.1.15.1 4-5HP
1. Remove the electrical assembly according to 4.1.14.
2. Remove the three (3) screws fixing the main board panel
to the assembly and take the panel out.
3. Remove the earth tab connection from the line filter.
4. Remove the five (5) screws fixing the terminal panel to
the assembly and take the panel out.
5. Disconnect all the wires from the driver terminals and the
communication connector.
6. Remove the five (5) screws fixing the line filter panel to
the driver panel and take the panel out.
7. Remove the four (4) screws fixing the driver module to
the heatsink.
8. Wipe out the grease paste with cloth soaked with
alcohol.
Notes:
Do not hold the PCB part of the driver module when
removing the driver module.
When handling the module, take care of not to use
excessive force as this may cause damage.
Removing driver module
14.1.15.2 6HP
Remove the electrical assembly according to 1. 14.1.14.
Remove the three (4) screws fixing the main board panel 2.
to the assembly and take the panel out.
Remove the earth tab connection from the line filter.3.
Remove the five (5) screws fixing the terminal panel to 4.
the assembly and take the panel out.
Disconnect all the wires from the driver terminals and the 5.
communication connector.
Remove the five (5) screws fixing the back panel to the 6.
driver panel and take the panel out.
Remove the four (2) screws fixing the driver module to 7.
the heatsink.
Squeeze the 4 spacers head with Long-Nose Pliers and 8.
pull out the board.
Wipe out the grease paste with cloth soaked with 9.
alcohol.
Notes:
Do not hold the PCB part of the driver module when
removing the driver module.
When handling the module, take care of not to use
excessive force as this may cause damage.
Removing driver module
 Loading...