EVID
EVID
TMTM
Owner’s ManualOwner’s Manual
1313
Appendix B: Painting the EVIDAppendix B: Painting the EVID
TMTM
SpeakersSpeakers
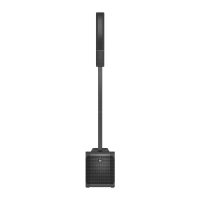
The 12.1 subwoofer is a painted woodThe 12.1 subwoofer is a painted wood
enclosure which can easily be repainted.enclosure which can easily be repainted.
Painting ProcessPainting Process
(3.2, 4.2, 6.2)(3.2, 4.2, 6.2)
The EVID™ 3.2, 4.2 and 6.2 are made ofThe EVID™ 3.2, 4.2 and 6.2 are made of
high-impact ABS, which accepts a widehigh-impact ABS, which accepts a wide
variety of paints.variety of paints.
•• RemovRemove the e the grille grille and mand mask task the bahe baffle.ffle.
•• Clean Clean the cathe cabinet abinet and grilnd grille by rle by rubbinubbingg
the speaker with a lightly dampenedthe speaker with a lightly dampened
cloth. Do not, however, use abrasivescloth. Do not, however, use abrasives
such as sandpaper or steel wool. Neversuch as sandpaper or steel wool. Never
use gasoline, kerosene, acetone, MEK,use gasoline, kerosene, acetone, MEK,
paint thinner, harsh detergents, or otherpaint thinner, harsh detergents, or other
chemicals, as these agents may causechemicals, as these agents may cause
permanent damage to the enclosure.permanent damage to the enclosure.
•• After After cleancleaning, aing, apply lpply latex oatex or enamr enamelel
paint. Spraying is recommendedpaint. Spraying is recommended
Painting the GrillePainting the Grille
•• PaintiPainting tng the ghe grille rille requirrequires ses spraypray
painting. If the grille is rolled or brushpainting. If the grille is rolled or brush
painted, the mesh may become cloggedpainted, the mesh may become clogged
with paint and poor sound quality maywith paint and poor sound quality may
result.result.
Painting ProcessPainting Process
(12.1 Subwoofer)(12.1 Subwoofer)
•• RemovRemove the e the four sfour screws crews secursecuring thing thee
front hatch and lift off the hatch panel.front hatch and lift off the hatch panel.
Carefully twist and lift off the EV® logoCarefully twist and lift off the EV® logo
and set it aside.and set it aside.
•• The foThe foam griam grille blolle blocks acks are helre held in pd in placelace
by sharp pins protruding through theby sharp pins protruding through the
baffle board. Note the relative position ofbaffle board. Note the relative position of
the foam and carefully lift the blocks offthe foam and carefully lift the blocks off
the pins. Mask around the input panelthe pins. Mask around the input panel
with tape and tape a piece of heavywith tape and tape a piece of heavy
paper over the woofer. It is not neces-paper over the woofer. It is not neces-
sary to remove any components.sary to remove any components.
•• Clean Clean the cathe cabinetbinet, brack, bracket and et and clipclips bys by
rubbing with a lightly dampened cloth.rubbing with a lightly dampened cloth.
Do not use abrasives such as sandpaperDo not use abrasives such as sandpaper
or steel wool. Never use gasoline,or steel wool. Never use gasoline,
kerosene, acetone, MEK, paint thinner,kerosene, acetone, MEK, paint thinner,
harsh detergents, or other chemicals, asharsh detergents, or other chemicals, as
these agents may cause permanentthese agents may cause permanent
damage to the enclosure.damage to the enclosure.
•• AfteAfter clear cleaningning, appl, apply two y two or moror more twoe two
thin coats of either latex or oil-basedthin coats of either latex or oil-based
paint. Spraying is recommended, but apaint. Spraying is recommended, but a
brush and small roller work very well. Itbrush and small roller work very well. It
is not necessary to paint all the way upis not necessary to paint all the way up
to the woofer. Only the visible surfacesto the woofer. Only the visible surfaces
need to be painted: the hatch front andneed to be painted: the hatch front and
side edges, the exposed enclosureside edges, the exposed enclosure
surfaces down to the hatch gaskets andsurfaces down to the hatch gaskets and
about halfway under where the foamabout halfway under where the foam
blocks sit. Likewise, the back sides ofblocks sit. Likewise, the back sides of
the bracket and clips need not bethe bracket and clips need not be
painted. The hatch screw heads may bepainted. The hatch screw heads may be
painted, if desired.painted, if desired.
•• When When the pthe paint iaint is thos thoroughroughly dryly dry,,
carefully unmask everything. Replacecarefully unmask everything. Replace
the foam blocks, pressing them gentlythe foam blocks, pressing them gently
down onto the sharp pins. Replace thedown onto the sharp pins. Replace the
hatch cover and tighten the four screws.hatch cover and tighten the four screws.
Locate the small center hole, properlyLocate the small center hole, properly
orient the EV® logo, and press it firmlyorient the EV® logo, and press it firmly
into place at its center to reseat it in theinto place at its center to reseat it in the
mounting hole.mounting hole.
 Loading...