EasyManua.ls Logo

Electro-Voice EVID 6.2 User Manual

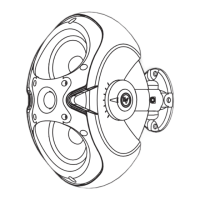
Electro-Voice EVID 6.2
20 pages
To Next Page IconTo Next Page
Page #1 background imageLoading...
Page #1 background image
Owner’s Manual
Owner’s Manual

Other manuals for Electro-Voice EVID 6.2

Questions and Answers:

Electro-Voice EVID 6.2 Specifications

General IconGeneral
Frequency Response (-10 dB)65 Hz - 20 kHz
Max. SPL/1m (calc)112 dB
Coverage (Nominal -6 dB) H90°
Coverage (Nominal -6 dB) V60°
Crossover Frequency2.5 kHz
Nominal Impedance8 Ω
Impedance8 Ohms
Enclosure MaterialABS
TypeFull-range
Frequency Response65 Hz - 20000 Hz
LF Transducer6.5 in
HF Transducer1 in
Tweeter1 in
Woofer6 in
Minimum Impedance6 Ω
Mounting OptionsWall

Summary

Step-by-Step Installation and Wiring (3.2, 4.2, 6.2)

Step 1: Mount the SAM™ Bracket to the Wall

Detailed instructions for securely mounting the SAM™ bracket to walls or ceilings for optimal speaker placement.

Step 2: Select Wattage Tap (Models 4.2t and 6.2t Only)

Guide on selecting the correct wattage tap for 4.2t and 6.2t models based on voltage and desired output.

Step 3: Mount the Speaker to the SAM™ Bracket

Instructions for attaching the EVID™™ speaker enclosure to the SAM™ bracket using provided bolts and ensuring proper angle.

Step 4: Attach the Wiring to the Terminal Connector and Wire the Speaker

Explains how to connect speaker wires using the 4-pin phoenix connector for parallel or daisy-chain wiring configurations.

Step 6: Test System Operation

Procedure for testing the complete speaker system after installation is complete to ensure proper functionality.

Step-by-Step Installation and Wiring (12.1 Subwoofer)

Step 1: Mount the Bracket

Instructions for mounting the 12.1 subwoofer bracket for corner or midwall installations, ensuring structural support.

Step 3: Wire the Speaker

Explains wiring connections for the 12.1 subwoofer, including direct and daisy-chain methods for multiple units.

Step 4: Mount the Speaker to the Bracket

Instructions for attaching the 12.1 subwoofer enclosure to the mounting bracket, ensuring it is securely seated.

System Operation, Safety, and Maintenance

Step 5: Test System Operation

Procedure for testing the complete 12.1 subwoofer system operation after installation is complete.

Uniform Limited Warranty

Appendix C: Troubleshooting Table

Appendix D: Technical Specifications (3.2/3.2t & 4.2/4.2t)

Appendix D: Technical Specifications (6.2/6.2t & 12.1)

Related product manuals