EVID
EVID
TMTM
Owner’s ManualOwner’s Manual
66
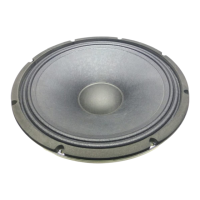
Product DescriptionProduct Description
Step 4: Attach the Wiring to theStep 4: Attach the Wiring to the
Terminal Connector and Wire theTerminal Connector and Wire the
SpeakerSpeaker
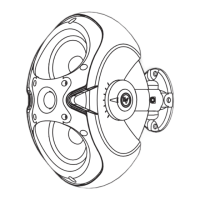
The 4-pin phoenix-style plug-in connectorThe 4-pin phoenix-style plug-in connector
provides for a pass-thru audio connectionprovides for a pass-thru audio connection
to daisy-cto daisy-chain a hain a line of line of speakers. speakers. InsertInsert
the bare end of wire into the appropriatethe bare end of wire into the appropriate
connector terminals as described below.connector terminals as described below.
For pFor parallel wiring, arallel wiring, see Figsee Figure 12. ure 12. WhenWhen
one input connector is removed, subse-one input connector is removed, subse-
quent speakers will remain connected.quent speakers will remain connected.
For daisFor daisy-chaining, sy-chaining, see Figure ee Figure 13. 13. WhenWhen
one input connector is removed, subse-one input connector is removed, subse-
quent speakers will be disconnected.quent speakers will be disconnected.
Screw down the hold-down screw untilScrew down the hold-down screw until
tight, using a small screwdriver. Seetight, using a small screwdriver. See
Figure 14. Figure 14. The conneThe connector accepts ctor accepts up toup to
12 gauge wire.12 gauge wire.
Step 5: Secure the Seismic TabStep 5: Secure the Seismic Tab
Connection PointConnection Point
The rear of the enclosure includes anThe rear of the enclosure includes an
eyebolt for connection to a seismiceyebolt for connection to a seismic
restraint. Connect it to a properly ratedrestraint. Connect it to a properly rated
hardware fitting that is securely installedhardware fitting that is securely installed
independently of the SAM™ bracket. Evenindependently of the SAM™ bracket. Even
if your local construction code does notif your local construction code does not
require the installation of secondaryrequire the installation of secondary
support, its use is highly recommended forsupport, its use is highly recommended for
further security.further security.
Step 6: TStep 6: Test Sysest System Opertem Operationation
After all connections are made, test theAfter all connections are made, test the
complete system operation. Appendix Ccomplete system operation. Appendix C
(page 14) contains a troubleshooting table(page 14) contains a troubleshooting table
to assist in locating many speaker-relatedto assist in locating many speaker-related
problems.problems.
Figure 14:Figure 14: TightTighten With en With ScrewdriverScrewdriver
Figure 12:Figure 12: Parallel WiringParallel Wiring
Figure 13:Figure 13: Daisy-Chain WiringDaisy-Chain Wiring
Figure 15:Figure 15: Secure Seismic SecuritySecure Seismic Security
CableCable
Figure 16:Figure 16: EVIDEVID
TMTM
SystemSystem
SS
cc
rr
ee
ww
dd
rr
ii
vv
ee
rr
From amplifier orFrom amplifier or
previous speakerprevious speaker
TTo next speao next speakerker
From amplifier orFrom amplifier or
previous speakerprevious speaker
TTo next speao next speakerker