Preparing your oven
1. Please remove all stickers, leaets and boxes from the
doors and the oor of the oven before operation.
2. Please wipe out the oven interior prior to operation with
warm soapy water and polish dry with a soft clean cloth.
Do not close the oven door until the oven is completely dry.
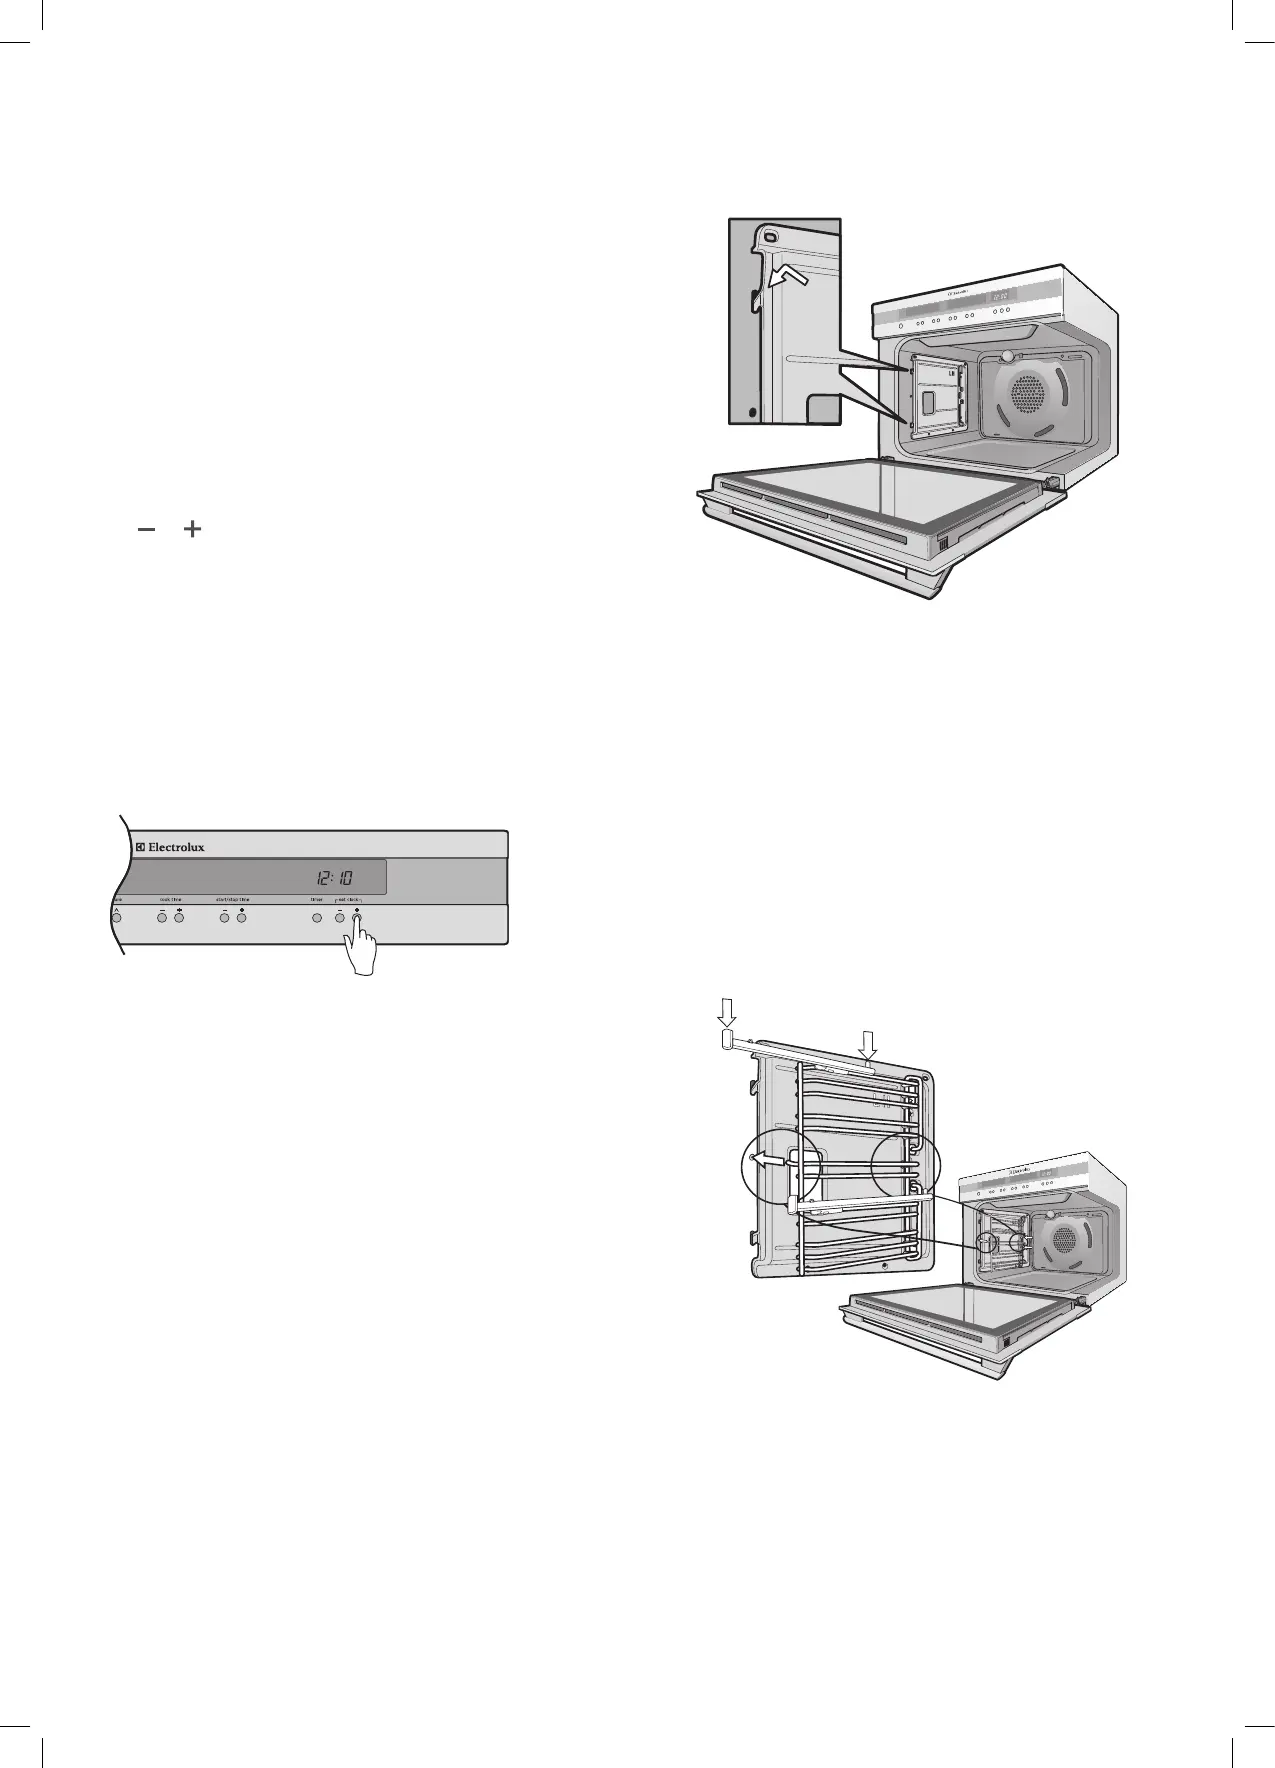
Setting the time
After electrically connecting the appliance, you must set the
time of day before you can operate your oven.
1. After the appliance has been electrically connected
“12:00” will ash on the clock display, along with the
scrolling message “Welcome to Electrolux”.
2. To set the time of day in hours and minutes, press the
or buttons underneath the “set clock” graphic.
3. 8 seconds after the last change the time will stop
ashing, conrming the time has been set. Once the
time has been entered, the clock advances minute
by minute.
Not e:
• Theclockhasa12hourdisplay
• Thedisplayhas3levelsofbrightness.
–Brightestillumination:whenevertheovenisinuse.
–Mediumillumination:theovenisnotinuse.
–Lowestillumination:theovenisnotinusebetween
thehoursof10pmand6am.
Installing your oven accessories
• Catalytic liners (if supplied)
The oven/s will already be fitted with a catalytic fan
bafe and top panel. We have supplied side panels
for you to fit. They can be fitted before you put the side
racks on but you can omit them, if you wish, with no
effect to cooking performance. Their sole purpose is
to make oven cleaning easier. Of course, you can
add them at any time by removing the side racks
(see page 22).
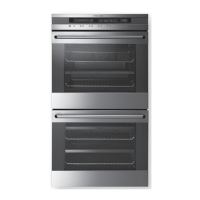
The catalytic liners will attach to each side of the oven.
There will be a left hand and a right hand version.
1. Position the first liner as per the diagram. The black,
shiny side of the liner should be facing the oven wall,
the hooks pointing down. Note that the diagram
shows the left hand liner. The right hand side will be
a mirror image of this.
2. Line the hooks up with the slots provided in the
oven wall, push them in and then allow the liner to
slide down to its final position. All 4 hooks MUST
be engaged in slots.
3. The access hole for the side racks should be visible
when the liner is correctly positioned – see diagram.
Before using your electronic control or
touch control oven
Not e:
• IfyouhavepurchasedanEDEE63CS,EUEE63CSor
EUEE63CKyouwillhaveadditionalcatalyticlinersfor
theextraovencavity.
• PyromodelsEPEE63CSandEPEE63CKdonotrequire
catalyticlinerswhicharenotsuppliedwiththese
models.Cleaningforthesemodelsisdoneviathe
“pyro”function.
• Side racks
1. Insert the twin pegged side into the rear access
holes provided, ensuring pegs are fully inserted.
2. Then locate the front peg into the front access hole
and push in firmly.
Note:Ifyouhaveslidestted,ensurethelocationpegsare
pointingupasshownwiththearrowsbelow.
Not e:
• IfyouhavepurchasedanEUEE63CSorEUEE63CKyou
willhaveadditionalsideracksfortheloweroven/grill.
Thesearettedinasimilarmanner,howevertheleft
handsiderackmustbettedtothelowertwoholesof
theoven/grillcavity.
10 before using your electronic control oven electrolux e:line ovens