!
http://www.elitescreens.com
9
Elite Screens Inc. |Elite Screens Europe GmbH| Elite Screens India |Elite Screens China Ltd.
Elite Screens Taiwan Corp |Elite Screens Japan |Elite Screens Australia
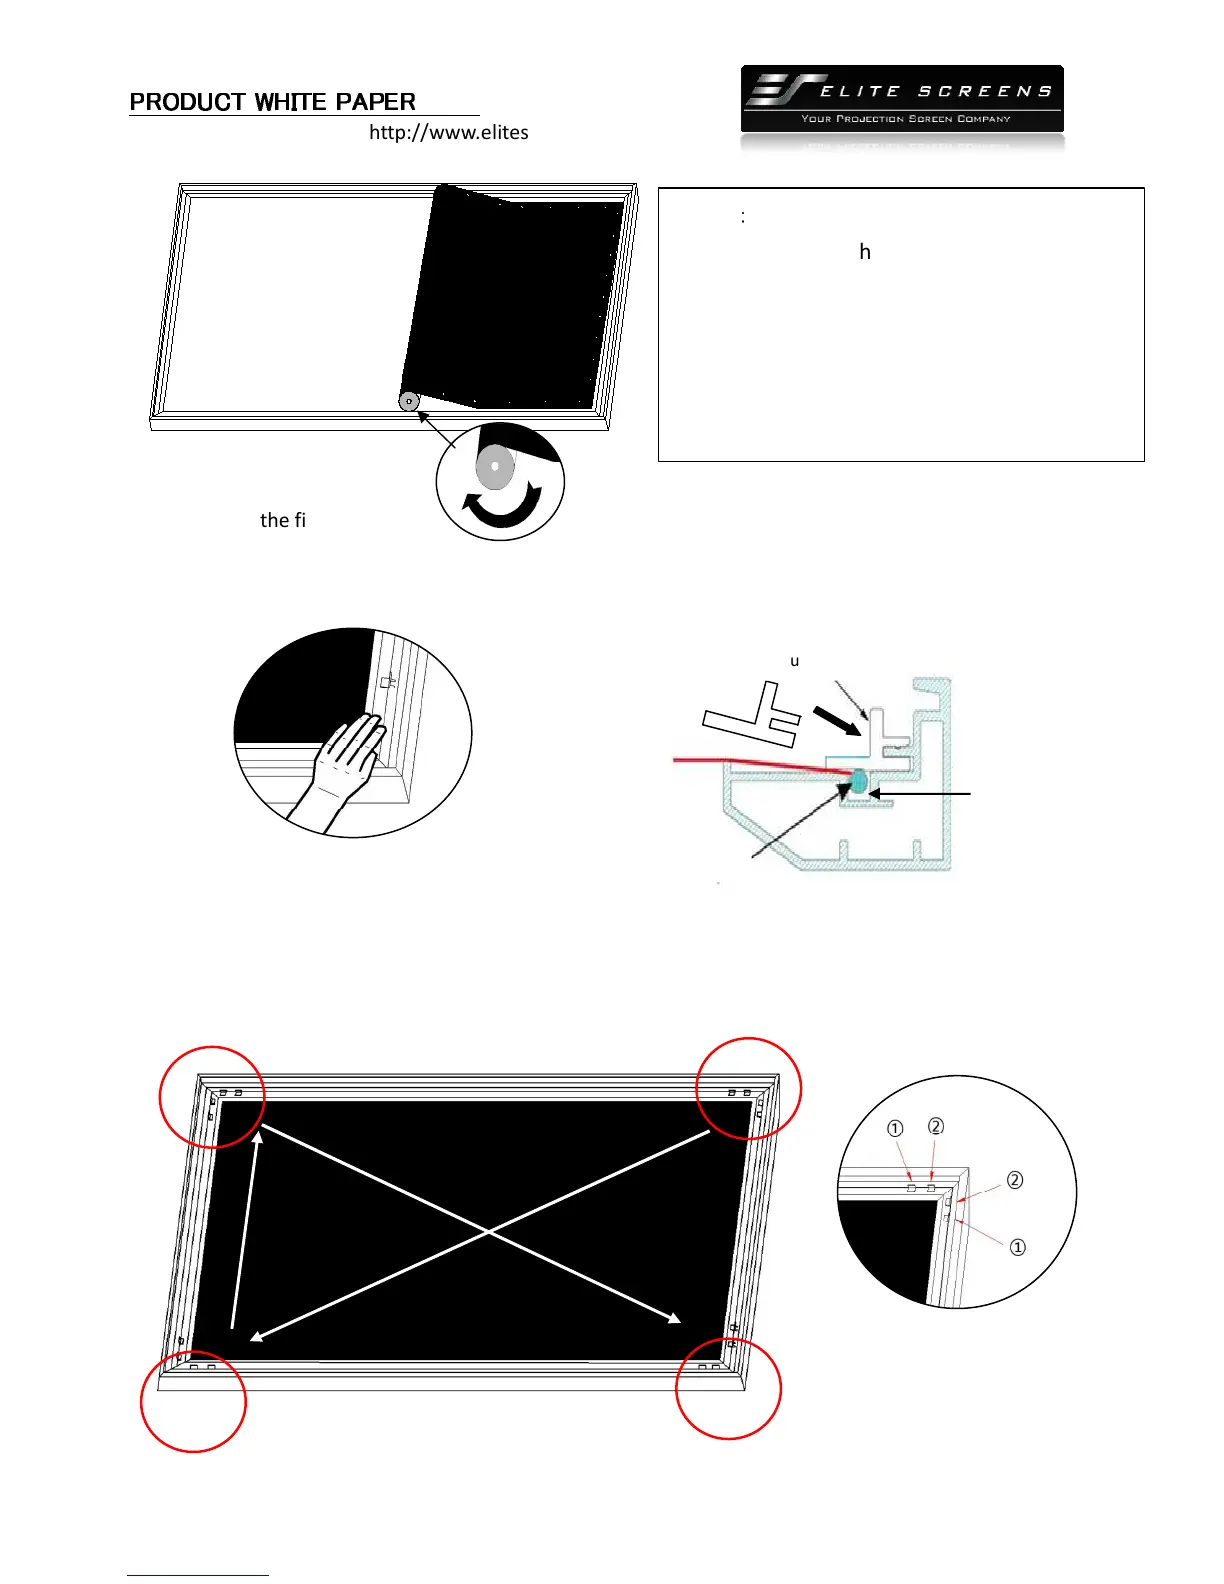
3. Attach the fix plates.
(1)
Stretch the material to the corner and insert the screen material’s edge in the groove of the frame.
While one hand holds the material in place the other hand snaps in the push plate (Fig.4-Fig.5).
(2) Begin by securing the four corners in the following sequence A→B→C→D (Fig.6).
(3) Insert the fix the plates as shown on Fig. 5. Fix plate ① is about 10cm away from the frame’s
corner. Fix plate ② is about 5cm away. (Fig.7)
(Fig. 6)
Notes
#
• Make note of the label to help distinguish
the back and front side.
• Unroll the screen material face down
• Keep the screen material as close as
possible to the frame and do not allow it
to scratch against any part of the frame.
(Fig. 4)
Insert push plate in
Screen material edge
(Fig. 5)
Schematic cross section
Plate
Frame groove
A
B
C
D
(Fig.3)

 Loading...