Rev.V02182023DT (DS8598) 5 www.elitescreens.com
Screen material tension adjustment
(4mm Allen Wrench required and not included)
Remove the weight bar end cap to expose the adjustment
tension knob. This knob has a 4mm Allen port. Insert your
4mm Allen Wrench and push in the adjustment tension
knob, turn clockwise and your screen will gain more
tension. Turn the Allen Wrench counterclockwise and the
screen will lose tension. Please note this adjustment is not
necessary as the tension of the screen has been pre-set to
its factory drop setting. If you would like to adjust the
screen tension, please contact Elite Screens
®
for assistance
to avoid damaging the screen and voiding your warranty.
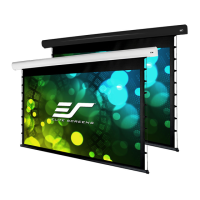
Starling Tab-Tension | Controls and Accessories
C. Wall box
controller
ZRC1-WB
Screen operation
Electric Current: 110v
1. After ensuring the power outlet & screen are compatible (voltage), plug the power cord into the power outlet.
2. Once the screen has power, you’ll be able to control it using any of the 5 methods described below.
5 Ways to control your Starling Tab-Tension screen
1. IR Remote control (Item A, Fig 1): The Infrared functions by direct line of
sight contact using an effective beam range of 25 feet within a 30-degree angle.
Aim the IR remote directly at either the IR receiver on the Wall Box Controller
or on the screen to operate the screen.
Note: Assure there is no obstruction between the IR remote and IR receiver.
2. RF Remote Control (Item B): The radio waves eliminate the need for a
direct line of sight and has a longer distance control range.
The RF remote is already pre-synced/paired and ready to use. If
synchronization/ pairing is needed, please follow the steps below.
How to synchronize/pair a new RF remote:
• Press & hold the “Programming Key”, then press the “Up Key” on the Wall box controller (wall-box
LED flashes). Reference the wall box controller section for programming key location.
• Then press the “Up Key” on the RF remote.
• The Wall box LED will flash 5 times, to indicate the RF remote has been properly synchronized/paired.
 Loading...
