Rev.V02182023DT (DS8598) 4 www.elitescreens.com
Installation Instructions
For installation assistance, please consult a professional Installer. Elite Screens
®
is not liable for faulty installations.
Two or more people are required while one holds the screen in place.
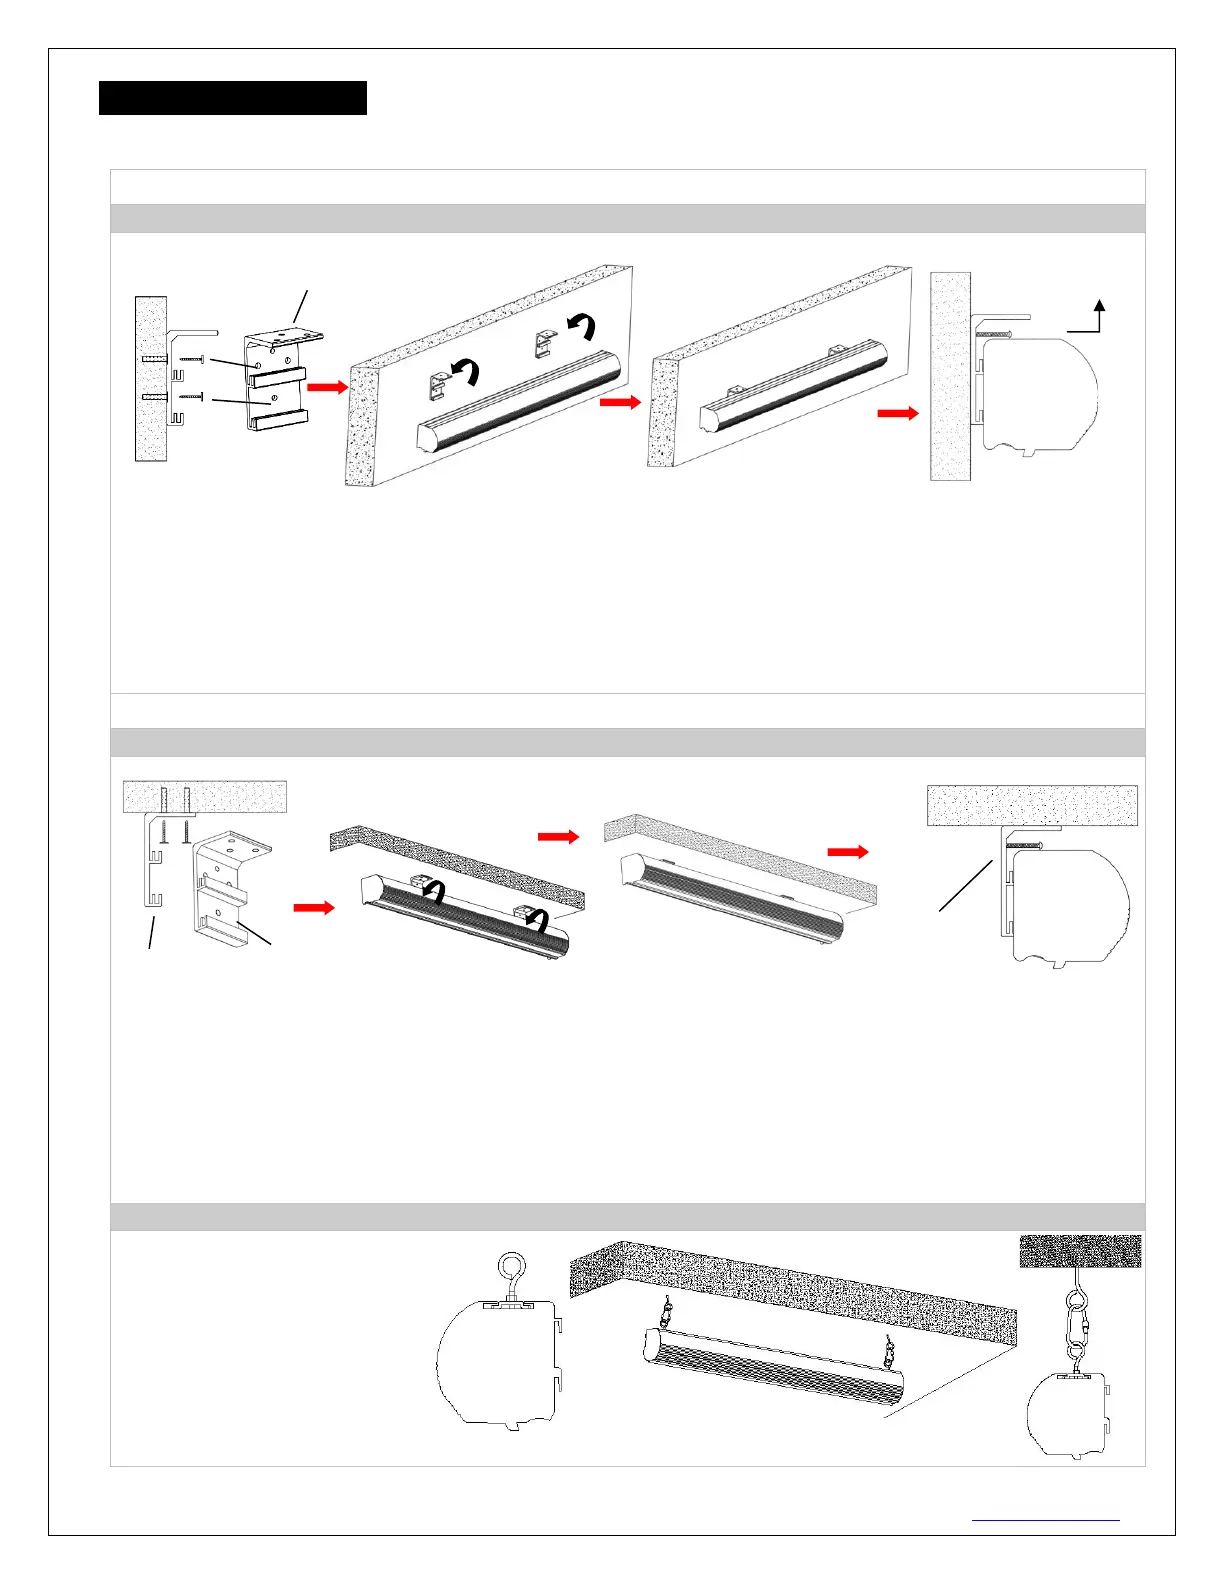
Flush hidden mount (movable position)
This mount method allows the screen to slide horizontally.
1. Determine where the screen will be installed. Then, measure and mark the distance between the top and
bottom screw holes from each Wall/Ceiling mount bracket (A).
2. Drill a hole on all marked points and install the brackets with the dry-wall anchor(C), M5x60 screw (B), Make
sure both brackets are properly leveled.
3. Hang the screen by placing the lower “catch” located on the back over the brackets upper “catch”.
4. After making sure the screen is secured, you can slide it left / right to properly center it in position.
5. Lastly, screw the M5 screw (F) into the upper hole of the bracket to add additional support for the screen.
I. Ceiling Mount (movable position)
This mount method allows the screen to slide horizontally.
1. Determine where the screen will be installed. Then, measure and mark the distance between the top and
bottom screw holes from each Wall/Ceiling mount bracket (A).
2. Drill a hole on all marked areas and install the brackets with the dry-wall anchor(C), M5x60 screw (B), Make
sure both brackets are properly leveled.
3. Hang the screen by placing the lower “catch” located on the back over the bracket’s upper “catch”.
4. After making sure the screen is secured, you can slide it left / right to properly center it in position.
5. Lastly, screw the M5 screw (F) into the upper hole of the bracket to add additional support for the screen.
1. Screw the eyebolt (G) onto the
bracket connector (D).
2. Attach the snap link (H)
through the eyebolt (G) and
connect it to the ceiling eyebolt
screw (not included) as rated for
the screen’s weight.
Front view of
bracket (A)
M5x25mm
round head
cross screws (F)
Front view of bracket (A)
M5x25MM round
head cross screws
(F)

 Loading...