Rev.V02182023DT (DS8598) 7 www.elitescreens.com
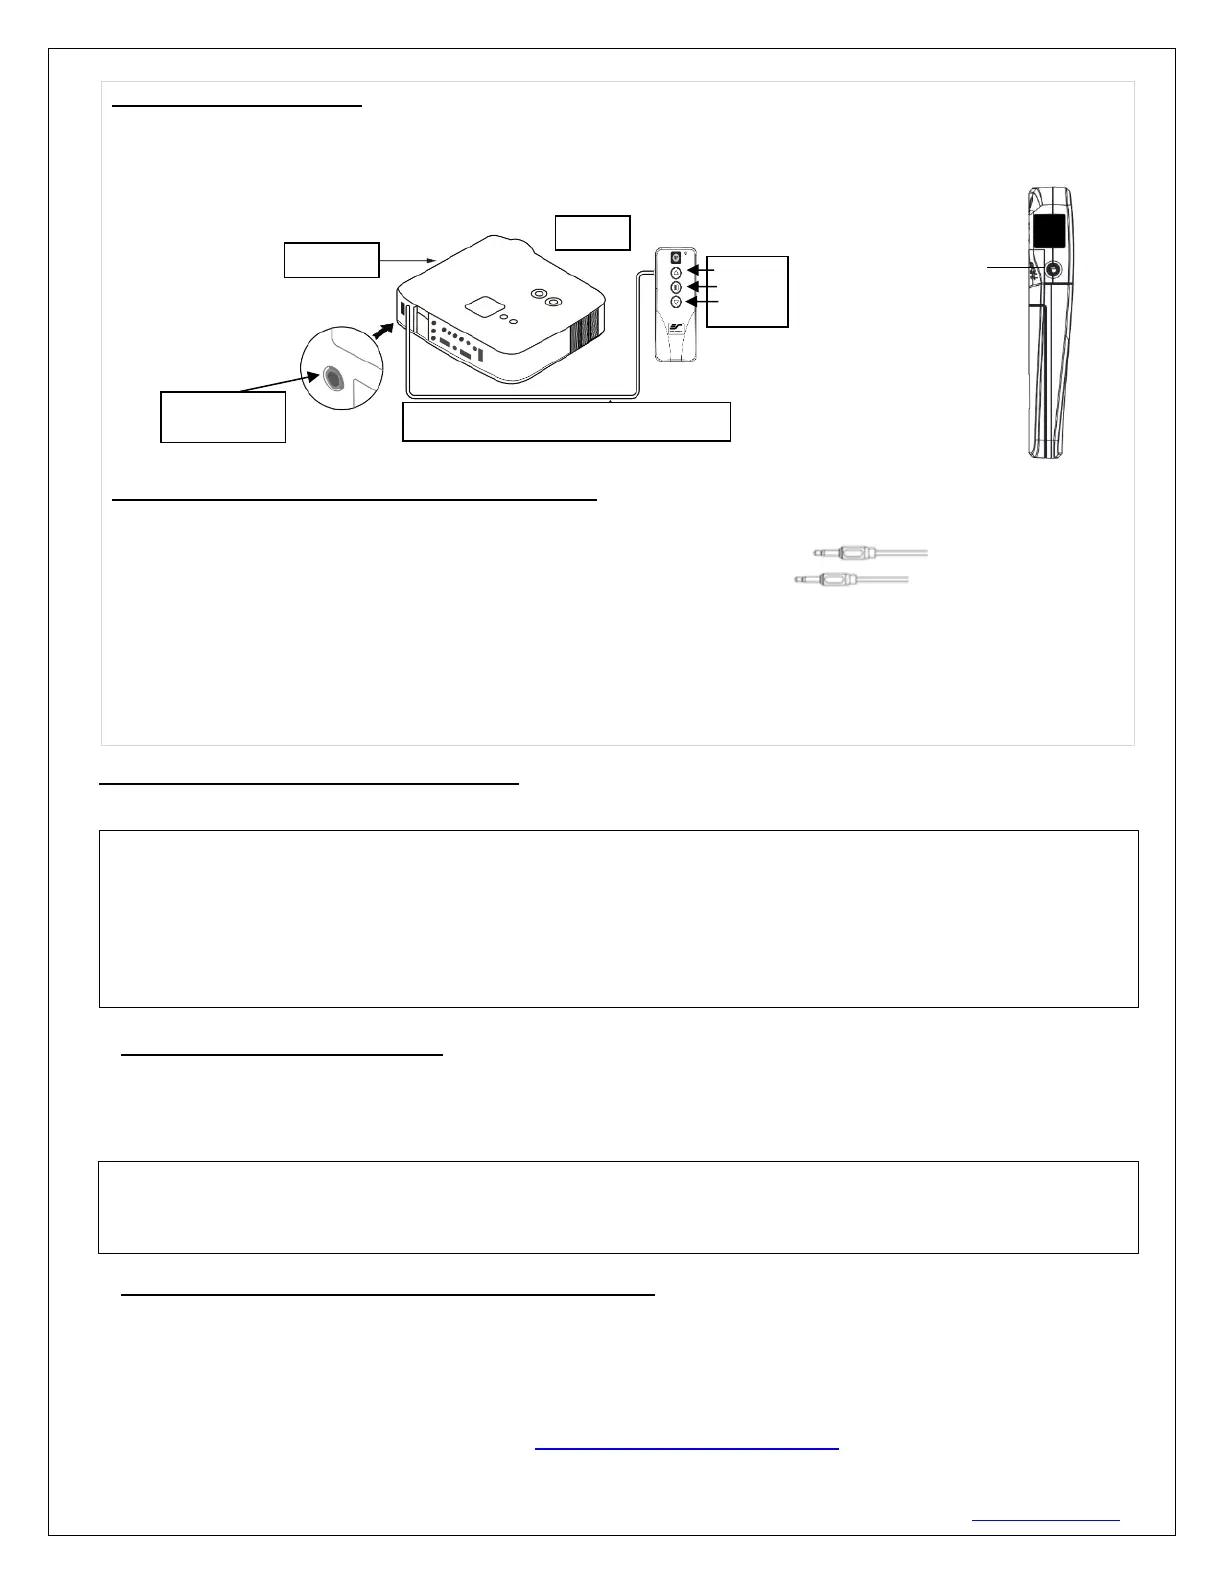
5. Wireless 5-12 volt trigger (Fig 5): Requires a 3.5mm to 3.5mm mono cable (not included).
The Radio Frequency (RF) remote control serves as a dual purpose, independently as a handheld remote control, or
as a Wireless 5-12 volt trigger. The radio frequency technology sends a wireless signal that synchronizes the
screen’s drop & rise with the projector’s power cycle.
Here’s how to set up your Wireless 5-12 volt trigger
The 5-12V wireless trigger should already be synced and ready to work.
Step1: Connect one end of the 3.5 mm mono trigger cable to the RF remote.
Step 2: Connect the other 3.5 mm mono end of the cable to your projector
Step 3: Turn on the projector and the screen should automatically deploy.
Step 4: Turn off your projector and the screen should automatically retract.
(Please be aware, the projector on/off cycle may take longer to fully activate. It usually takes around 20- 30 seconds
for full off and on cycle each time)
Note: If the wireless trigger feature does not work, please resync the RF remote to the Wall box controller per the
instructions in the Radio Frequency remote section.
ADVANCED Programming Key Instructions: (FOR ADVANCED USERS ONLY)
Wall box controller must be connected to the screen.
1. Preset the Screen’s Drop Position:
Use the RF/IR remote or Wall Box Controller to Drop the screen to the desired position you want to set it at.
Press & hold the “Programming Key”, then press the “down key” on the Wall Box Controller. The LED will
flash 5 times to confirm new programmed drop position.
2. Clear/Reset the Screen’s Drop Position to factory default:
Press & Hold the “Programming Key + “Stop key” on the wall box controller.
For more information, technical support or your local Elite Screens® contact,
please visit www.elitescreens.com
3.5mm to 3.5mm mono cable
RF remote control
SIDE VIEW
ATTENTION: Reducing the factory’s full screen drop may produce waves/wrinkles on the projection surface
on tab-tension screens. The full drop is recommended to allow the screen to rely on the tab-tension system to
maintain the projection surface flat and taut on all sides.
The same applies on non-tensioned screens, although some level of waves may be present due to the nature
of the screen not being tensioned. If wrinkles/waves develop after making the adjustment to the desired drop
position, reset it to the factory’s default position per the instructions below.
PROGAMMING NOTE:
The programmed vertical drop position will have +/- 2" tolerance, which will depend on the temperature of the
installed screen environment.
 Loading...