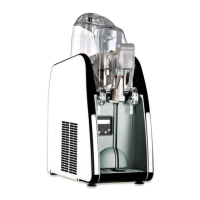
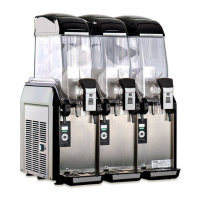
Cleaning
Cleaning is very important for the life
and maintenance of the machine; we
recommend to periodically clean the
parts that are in contact with the
product using the following procedure.
Warning! The appliance must not be
cleaned by a water jet.
Warning! Switch off the main switch
and disconnect the power plug (pic.
7 in appendix-25) before starting
any operation.
Use a solution of cold water and
sodium hypochlorite (bleach) with a 10
grams (1/2 spoon) for 1 liter of water
ratio. Rinse with lukewarm water.
Warning! A greater quantity of
beach could damage the material of
the auger.
Warning! If the plastic parts are
washed in the dishwashing
machine, verify that the temperature
is not higher than 60°C or 140°F,
because they could be damaged.
Do not use any abrasive powder.
.
.
.
a
hypochlorite (
a 10
.
.
°C
°F
.
.
Tank cleaning procedure
See the picture at the end of this
manual.
• Empty the tanks by opening the
outlets and blocking them (pic. 8
in appendix-25), moving the little
letter from the left to the right.
• Remove the lamp (pic. 9 in
appendix-25), pour water in the
tanks and then empty them.
• Remove the auger ring nut (pic.
10 and 11 in appendix-25).
• Remove the tank unscrewing the
hooks grips (pic. 12 in appendix-
25), if present, and opening the
hooks (pic. 13 in appendix-25); lift
the tank as shown in pic. 14 and
15 in appendix-25.
• Unscrew the ring nut (pic. 16 in
appendix-25) in order to remove
the vertical auger (pic. 17 in
appendix-25).
• Remove the horizontal auger; this
way the inox side of the tank is
completely open and ready to be
cleaned (pic. 18 and 19 in
appendix-25).
• Remove the outlet (pic. 20, 21, 22,
23 in appendix-25) and the tank
gasket (pic. 24 in appendix-25):
• Remove the lever cover (pic.
20 in appendix-25) by
and remove the lever (pic. 21
in appendix-25);
• Rotate the ring nut clockwise
(pic. 22 e 23 in appendix-25)
and pull the outlet.
• Dip the dismantled parts in the
solution of water and bleach.
• Wash and dry.
• Wet the gasket before inserting it
in place (pic. 24 in appendix-25),
be careful to place the gasket joint
in one of the back corners of the
tank in the proper allocation.
• Reassemble everything.
• When you put the tank back in its
place verify that the low tension
contact wires are in the guides of
the terminal board. If they are not,
the lamp and the augers will not
work (pic. 25 in appendix-25).
• Connect the machine to the power
supply.
Warning!
Any time the covers (lamp) are
removed, for security reasons, the
augers and the cooling system will
stop working.
.
• "
.
• "
.
• "
).
• "
.
• "
).
• "
inox
).
• "
):
• "
• "
e 23
.
• "
.
• "
.
• "
.
• "
.
• "
).
• "
.
!
.
 Loading...