66
z x
r
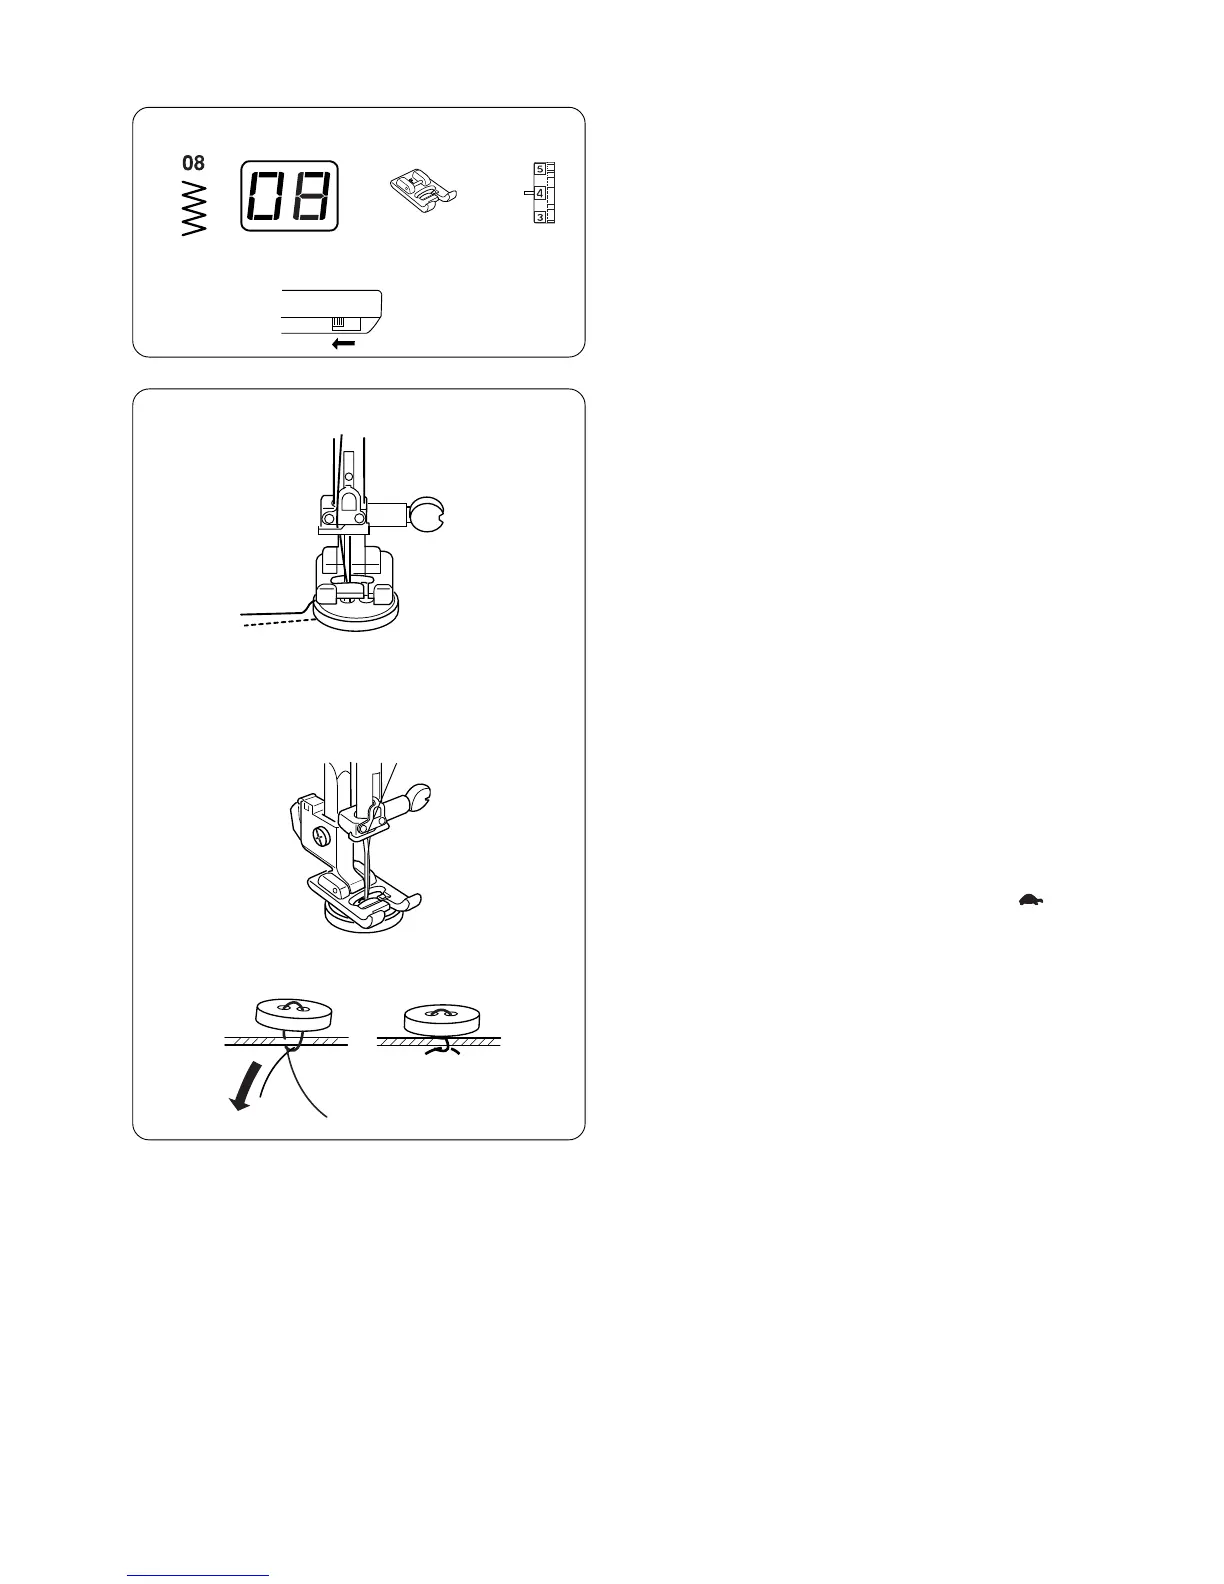
Button Sewing
Machine Settings
q Pattern: #08
w Presser foot: Satin stitch foot F
e Needle thread tension: 3–7
r Feed dog: Down
c v
z Unthread the needle thread.
Set the stitch width according to the position of the
holes in the button.
x Mark button placement on fabric. Use washable
glue or transparent tape to temporarily secure the
button. Place the button and fabric under the
presser foot. Match the holes in the button to the
horizontal slot on the presser foot.
c Tu rn the flywheel to lower the needle into the
right hole in the button.
Adjust the stitch width if necessary.
Rethread the machine and sew about 10 stitches at
a slow speed (set the speed control slider at ).
v Raise the presser foot and remove the fabric.
Tr im both needle and bobbin threads at the
beginning.
Cut both threads leaving 20 cm (8˝) tails.
b Pull the bobbin thread to bring the needle thread to
the wrong side of the fabric then knot the threads.
After sewing is finished, raise the feed dog.
q we
Hand sewing buttons to a garment is very
timeconsuming.
Sew them on in one quick, easy step.
b