Page 8
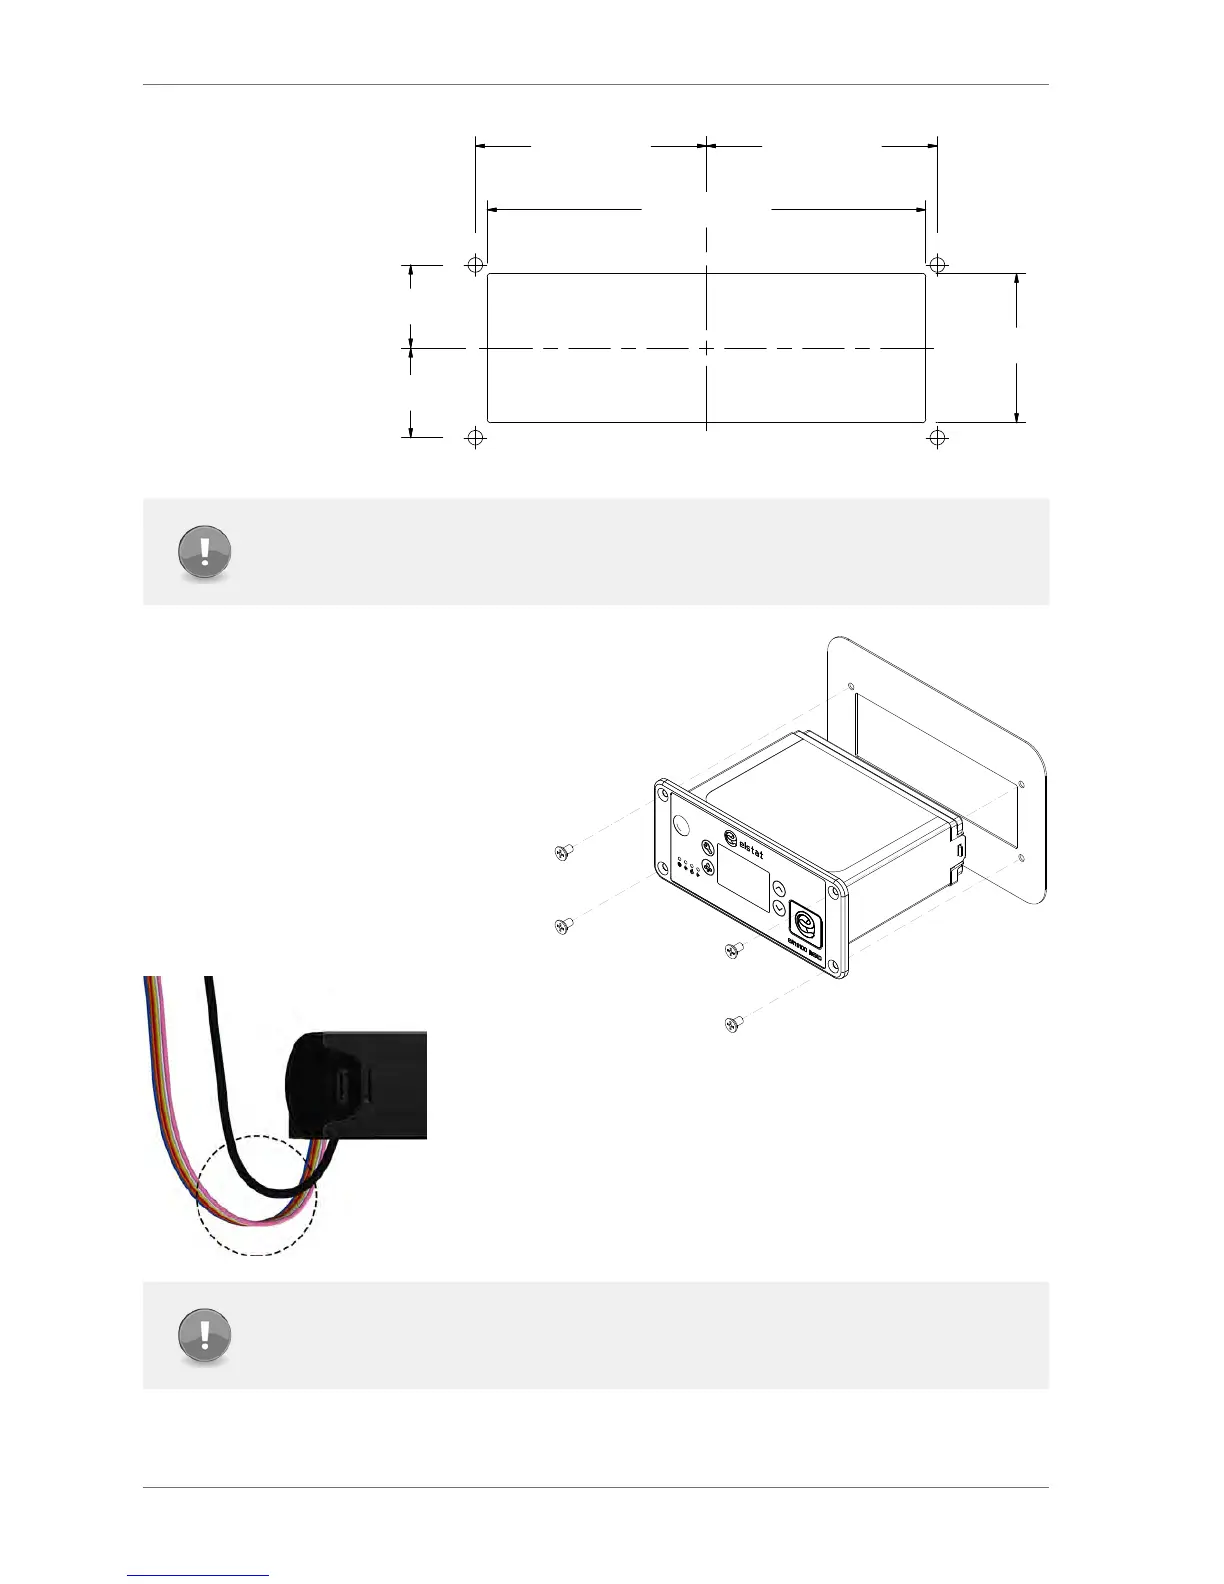
1.4 Mounting
ems100 Nexo
controllers are
designed for panel
mounting and are
secured using four
countersunk self-
tapping screws.
The aperture
and screw pitch
dimensions are as
shown.
Note
Mounting controllers vertically may result in water ingress.
In addition, incorrect installation may result in
the following conditions:
` If mounted vertically with the integrated
motion sensor close to the oor, the
motion sensor may not be able to detect
motion eectively.
` If mounted vertically with [parameter
programming port] close to the oor,
water ingress may occur.
` If mounted too close the oor, water
ingress may occur at the mains or line
voltage terminals.
Cable routing to the ems100 controller is critical as water can trace
or follow the cable downwards.
Therefore, immediately prior to the connection to the controller, a
drip loop must be formed in all wiring as shown.
An appropriate level of protection must be given for the eects of
water ingress due to condensation, product spillage, and so on.
Note
Cable routing looms must not be secured to hot pipes or vibrating components. Secure
cable routing looms with clips where ever possible.
121.3
-
0.5
0.5
+
mm
41.3
-
0.5
0.5
+
mm
24.5
-
0.5
0.5
+
mm
24.5
-
0.5
0.5
+
mm
64.2
-
0.5
0.5
+
mm
64.2
-
0.5
0.5
+
mm