electrostatic
innovations
10 BA-en-1022-0802_PGT120
3. Installation and assembly
The PTG120 tester has been designed for table and wall mounting. When
used as wall-mounted unit, use our wall bracket which is available as
optional accessory. Mount the wall bracket roughly at chest height to the
wall and attach the PGT120 with the self-adhesive connectors supplied
with the wall bracket.
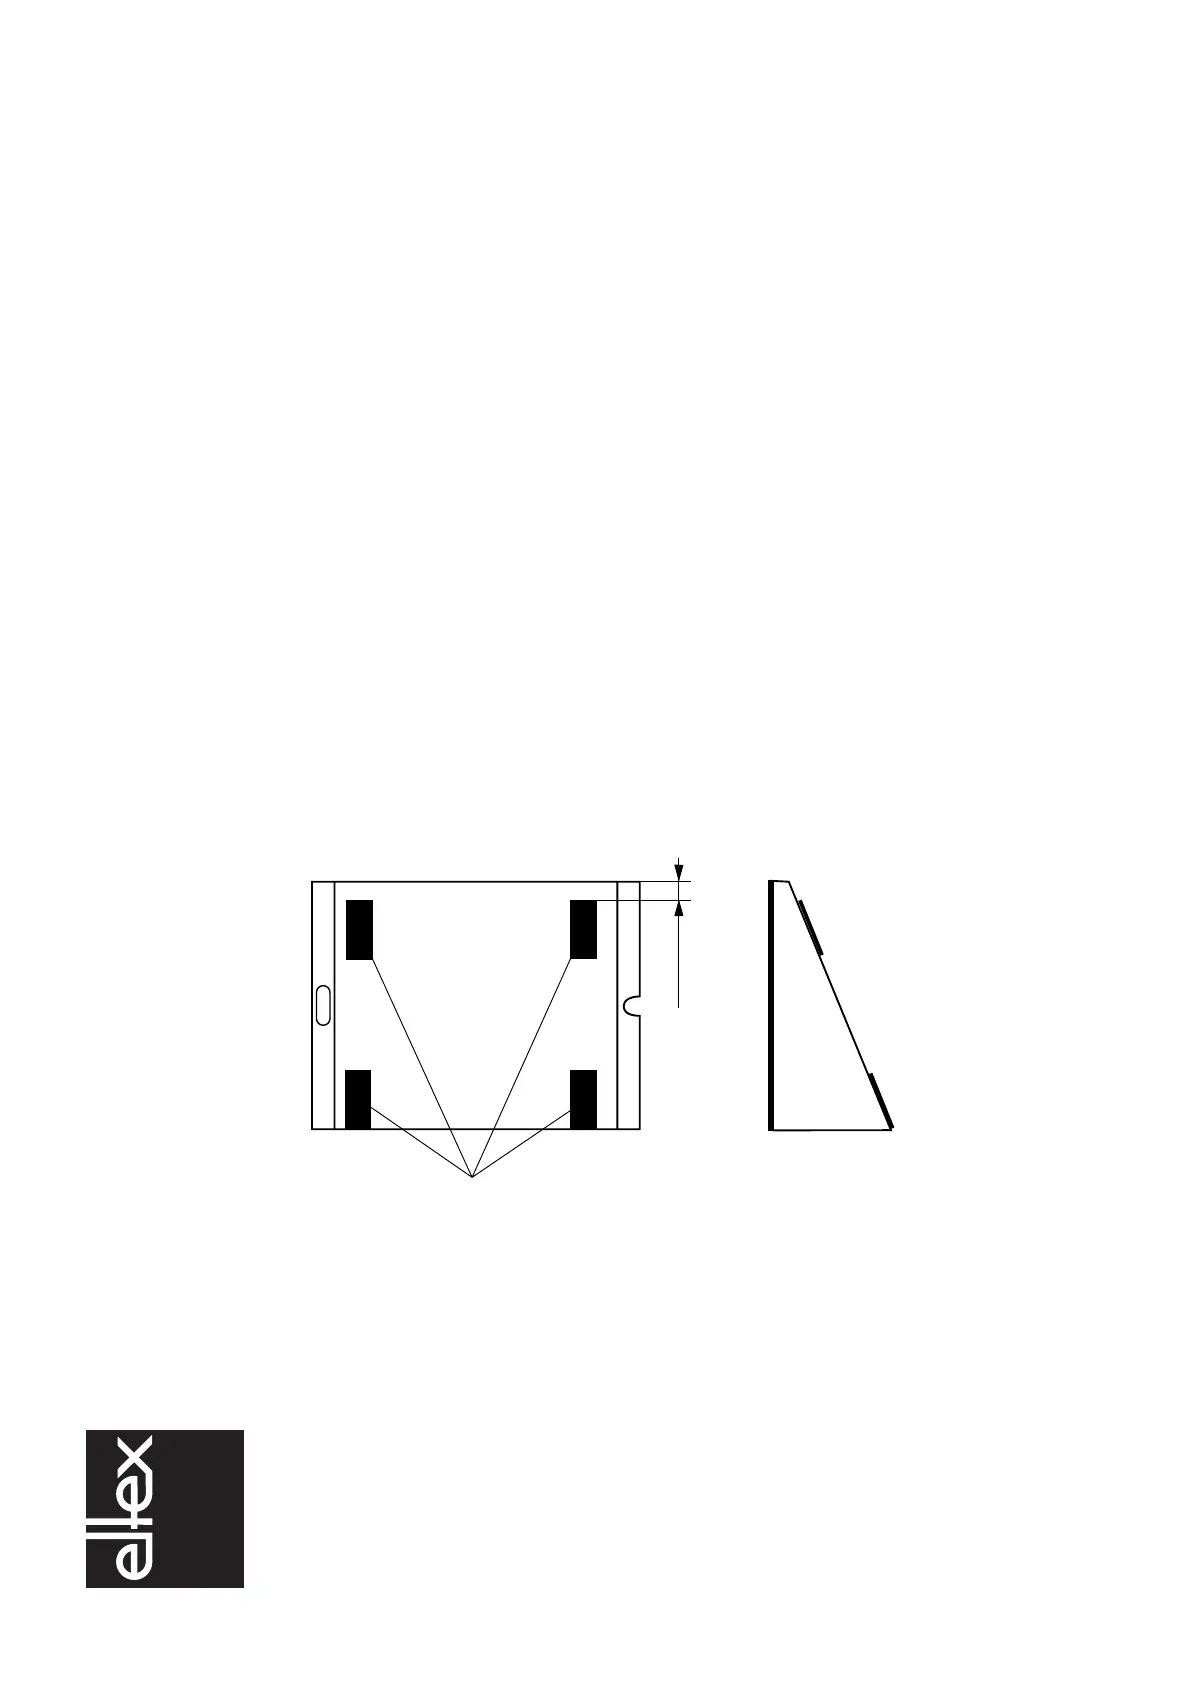
3.1 Wall mounting plate for the PGT120
Mount the bracket with the plugs and screws supplied at chest height such
that the lower edge has the larger distance from the wall. Stick the self-
adhesive connectors to the wall bracket as shown in the outline drawing.
1 The surface of the plate and the bottom side of the PGT120 have to be
clean, dry and free of grease.
2 Remove protecting foil of the velcro tape pieces and do not touch the
sticky side.
3 Apply the velcro tape pieces according to the picture onto the mount-
ing plate.
4 Remove the second protecting foil of the velcro tape pieces and press
the PGT120 to those pieces. The back edge of the PGT120 needs to
be in line with the upper edge of the mounting plate.
5 After 24 hour curing time the PGT120 can be removed from the wall
mounting plate.
Removing:
Before removing the unit, please remove all plugs on the back of the
PGT120. Hold the unit on the left and the right and tip it forwards. To put
the unit back onto the mounting plate just press the unit back to the velcro
tapes.
Fig. 3:
Wall mounting
plate for PGT120
1 =
velcro tapes
Z00458y
~10 mm