Table of Contents • v
Contents
1 OVERVIEW ................................................................................................................................................................... 1
2 COMPONENTS ............................................................................................................................................................. 1
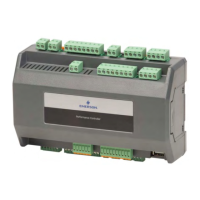
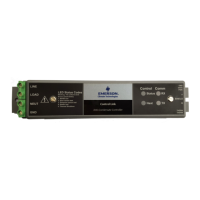
2.1. C
ONTROL LINK ACC (P/NS 815-6100 AND 815-6105) ............................................................................................... 1
2.2. D
EWPOINT SENSOR (P/N 814-6115) ........................................................................................................................... 2
2.3. D
OOR FRAME TEMPERATURE SENSOR (P/N 281-0002) .............................................................................................. 2
3 MOUNTING THE CONTROL LINK ACC ............................................................................................................... 3
4 CALCULATING MAXIMUM AMBIENT TEMPERATURE ................................................................................. 4
5 WIRING THE CONTROL LINK ACC ...................................................................................................................... 6
5.1. P
OWER AND HEATER ELEMENT WIRING ..................................................................................................................... 6
5.2. R
ATINGS AND CURRENT PROTECTION.......................................................................................................................... 6
6 MOUNTING AND WIRING THE SENSORS ........................................................................................................... 7
6.1. T
HE DEWPOINT SENSOR ............................................................................................................................................... 7
6.1.1. Placement.............................................................................................................................................................. 7
6.1.2. Note About Using RTV Sealants ........................................................................................................................... 7
6.1.3. Dewpoint Sensor Mounting Dimensions............................................................................................................... 8
6.1.4. Dewpoint Sensor Wiring ....................................................................................................................................... 8
6.1.5. Dewpoint Sensor Storage...................................................................................................................................... 9
6.2. T
HE DOOR FRAME TEMPERATURE SENSOR ............................................................................................................... 10
6.2.1. Placement............................................................................................................................................................ 10
7 NETWORK WIRING AND CONFIGURATION.................................................................................................... 11
7.1. N
ETWORK CONNECTION TO E2 ................................................................................................................................. 11
7.2. E2 S
ETUP OF CONTROL LINK ACC DEVICES ............................................................................................................. 11
7.2.1. Setup Network Ports............................................................................................................................................ 11
7.2.2. Add and Connect Control Link ACCs - E2 Firmware Revision Prior to 2.8...................................................... 12
7.2.3. Add and Connect Control Link ACCs - E2 Firmware Version 2.8 and above ................................................... 13
7.3. W
IRING TYPES............................................................................................................................................................ 15
7.4. MODBUS N
ETWORK AND DAISY-CHAINING ............................................................................................................ 16
7.4.1. Step 1: Disconnect Power to the Control Link ACC and Open the ACC Enclosure .......................................... 16
7.4.2. Step 2: Connect the MODBUS Network Cable................................................................................................... 16
7.4.3. Step 3: Set the Network Address ......................................................................................................................... 16
7.4.4. Step 4: Set the Network Baud Rate and MODBUS Parity ................................................................................. 17
7.4.5. Step 5 - Terminate the End Devices ................................................................................................................... 18
7.4.5.1. Termination Block Network ............................................................................................................................................. 18
7.4.6. Step 6 - Connect a Dewpoint Sensor to Control Link ACC(s) on the Network................................................... 18
7.4.7. Step 7 - Set the Setpoint Temperature Offset ..................................................................................................... 19
7.4.8. Step 8 - Network Configuration Is Complete - Restore Power to the ACC ........................................................ 19
8 THE ACC HAND-HELD TERMINAL INTERFACE............................................................................................. 21
8.1. HHT H
ARDWARE OVERVIEW..................................................................................................................................... 21
8.2. K
EYS AND FUNCTIONS .............................................................................................................................................. 21
8.3. H
AND HELD TERMINAL EXPANSION BOARD ............................................................................................................ 22
8.4. C
ONNECTING THE HHT ADAPTER BOARD ................................................................................................................. 22
8.4.1. HHT Home Screen ............................................................................................................................................. 22
8.5. HHT I
NTERFACE NAVIGATION................................................................................................................................... 23