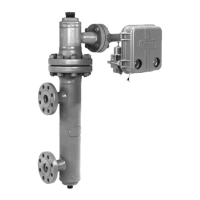
Type LR125
12
!
WARNING
• Main Spring (key 12), small end rst
• Upper Spring Seat (key 17), make sure to place
the large end toward the spring
• First Back-up Ring (key 16)
• O-ring (key 18)
• Second Back-up Ring (key 16)
• Indicator Fitting (key 19), the back-up rings
(key 16) and O-ring (key 18) should slide into
the indicator tting and the small end of the
upper spring seat (key 17) should slide into the
indicator tting.
• First Hex Nut (key 4)
• Indicator Washer (key 20)
• Second Hex Nut (key 4)
11. Install the indicator tting (key 19) into the bonnet
(key 2, Figure 10), tighten to the proper torque
(see Table 9). To set the travel indicator, hold
the indicator cover (key 21) next to the indicator
tting (key 19). Screw the hex nuts (key 4) and the
indicator washer (key 20) down on the indicator
stem (key 15) until the washer is even with the
lowest marking on the indicator cover. Lightly
lubricate the indicator cover threads and install.
Replace the indicator protector (key 22). To replace
the travel indicator with the non-travel indicator
option, place the main spring (key 12) into the
bonnet. Install the indicator plug (key 19, Figure 14)
and tighten to proper torque (see Table 9).
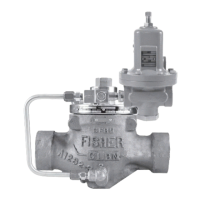
Type MR95H/MR95HP Pilot Maintenance
To avoid personal injury, property
damage or equipment damage caused
by sudden release of pressure or
uncontrolled process uid, do not
attempt any maintenance or disassembly
without rst isolating the regulator
from system pressure and relieving all
internal pressure from the regulator.
Regulators that have been disassembled
for repair must be tested for proper
operation before being returned to
service. Only parts manufactured by
Emerson should be used for repairing
Fisher™ regulators.
Due to normal wear that may occur, parts must be
periodically inspected and replaced as necessary.
The frequency of inspection depends on the severity
of service conditions or the requirement of local,
state and federal rules and regulations. This section
includes instructions for disassembly and replacement
of parts. All key numbers refer to Figure 15.
1. Unscrew the valve plug guide (key 5) from the
body (key 1). The valve plug spring (key 26) and
the valve plug (key 4) will normally come out of the
body along with the valve plug guide.
2. Inspect the seating surface of the valve plug
(key 4), make sure that the elastomer or polished
metal surface of the valve plug is not damaged.
Replace if damage is noted.
3. Inspect the seating edge of the orice (key 3).
If damage is noted, unscrew the orice from the
body (key 1). Reference Table 10 for proper torque
values. If no further maintenance is required,
reassemble the regulator in the reverse of the
above steps. When installing the valve plug guide
(key 5) coat the threads and sealing surface with
sealant to ensure an adequate metal-to-metal
seal. Reference Table 10 for proper torque values.
4. If diaphragm damage is suspected, or to inspect
the diaphragm or other internal parts, loosen the
jam nut (key 17) and turn the adjusting screw
(key 15) to remove all spring compression.
5. Remove the diaphragm case cap screws (key 16)
and lift o the spring case (key 2). Remove the
upper spring seat (key 9) and regulator spring
(key 11). Remove the lower spring seat (key 8).
6. Remove the diaphragm (key 12) and examine for
damage. Replace if damage is noted.
7. Unscrew and remove the stem guide bushing
(key 7).
8. With diaphragm (key 12) removed, check to be
sure the pressure registration hole is completely
open and free of obstructions.
9. Reassemble in the reverse of the above
procedures. Lubricate the upper spring seat
(key 9) and the exposed threads of the adjusting
screw (key 15) with anti-seize lubricant.
10. Before tightening cap screws (key 16) be sure to
install the adjusting screw, if completely removed,
and turn it clockwise to ensure proper slack in the
diaphragm (key 12). This allows proper positioning
of the diaphragm to permit full travel of the valve
plug (key 4). Torque diaphragm cap screws per
Table 10. Complete reassembly procedures and
turn the adjusting screw (key 15) to produce
the desired outlet pressure. Tighten the jam nut
(key 17) to maintain the desired setting.
 Loading...