5
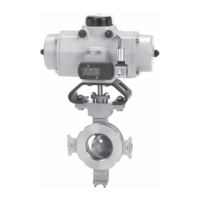
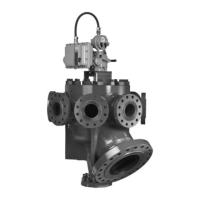
SEMPELL SERIES STE 4 CONTROL DEVICE FOR SAFETY VALVES
Operating instructiOns
4.4 Reseat pressure
Increase pressure with the spindle pump
connected at the test connection beyond the
desired closing pressure until the control
lamp P-min (yellow) shines. Slowly decrease
pressure until the control lamp P-min (yellow)
goes out. This is the switch point. Register
pressure reading of the gauge.
To change the switch point, turn the
corresponding adjusting screw. Turn adjusting
screw a little when approaching the switch
point. Lower excess pressure up to about 0 bar
and then increase again beyond the closing
pressure (control lamp P-min (yellow) shines).
Slowly decrease pressure until the pressure
switch actuates. Register pressure reading
of the gauge again and correct switch point if
necessary.
Repeat procedures until the desired switch
point is reached.
In case of pressure decrease the switching
band of the pressure switch with micro switch
can be determined. This is the pressure
difference between switch-on point (lighting
up of the control lamp P-min) and back switch
point (darken of the control lamp P-min).
After adjustment open the corresponding
shut-off valve again and lock it by means of the
interlock key. Put the cover on the pressure
switch and lead seal. Close front door again.
Switch back test switch of the electric switch
unit in the “Test” field.
Indicator: yellow control lamp in the field “Test”
does not signal.
4.6 TROUBLE SHOOTING
Malfunction Cause Remedies
Loading air is
prematurely dropped
Pressure switch adjustment changed Pressure switch adjustment see chapter 4
Control line “Load” leaky Eliminate leaking point in the control line
Tube fittings leaky Retighten tube fittings
Electric supply deactivated Check electric connections
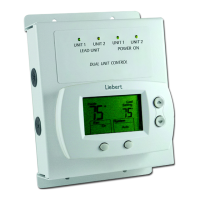
4.5 Monitoring
Check daily the actual status of the control
device by visual check.
The actual function will be shown as follows:
• The safety valve is closed and loading air is
applied:
Electric switch unit:
white control lamp “Operation” shines. Gauge
reading is in the black area “Operation”.
Green lamps Y1, Y2, Y3 and B shine.
Pneumatic control unit:
gauge reading present at “Load” (MB).
Inspection window “Load” is green.
4.7 Testing
4.7.1 Check of pressure switch and operation of
the solenoid valves
For testing, one of the three pressure
switches (D1, D2, D3) can be separated from
the system by closing the unlocked shut-off
valve (A1,A2,A3) in the pressure sense line
(E1,E2,E3) by means of the valve interlock (G).
With a spindle pump with test gauge
(accessory) the desired set pressure can be
applied through the respective connection
(P1, P2, P3). Therefore connect the spindle
pump with a pressure hose and vice coupling
(Minimess Fa. Hydrotechnik) after removing the
knurled protective cap.
The control lamps P-min or P-max show the
gain of set and closing pressure (also see
sections4.3, 3.4).
If the safety valve shall not open during the
tests, set the test switch at field “Test” of the
control device in position “Test 1” to prevent the
opening of the 3/2 way solenoid valve (Y4) and
so the charge of the lifting air. At the same time
this switch position leads to the opening of only
the solenoid valve (Y1, Y2, Y3) assigned to the
specific pressure switch.
Have the set and closing pressure adjustment
checked once a year by an inspector.
ATTENTION!
A change of the lead sealed pressure switch
adjustment must take place inthe presence of
the independent TÜVinspector (TRD 601, sheet 2,
section4.2.1).
• The safety valve is opened and lifting air is
applied:
Electric switch unit:
white control lamp “Operation” shines. Gauge
reading is in the black area “Lifting”. Yellow
lamps Y4 and H shine. Red and yellow lamps
(P-min/P-max) 1 and/or 2 and/or 3 shine.
Pneumatic control unit:
gauge reading present at “Lifting” (MH).
Inspection window “Lifting” is green.