Europe, Middle East, and Africa Only
b. Press the “EMERGENCY” button. This will cause the
immediate closing of slam-shut device.
c. Loosen a connector in the downstream line of the slam-
shut device or of the regulator. Check the connector with
soap and water, making sure there are no leaks; make
any necessary repairs otherwise.
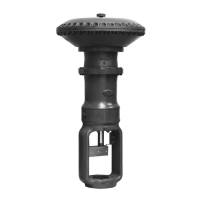
Maintenance
Routine actuator maintenance entails simply periodic
checking of the diaphragm on the Type OS/80X (the piston
Gaco ex on the Type OS/84X) and the movement of the
levers, i.e. they should move freely with a minimum of
friction. If necessary, lubricate pins with “Molykote 55 M”.
!
WARNING
For a successful job it is indispensable to use
a. Remove screws (key 27) and cover (key 61).
b. Replace diaphragm (key 62).
c. To remount diaphragm, coat it with grease, set it in place
around the edge of cover (key 61) and evenly tighten
screws (key 27) to ensure proper sealing.
a. Remove plug (key 61) and extract piston (key 68) from
body (key 60).
b. Replace O-ring (key 67) and gaco ex (key 66).
c. Reassemble by reversing the above procedures.
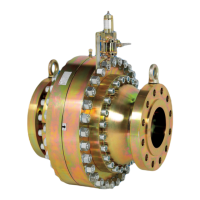
General Maintenance
a. Remove screws (key 40) and casing (key 47).
b. Remove dowels (key 12) and bushing (key 13).
c. Slide off pin (key 6), lever assembly (key 17-2), balls
(key 10) and shim ring (key 15). Wash parts, replace any
if worn.
d. Remove nuts (key 18), levers (keys 20 and 36) and springs
(keys 37 and 21).
e. Remove nut (key 30), screw (key 29) and lever (key 33).
f. Remove minimum register screw (key 49), maximum
register ring (key 50) and springs (keys 53 and 54).
Installation
a. Install the actuator in a covered area and protect it
against weather agents.
b. Check that data on the plate are compatible with actual
working conditions.
c. Make sure actuator is installed upright, i.e. screw (key 49)
on top.
CAUTION
actuator’s performance.
d. Carry out the connection of gas outlet (A). It must be
derived from the pressure control piping, in a straight
tract, possibly far away from restrictions, curves or
derivations, in order to avoid turbulence that can alter the
trip pressure setpoints.
Startup
a. Using lever, activate slam-shut by turning reset pin (key 6)
in the direction shown by the arrow.
b. Wait until the pressure being controlled stabilizes and
then slowly release lever.
c. Now repeat this procedure, make sure that levers
keep actuator properly set and that lever (key 33) is in
horizontal position.
It is recommended that actuator be efficiency checked
periodically.
Cut-off Test
a. Cut-off the circuit by means of inlet and outlet valves and
disconnect the pressure control pipe (A). The Actuator
should cut-off at minimum pressure (only if so set).
b. Through the pressure control connection, use a small
pump or other appropriate means, to raise the pressure
to normal operating level. Reset actuator after cut-off in
step a.
c. Simulate pressure increase until maximum pressure cutoff
value is reached.
d. Connect the pressure control actuator (A) and set the
circuit back to operating conditions by following the
instructions described in the Startup section.
Valve-seal Check
a. Slowly close the valve located downstream.
 Loading...