10(12)
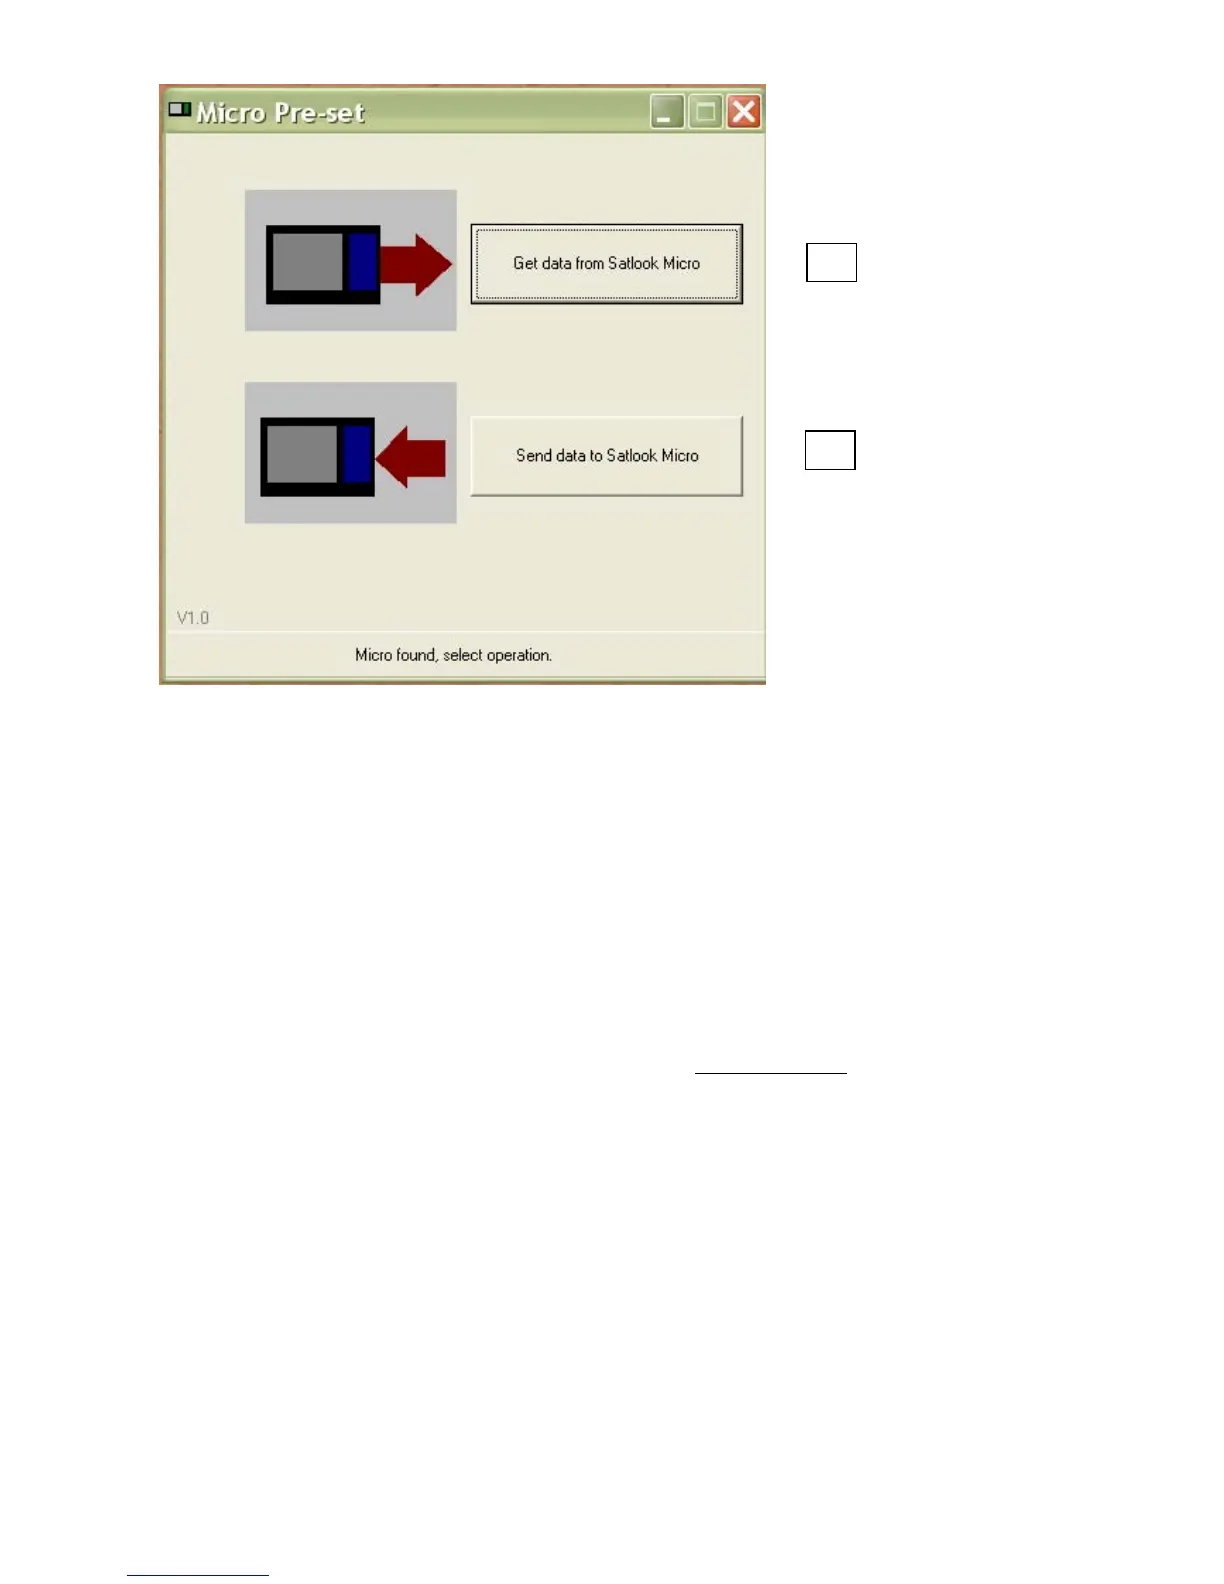
Press the button “Get data from SATLOOK Micro” and this will start the transfer of data. When
the transfer is done it will appear a window on the screen for saving this data in a file on the PC.
Disconnect the instrument and connect the SATLOOK Micro + that the transponder
information should be transferred to. Press the button “send data to SATLOOK Micro” and a
window will appear where the saved file is to be chosen. This will start the transfer of data.
- Some advice when doing an individual and unique list of transponders
* Many saved transponders will prolong the time of identification.
* Three transponders on each satellite are recommended for high accuracy and short
identification time.
* Identification of transponders with low symbol rate cannot be done.
3.5 Setup
The following features can be adjusted to fit the individual installer:
* Contrast. Adjust (with the control knob) the contrast of the LCD-display.
* Backlight. Turn the LCD-backlight on or off (the LCD-backlight can also be turned
on/off in the menu system).
* Autooff. Chose no auto turn off or set the auto off timer to 5, 15, 30 or 60 minutes.
* Set LNB. Select the type of LNB LO to use. E.g. Standard Universal or any of the other many
different types there is to choose between.
* Version. Here you can find information about this specific SATLOOK Micro +, like for
example serial no. and firmware version.
1
2