ENGLISH
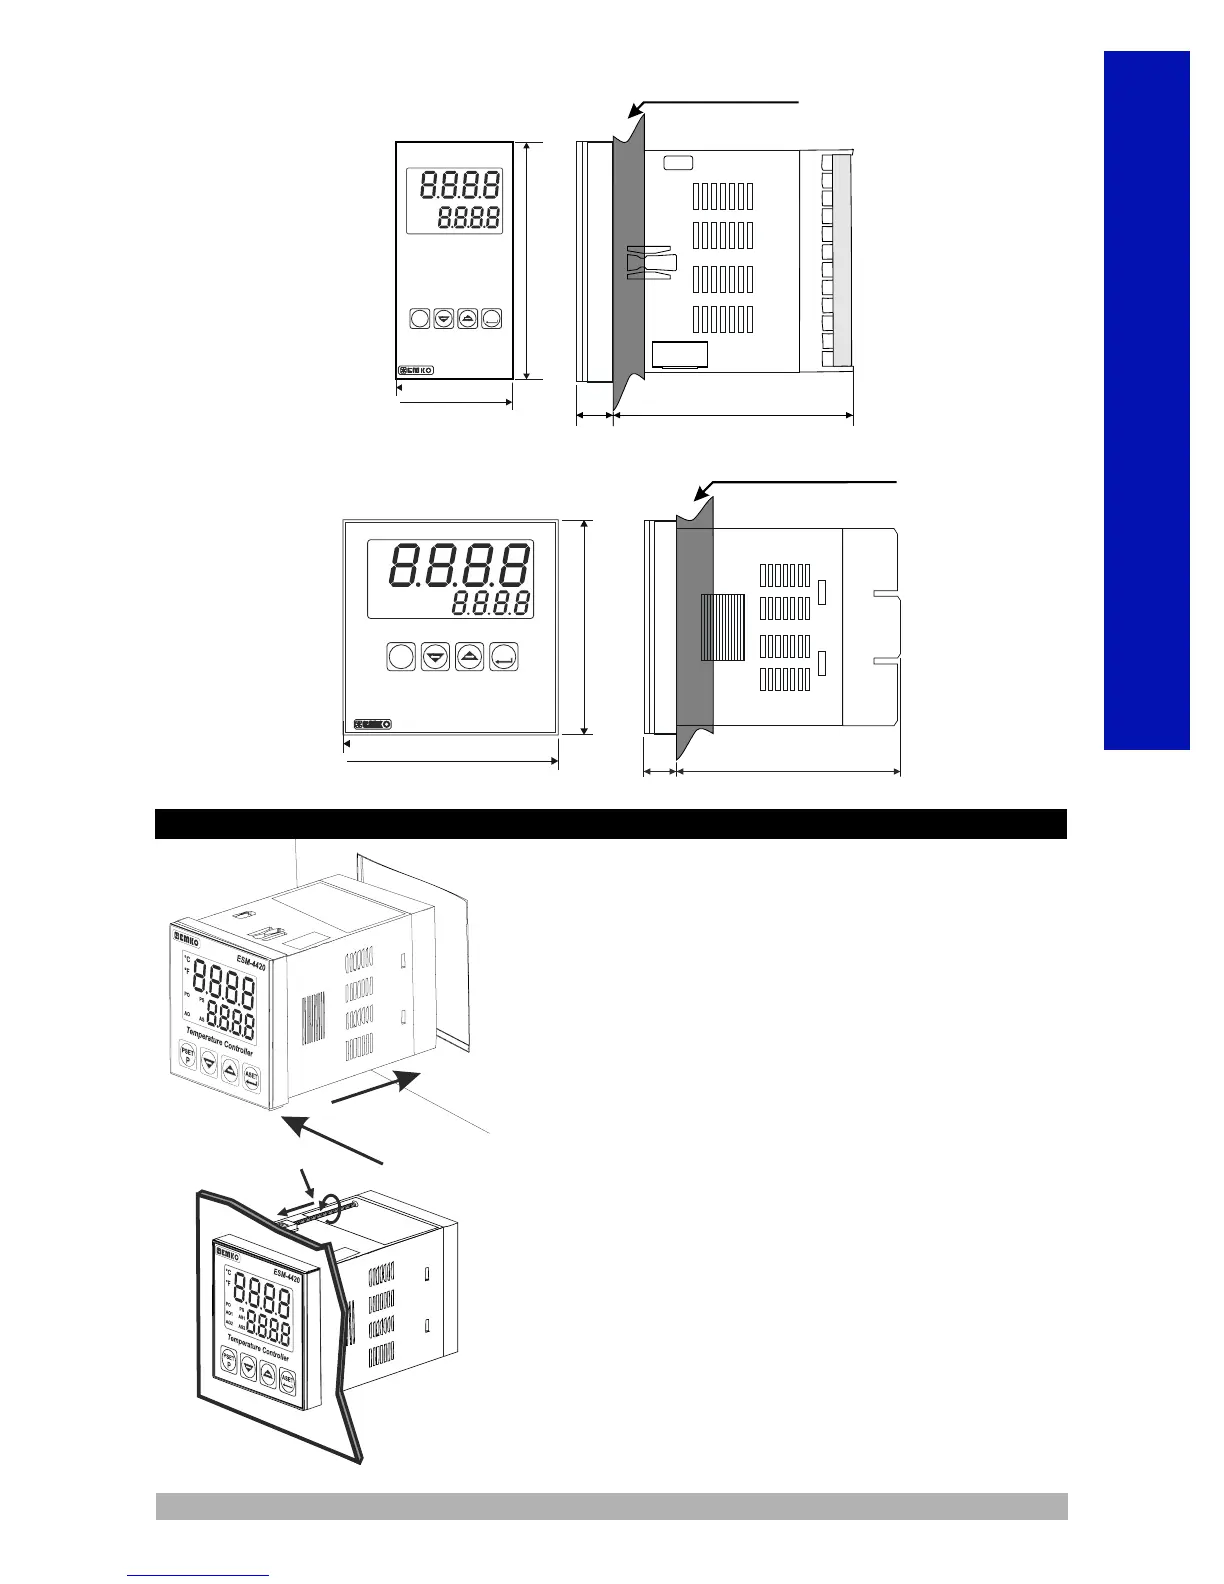
4-Insert the unit in the panel cut-out from the front side.
5- Insert the mounting clamps to the holes that located
top and bottom sides of device and screw up the fixing
screws until the unit completely immobile within the
panel.
1
2
3
1-Before mounting the device in your panel, make sure
that the cutout is of the right size.
2-Check front panel gasket position
3-Insert the device through the cutout.If the mounting
clamps are on
the unit, put out them before inserting the unit to the panel.
4
5
6
Panel Mounting
84 mm / 3.31 inch12 ± 1 mm /0.47 inch
96mm / 3.78 inch
96mm / 3.78 inch
°C
°F
Temperature Controller
ESM-9920
Maximum 15 mm / 0.59 inch
PO
AO 1
AO 2
PS
AS 1
AS 2
ASET
P
PSET
ESM-9920
ESM-9420
ASET
P
PSET
96mm / 3.78 inch
48mm / 1.89 inch
84 mm / 3.31 inch10.5 ± 1 mm /0.41 inch
Temperature
Controller
ESM-9420
PO
AO
°C
°F
PO
AO 1
AO 2
PS
AS 1
AS 2
Maximum 15mm / 0.59 inch
 Loading...