4
P5602 T105-man-100x126 0-0-0-K
EMOS spol. s r. o.
INSTALLATION
Removal of the original thermostat
Warning:
Before replacement of the thermostat, disconnect the heating/cooling system for the main power source in your flat.
This will protect you from a possible electric shock.
Before removing the supply lines, please read the following instructions:
1. Unscrew the thermostat from the wall plate.
2. Unscrew the connecting rear board of the thermostat from the wall.
3. Push the rear board a small distance off the wall, but do not disconnect any wiring yet.
Wire marking
1. Identify each wire and disconnect.
2. Secure the wires against tearing off.
3. Prevent any air leakage through the insulation foam, if the space behind the thermostat is too big. By this you
can avoid incorrect temperature measurement.
Thermostat location
The function of the thermostat is significantly affected by its location. Choose a place, where your family members
spend the most of their time, possibly an inner wall, where the air circulates freely and which is not in direct sunlight.
Do not put the thermostat near sources of heat (TVs, radiators, fridges) or near the door (due to frequent vibrations).
If you don’t follow these recommendations, the temperature in the room won’t be regulated properly.
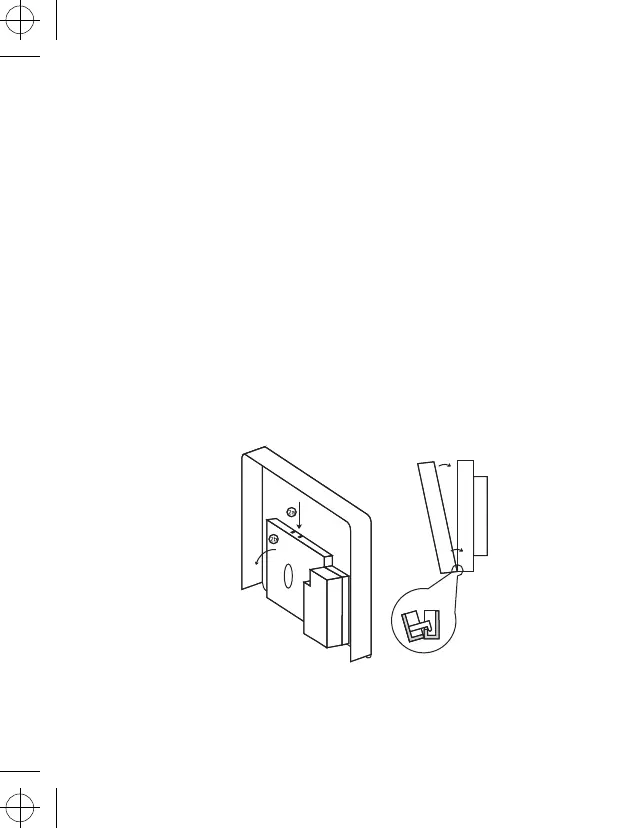
Thermostat installation
1. Remove the front cover of the control unit.
2. Mark the position of the holes for the rear plate.
3. Drill two holes, carefully insert plastic dowels and align them with the wall.
4. Remove cover off the contacts (see the picture) and connect the wires.
5. Securely fix the control unit to the rear plate, using two screws.
6. Complete the installation by covering the unit with a front cover.
2a – Push downwards
2b – Remove the cover