14 15
2.2.3- On the device
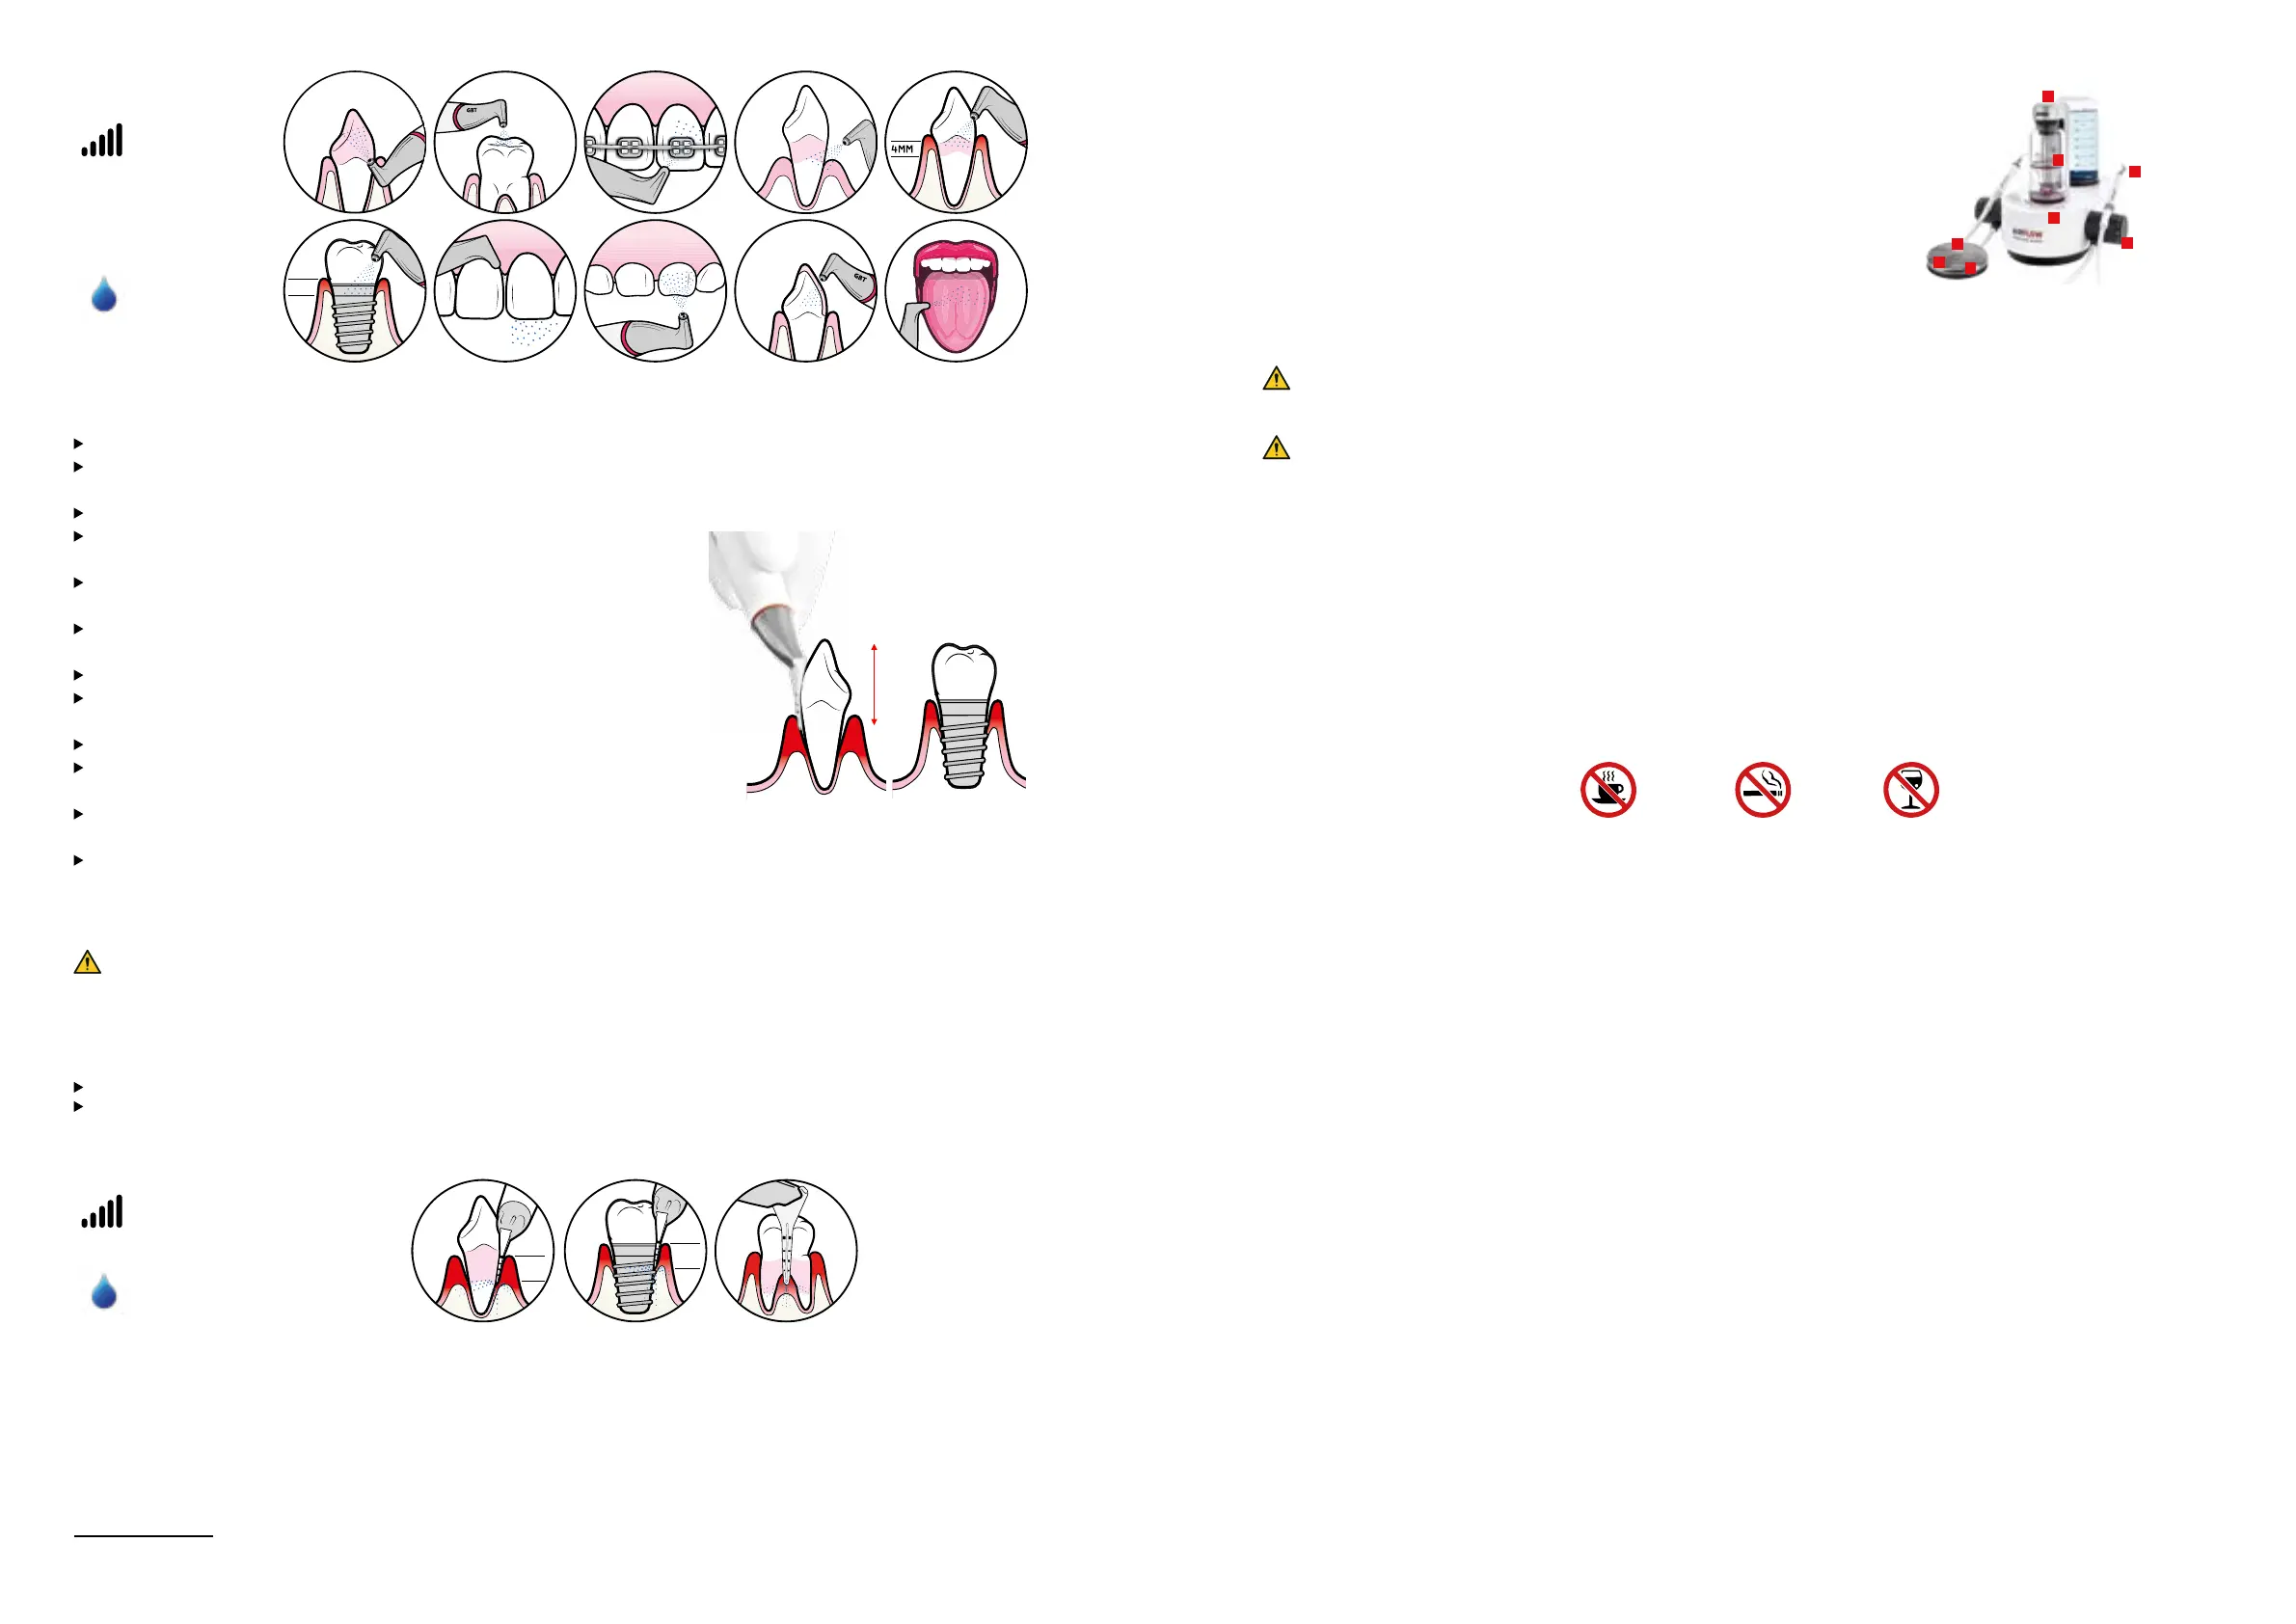
1 Position the powder chamber.
2 Pressurize the chamber.
3 Set the AIRFLOW
®
power.
4 Set the water flow.
5 Take the AIRFLOW
®
or PERIOFLOW
®
Handpiece.
6 Press the pedal to start treatment.
7 [Step hard on the center of the BT pedal for BOOST.]
8 Release the pedal to stop treatment.
9 Put the handpiece back into its holder.
10 Depressurize the powder chamber before removing the AIRFLOW
®
handpiece for sterilization.
4
3
1
2
5
6
7
8
Treatment does not stop immediately. Beware there is a small delay between the release of the pedal and the effective stop
of the treatment (approximately 0.2 second). Make sure to never point the PERIOFLOW Nozzle toward the patient, during and
after operation.
Risk of patient injury. If you are not trained on a specific treatment, do not execute it. Always get trained before executing
new treatments.
2.2.4- End of treatment
2.2.4.1- Fluoride protection
After completion of treatment, the patient can do a final rinse.
After the treatment, the teeth are practically free from mucin. It is thus advised to carry out a topics application of fluoride. It is
then important to use a colorless fluoride.
2.2.4.2- Post-treatment recommendations
Treatment cleans the teeth but also eliminates the pellicle acquired by the patient. Since the restoration by salivary proteins
takes time, the teeth are left without natural protection against coloration for 1 hour.
DURING 1 HOUR
NO
COFFEE
NO
SMOKING
NO
ALCOHOL
2.2.1.2- Settings
20 to 60%
A
B
O
V
E
C
E
M
E
N
T
O
-
E
N
A
M
E
L
J
U
N
C
T
I
O
N
I
N
P
I
T
S
A
N
D
F
I
S
S
U
R
E
S
E
X
P
O
S
E
D
D
E
N
T
I
N
E
4MM
A
R
O
U
N
D
I
M
P
L
A
N
T
S
I
N
T
E
R
D
E
N
T
A
L
O
N
P
R
I
M
A
R
Y
T
E
E
T
H
O
N
R
E
S
T
O
R
A
T
I
O
N
S
S
U
B
G
I
N
G
I
V
A
L
T
O
N
G
U
E
A
N
D
P
A
L
A
T
E
100%
13
2.2.2- PERIOFLOW
®
treatment
2.2.2.1- Recommended use
Only use by trained and qualified personnel.
Correlate clinical probing depth with radiographs before using the PERIOFLOW
Nozzle.
Always check the patency of the PERIOFLOW Nozzle before and during use.
Single use per patient. DO NOT use the same PERIOFLOW Nozzle in more than
1 patient, PERIOFLOW Nozzle cannot be sterilized or re-used.
Use the PERIOFLOW Nozzle between 5-10 secs per site depending on the
probing depth.
If treating multiple sites in 1 patient, check if the tip of the PERIOFLOW Nozzle is
not bent and the quality of the PERIOFLOW Nozzle has not changed.
After approx. 20 sites, change the PERIOFLOW Nozzle.
In natural teeth, after a 6-point pocket charting, the PERIOFLOW Nozzle is to be
used only in sites where probing depths exceed 4mm.
Use your finger and thumb to compress the site.
Never push or force the PERIOFLOW Nozzle into the pocket even if the depth is
> 4 mm.
Use it in a vertical overlapping, repetitive movement. The PERIOFLOW Nozzle
must be inside the pocket during the entire cleaning process.
Around dental implants, use the PERIOFLOW Nozzle in buccal, lingual, mesial
and distal sites - all sites in general..
Vertical movements
2.2.2.2- Risk of emphysema
To limit the risk, always follow contraindications, recommendations and detailed instructions.
Subcutaneous emphysema occurs as a result of an abnormal introduction or presence of air or gas into tissue or tissue spaces.
It has been recognized and documented as a complicating factor of any dental procedure where pressurized air has been used.
Expeditious diagnosis and management of subcutaneous emphysema are important to facilitate recovery.
Clinical signs of emphysema:
Crackling of mucosa upon pressure (subcutaneous crepitation), pain, swelling, tenderness and discomfort.
Often accompanied by facial or neck swelling.
2.2.2.3- Settings
50 to 100%
9MM
I
N
P
E
R
I
O
D
O
N
T
A
L
P
O
C
K
E
T
S
9MM
I
N
P
E
R
I
-
I
M
P
L
A
N
T
P
O
C
K
E
T
S
I
N
R
O
O
T
F
U
R
C
A
100%
14
13 Adjust setting up to 100% for warmer water.
14 Set water spray at 100% to prevent lesions.